
Create API Account ID and Keys
This procedure produces the API Account ID, Account Base URI, Integration Key, and Private Key File required by the DocuSign adapter connection.
Note
Initial consent in DocuSign is required for setup of this adapter, in some of the configurations.
To create the API Account ID, Account Base URI, Integration Key, and Private Key
-
Create a DocuSign Developer Account by navigating to Get your Free Developer Account and filling-in your details.
-
From the Settings tab, under Integrations, select Apps and Keys.
-
Click Add App and Integration Key. The Add Integration Key window is displayed.
-
Click the Copy icon to copy the Integration Key for later use.
-
In App Name, specify the name of the app and click Create App. The Authentication window is displayed.
-
Under User Application, select No.
-
Fill in the redirect URI with the following value:
http://localhost/adapters/docusign_adapter -
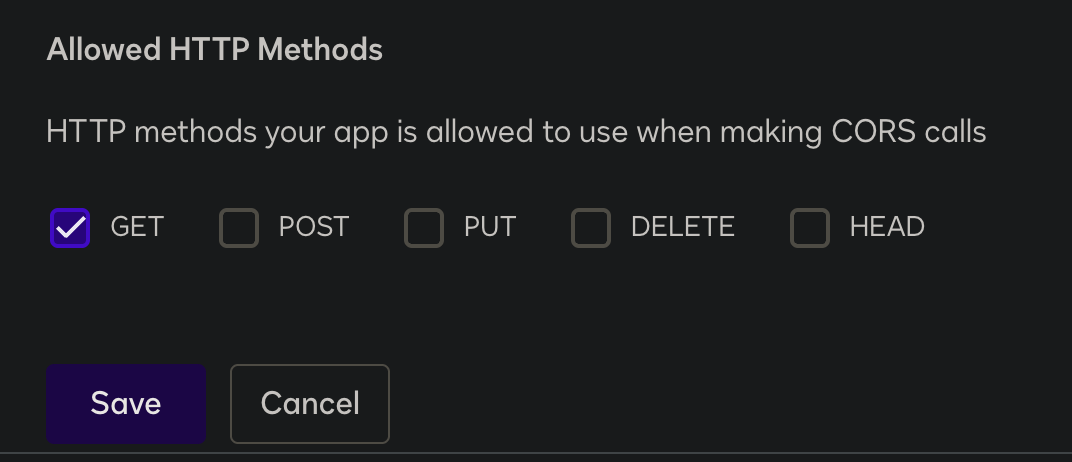
In the Additional settings section, under Allowed HTTP Methods, select GET.
-
Copy the User ID, API Account ID, and Account Base URI for later use.

-
Navigate to your browser and access this URL template (replace the UPPERCASE values with your actual integration key):
https://account-d.docusign.com/oauth/auth?response_type=token&scope=signature&client_id=YOUR_INTEGRATION_KEY&redirect_uri=http://localhost/adapters/docusign_adapter -
Follow the prompt to log in.
-
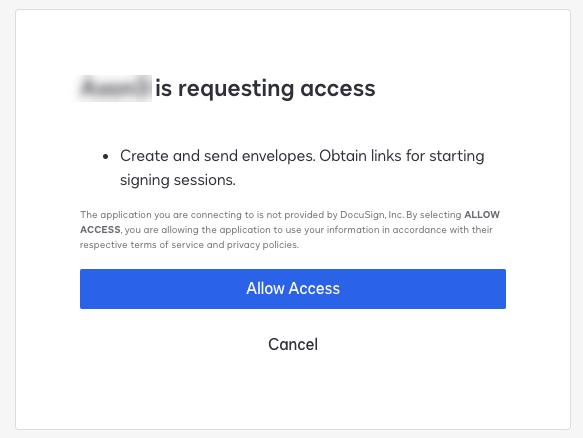
Click Allow Access to permit the app to make calls. The browser redirects to the
localhostURL.
-
In the URL in the browser's Address bar, copy the value of the
ACCESS_TOKENparameter.
For example:https://localhost/adapters/docusign_adapter#access_token=ACCESS_TOKEN&expires_in=28800&token_type=bearer&scope=signature -
Using the Access Token, API Account ID, and Account Base URI values that you copied earlier, run this curl command at least 20 times before the
ACCESS_TOKENexpires.
Please allow up to thirty minutes for this to register in the Docusign console. A successful output will include a 'remaining requests' value that decreases with each run.Linux/OSX:
curl -H "Content-Type: application/json" -H "Authorization: Bearer ACCESS_TOKEN" -i "ACCOUNT_BASE_URI/restapi/v2.1/accounts/API_ACCOUNT_ID"Windows:
curl.exe -H "Content-Type: application/json" -H "Authorization: Bearer ACCESS_TOKEN" -i "ACCOUNT_BASE_URI/restapi/v2.1/accounts/API_ACCOUNT_ID"Note
You can use the following script to automatically repeat the command. Insert the correct values into the variables at the beginning and run
chmod +x loop_curl.sh. To execute, use./loop_curl.sh).#!/bin/bash # Define the required variables ACCESS_TOKEN="your_access_token_here" ACCOUNT_BASE_URI="your_account_base_uri_here" API_ACCOUNT_ID="your_api_account_id_here" # Run the curl command 25 times for i in {1..25} do curl -H "Content-Type: application/json" -H "Authorization: Bearer $ACCESS_TOKEN" -i "$ACCOUNT_BASE_URI/restapi/v2.1/accounts/$API_ACCOUNT_ID" sleep 10 # Sleeping for 10 seconds between requests. doneAfter the Docusign console reflects the successful connections, the app is approved and you can promote it to production.
-
Promote the App to live:
-
Navigate to Action > Select Go Live Location.
-
Choose the relevant production account.
-
After verifying that the new app appears in your DocuSign account, repeat Steps 2-6.
-
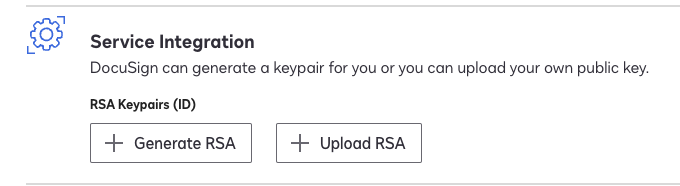
Under Service Integration, select Generate RSA to generate the public and private keys. The RSA Keypair page generates a public key and a private key. Save the values for later use.
-
Paste the private key into a .pem file, which you will need to retrieve later. The file must be in a Linux or MAC format with LF as the end of line sequence. This RSA key is the Private Key file for the Axonius Configuration.
-
In the Additional settings section, Add URIs.
-
In the Redirects URIs field, enter
https://localhost/adapters/docusign_adapter. -
In the Additional settings section under Allowed HTTP Methods select GET, POST.
-
The My Account Information now shows the User ID, API Account ID, and Account Base URI.
-
Copy the User ID, Account ID, and Account Base URI from the 'live'/production app and paste the values into their corresponding fields in Axonius's Docusign Adapter Connection configuration.
-
Click Save or Save and Fetch.
-
The adapter will produce an error message containing a URL.
Follow this URL to perform the final Authentication in a web browser.
Refer to these resources for additional information:
Getting an Access Token using Auth Code Grant
Updated 12 days ago