
Deploying the Okta Adapter
To deploy the Okta adapter, perform the following steps:
1. Create Okta credentials with the appropriate permissions
Note:
An admin on your system who has Super Administrator permissions needs to create the user account for the Axonius User. Note that the Axonius user itself does not require Admin permissions.
1.1 Create a User Account in Okta (Only Required for the API Key Authentication)
Add User
You only need to create a specific user when working with the API Key Authentication.
-
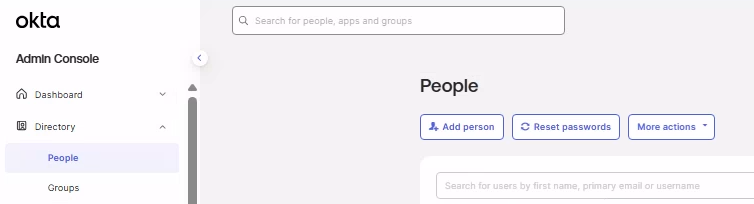
Log in to your Okta Admin Console using an administrator account.
-
Go to Directory, select People, and click Add Person.
-
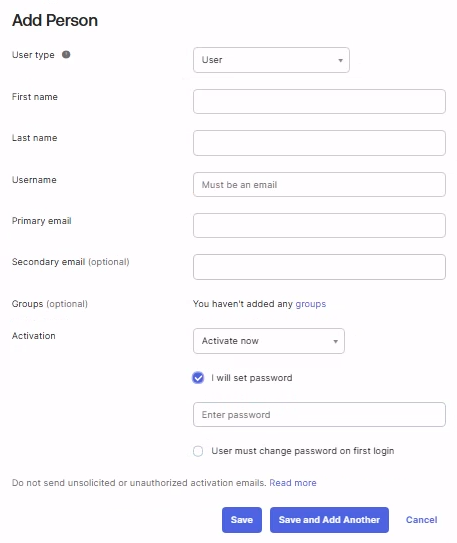
Fill the below user details:
- First name
- Last name
- Username
- Password
-
For the password, choose I will set password and provide the password.
- If you want the user to reset or change the password on first login, choose the User must change password on first login option.
-
Click Save to add the new user.
-
Assign roles to the user:
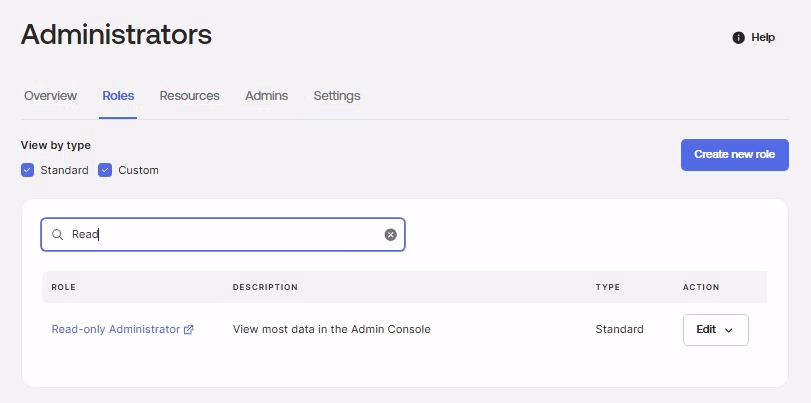
a. Navigate to Security then clcik Administrators, and select the Roles tab.
b. Locate the Read-only Administrator role, click Edit, and select View or edit assignments.
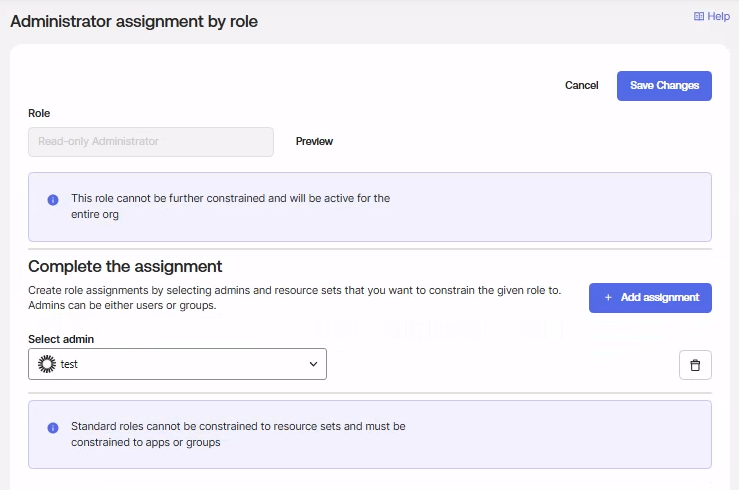
c. Click Add assignment, and select the newly created user account and click Save Changes.
d. Repeat steps a-c for the following roles, as required:
- Super Admin – Required to fetch other admin roles (Asset Management)
- Report Administrator – Required for Axonius SaaS Applications
- API Access Management Administrator – Required for Axonius SaaS Applications
For a detailed mapping of roles and permissions per asset type, see the Required Permissions.
1.2 Authentication Methods
Note:
Username and password authentication may be required to fetch certain elevated application settings. For standard read-only access, API Key or OAuth2 is recommended.
Axonius supports the following authentication methods for connecting to Okta:
API Key
-
From the left side menu in the Admin Console, click Security dropdown and then click API.
-
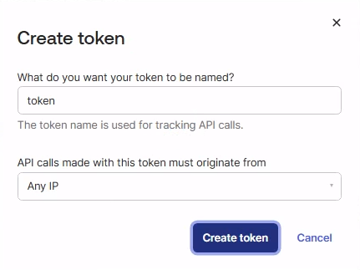
In the Tokens tab, click Create Token.

-
In the pop-up window, provide a name for the token and choose the required option from the drop-down menu to enable the API call origin.

-
Click Create token.
-
Click
 to copy the token value and save it for later use as it will be displayed only once.
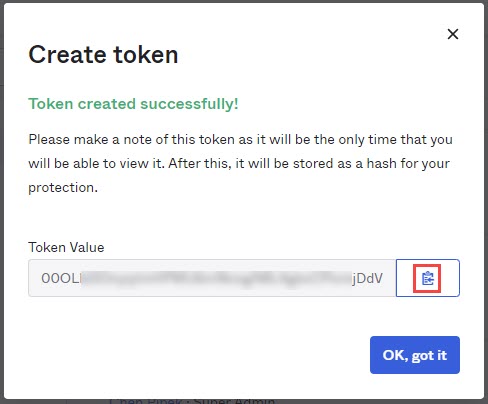
OAuth2
-
From the left-side menu in the Okta Admin Console, click Applications, then select Applications.
-
Click Create App Integration.
-
Select API Services as the sign-in method and click Next.
-
Enter a name for the application and click Save.
-
Copy the Client ID displayed under the Client Credentials section in the General tab.
-
Generate the JSON Web Key (JWK):
a. In the same General tab, click Edit under the Client Credentials.
b. Select Public key / Private key option in the Client authentication.
b. Ensure Save keys in Okta is selected under the Configuration section.
c. Click Add Key, then click on Generate new key from the pop-up to generate new keys.
d. Copy the Private Key value only in JSON format by clicking on Copy to clipboard, then paste it into a text file, and save the file securely on your device as the Private key will be displayed only once. -
Assign required Okta API scopes:
a. Open the Okta API Scopes tab in the application.
b. Grant the required scopes.
Note
When using Okta API Key, you can set up a DPoP requirement on Okta when they are creating the OAuth client app to add an extra level of security. While the DPoP header improves overall security, not using it doesn’t pose a particular risk, as the communication between the adapter and the Okta server remains encrypted.
-
In the Admin Roles tab
a. Click Edit Assignments.
b. From the Role drop-down list, select Read-only Administrator (recommended).
c. Additional roles may be required depending on the data you want to retrieve. See the Required Permissions section for details.
d. Click Save Changes.
1.3 Configure a Group in Okta (Optional)
You only need to add a group if you want to use the Filter Users by Group Name configuration option.
Add Group
-
Login to the Okta Admin Console with a user account that has a Super Administrator or API Access Management Admin role.
-
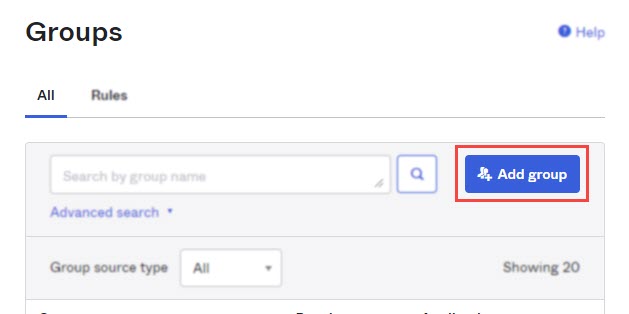
Navigate to Directory and select Groups.
-
Click Add Group.
-
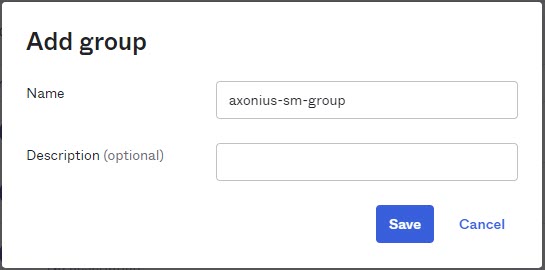
Specify a group Name and an optional Description.
-
Click Save.
-
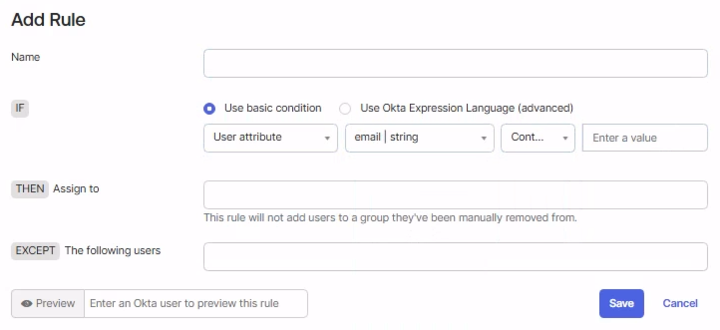
In the group, select the Rules tab and choose Add Rule.
-
On the Add Rule pop-up, within the
IFsection under Use basic condition select User attribute and the condition to add would be email, contains, and add the domain. -
On the same Add Rule pop-up, within the
THENsection select a group of your choice where the user needs to be added or assigned automatically. Note: This rule will not add users to a group they've been manually removed from. -
(Optional) On the same Add Role pop-up, If you want to explicitly exclude specific users from the rule then add those emails within the
EXCEPTsection. -
Click Save to to create the rule. On the rules list, from Actions, select Activate to activate the rule.
1.4 Configure Authentication for SaaS Application Settings (Optional)
This section is only relevant for accounts using Axonius SaaS Applications and is only necessary for fetching high-privilege settings that cannot be fetched with an API token.
Depending on your organization’s security policies, you can either enable 2-step verification (MFA) for the user you just created, or exclude the user from the 2-step verification policy.
You only need to complete one of the following sections:
- Enable Multi-Factor Authentication (recommended)
- Optional: How to Exclude the User From MFA
Enable Multi-Factor Authentication (MFA) in Okta
-
Add the Admin user to the group:
a. Navigate to Groups, select the group you have created.
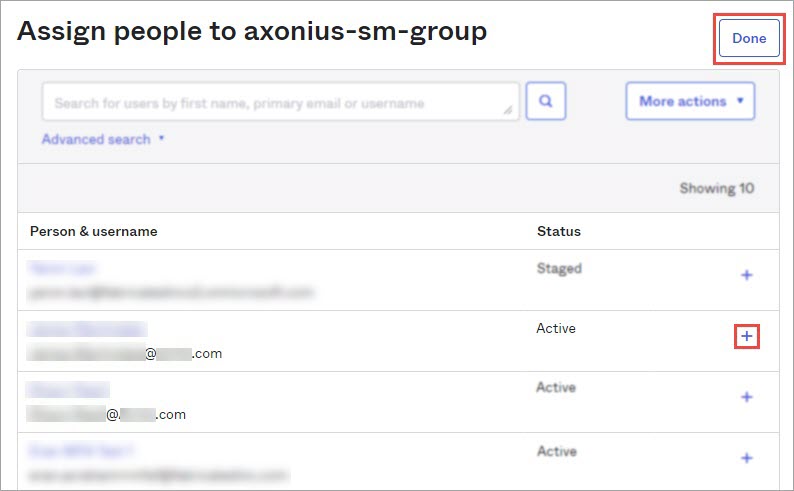
b. In the People tab, click Assign people.
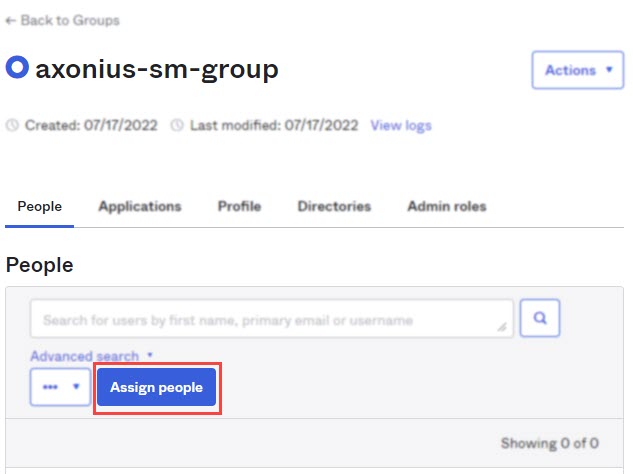
c. Locate the user account and click the corresponding
+to assign the user.d. Click Done.
-
Add Google Authenticator:
a. Navigate to Security
>Authenticators.b. In the Setup tab, click Add Authenticator.
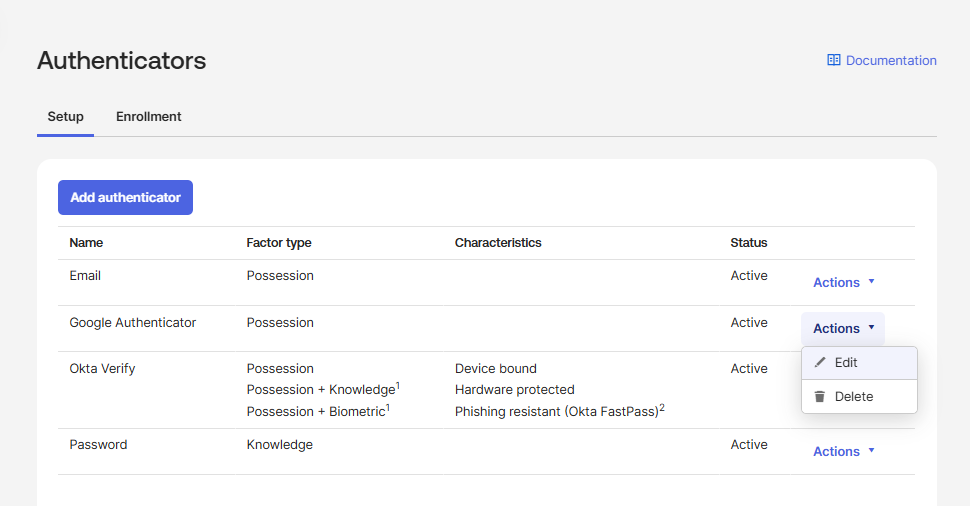
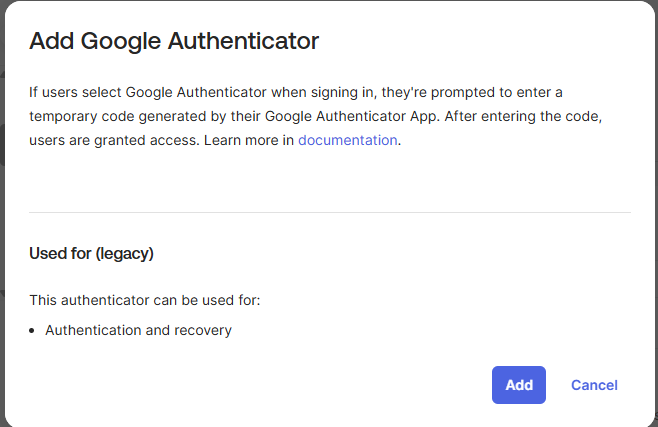
c. Select the Authenticator type of your choice and click Add
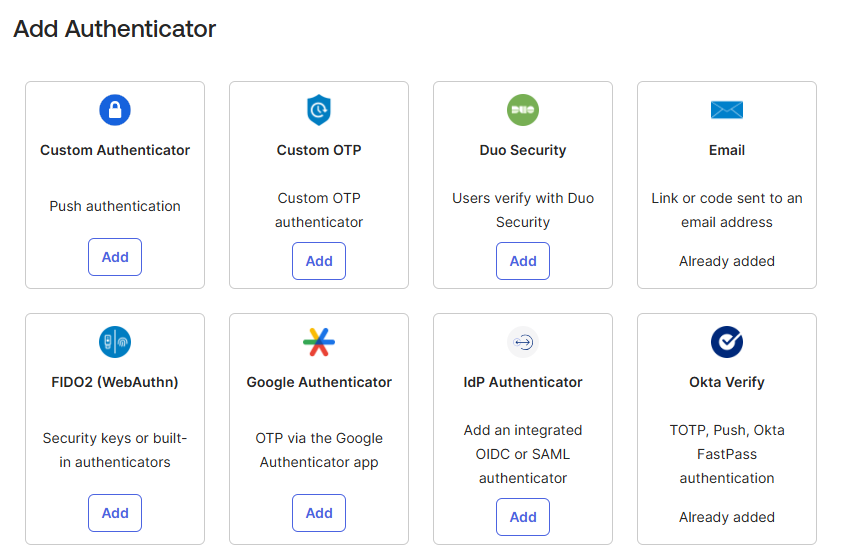
d. Click Add
-
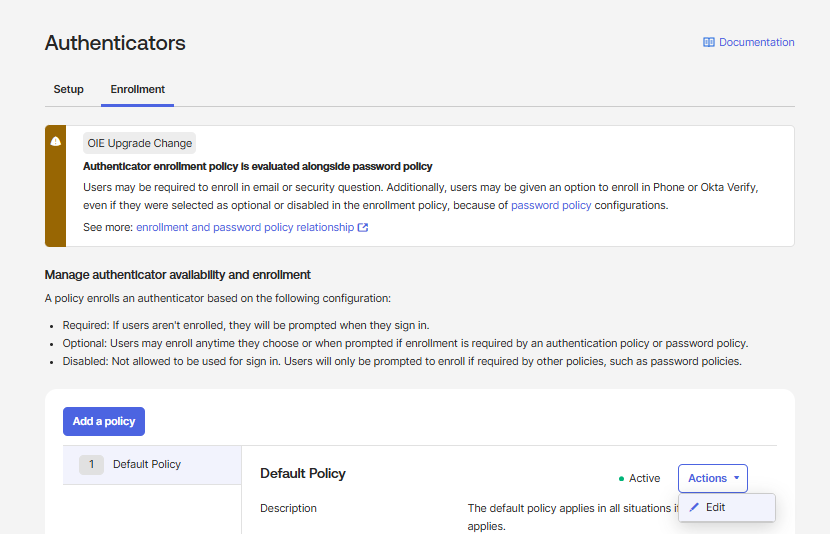
Enroll Google Authenticator in a policy:
a. Navigate to Security
>Authenticators.b. On the Enrollment tab, click Add a policy.
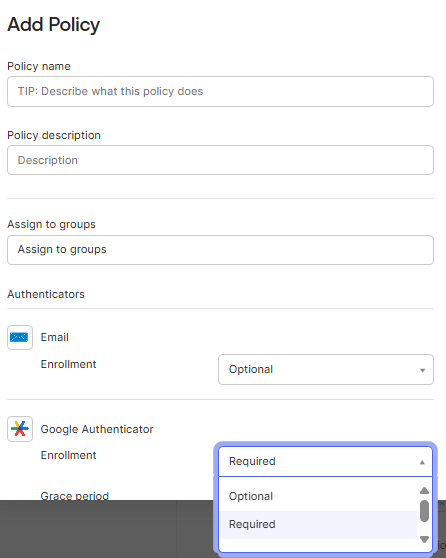
c. Specify a Policy name
d. In Assign to Groups, select the group that your created earlier.
e. From the Google Authenticator drop-down, select Required.
f. Click Create Policy.
g. In the Add Rule window, enter the Rule name and click Create rule.
-
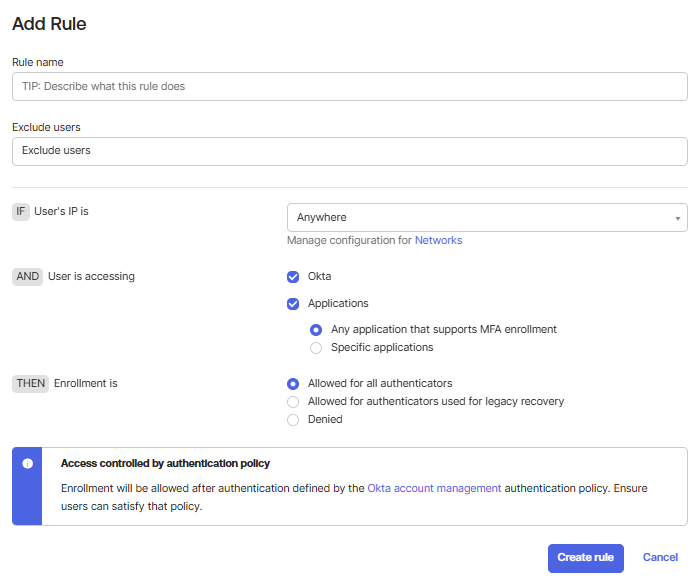
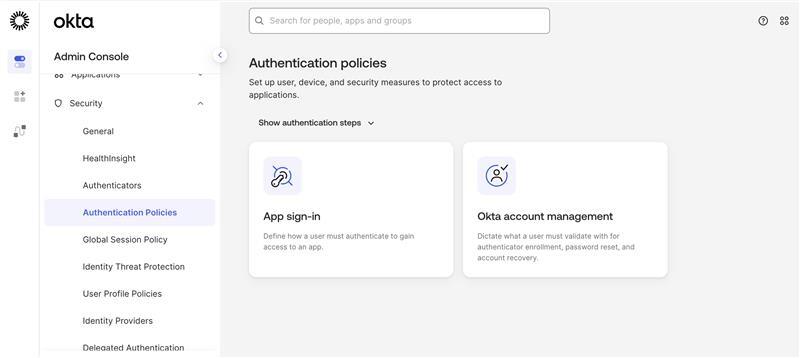
Add a rule for MFA:
a. Navigate to Security then select Authentication Policies in the Admin Console.
b. Under App sign-in policies, click Create policy.
c. In the Create policy pop-up:
-
Enter a Name
-
Enter a Description (Optional)
-
Click Create policy
d. Open the newly created policy and click Add rule.
e. In the Add rule pop-up.
- Enter a Rule name
- Configure the required IF conditions based on your organization’s requirements
- In Assign to Groups, select the group you created earlier
- From the User must authenticate with dropdown, select the required factor type
- Recommended: Authentication method chain (Custom)
f. Click Save.
-
-
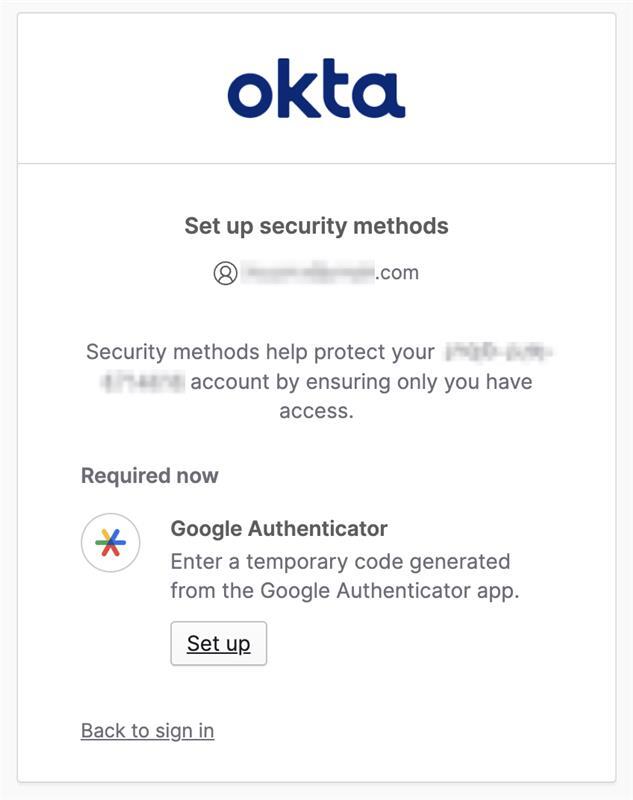
Set up MFA for the user account:
a. Login to Okta with the account you created.
b. In the 'Set Up 2 Factor Authentication' window, select Authenticator of your choice.
Setting Up Multi-Factor Authentication
Axonius enables you to use Multi-factor Authentication in several ways: You can use your organization's SSO according to its policy, Google's authenticator, or the Axonius built-in Multi-factor authentication.
Set Up Google Authenticator
-
Install Google Authenticator on your phone or add the Chrome extension.
-
Select your device type. A QR code will be displayed.
-
Click Can't scan QR Code?.
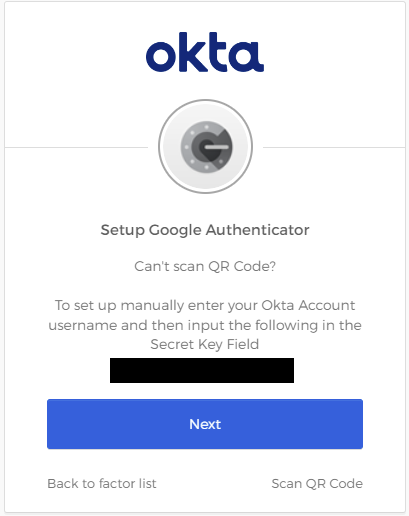
-
Copy the displayed secret key.
-
Click Next and enter the verification code displayed in Google Authenticator.
-
Click Verify. (The verification is one-time process.)
Set Up Axonius 2FA Authenticator
- On the adapter's Add Connection screen, click the Generate Secret Key icon. The Set 2FA Secret Key screen opens.
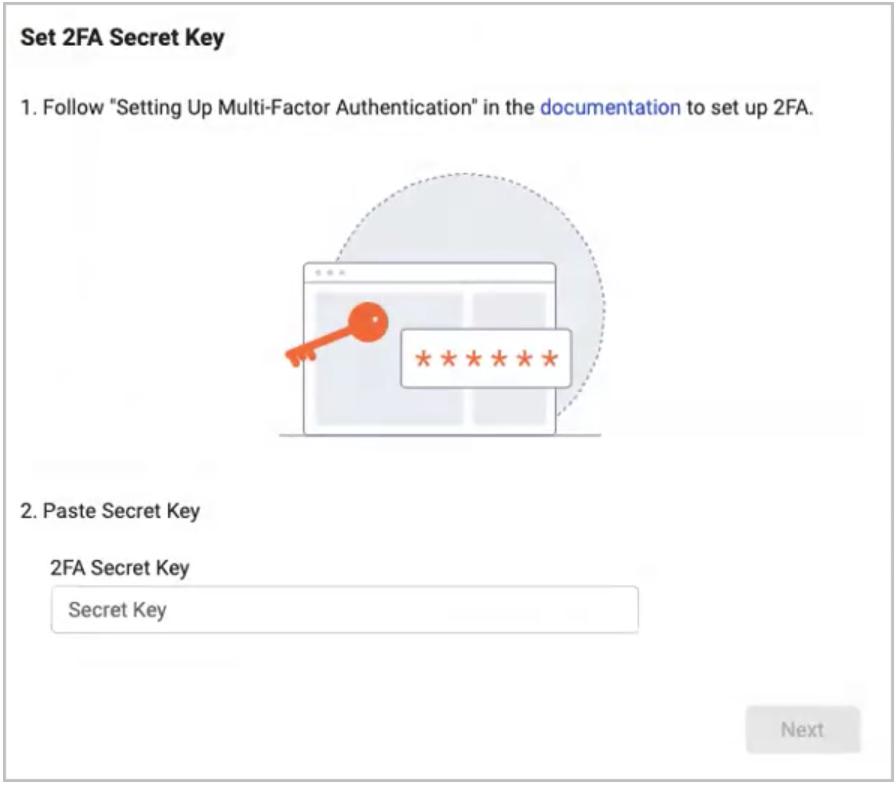
- Paste the secret key in the 2FA Secret Key field and click Next.
- The system displays a 6-digit code for you to copy.
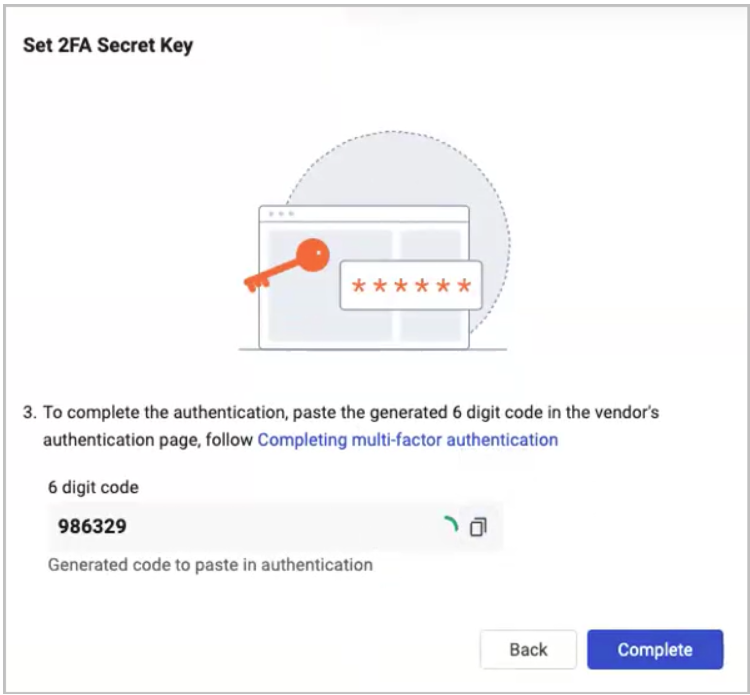
- Back in Axonius, paste the 6-digit code in the 2FA Secret Key field to get a verification code.
- Back in Okta, paste the verification code.
MFA adds an additional layer of security, but if it is not required for service users in your organization, you can follow the steps below to exclude the Okta user from MFA.
Optional: How to Exclude the User From MFA
-
Login to the Okta Admin Console with a user account that has a Super Administrator or API Access Management Admin role.
-
Navigate to Directory
>Groups. -
Locate and open the group you created earlier.
-
In the People tab, click Assign people.
-
Locate the newly created user account and click the corresponding
+to assign the user. -
Click Done.
-
Navigate to Security
>Global Session Policy in the Admin Console. -
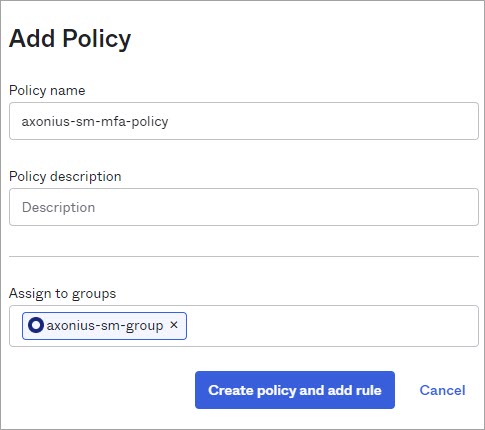
Click Add policy.
-
Specify a policy name (for example, 'axonius-sm-mfa-policy') and an optional description.
-
In the Assign to Groups field, add the group you just created.
-
Click Create policy and add rule.
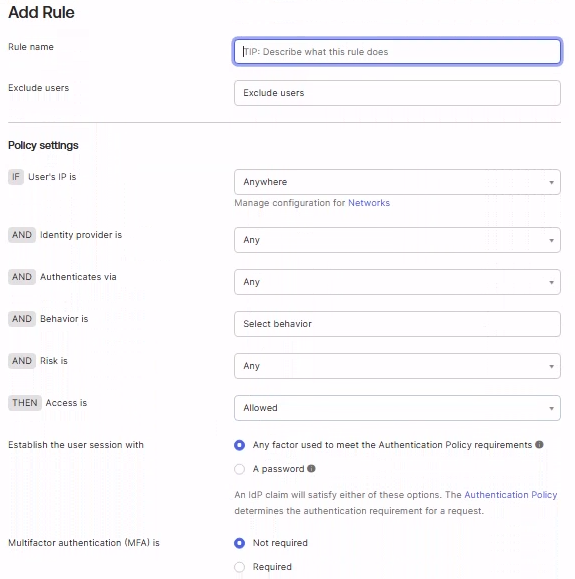
-
Use the default configuration and ensure Multifactor authentication (MFA) is set to Not Required.
-
Click Create Rule.
1.5 Permissions Required to Fetch Roles and Permissions
To fetch Roles and Role Assignments from Okta, complete the following steps:
Configure Okta to Fetch Roles and Role Assignments
-
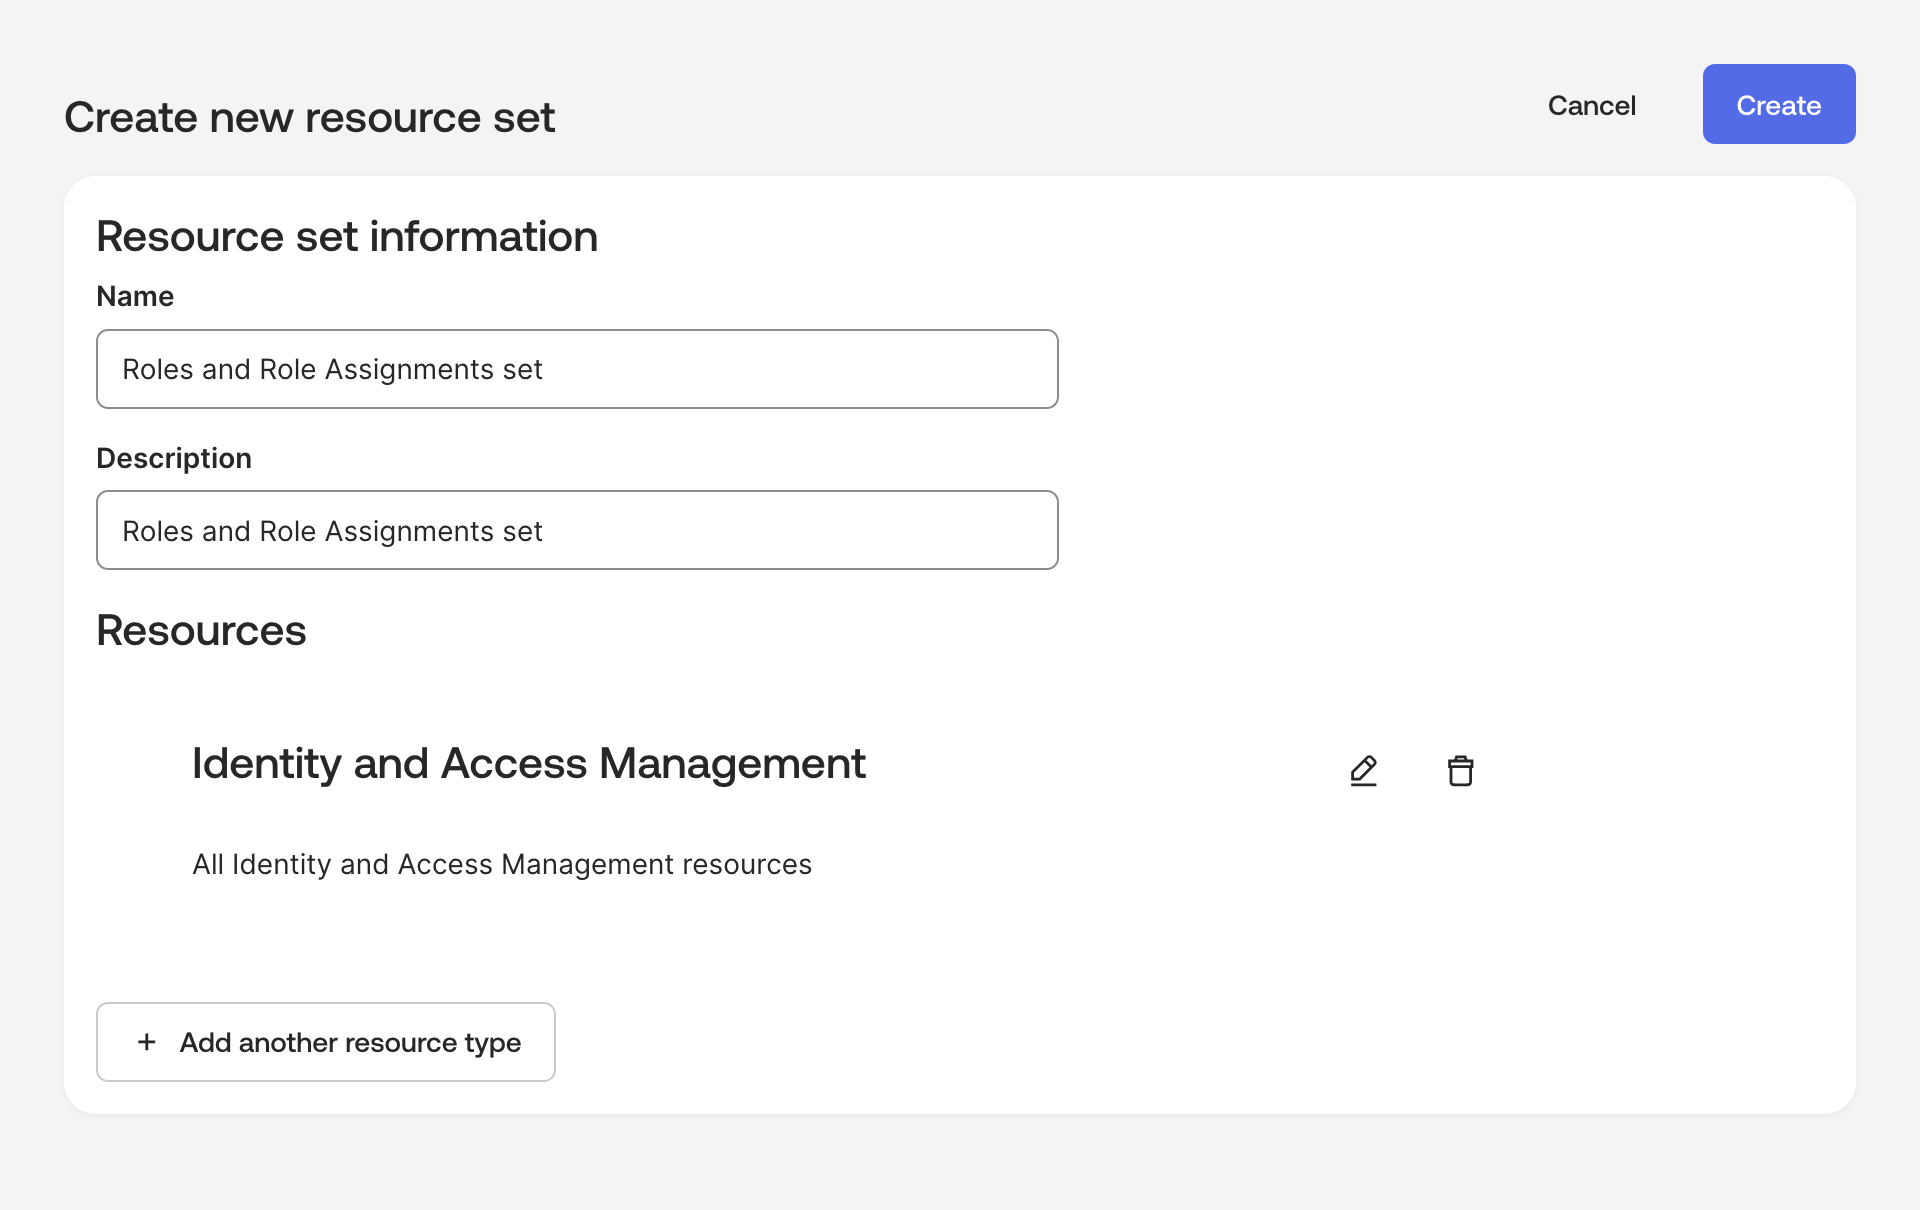
Create a resource set for Roles and Role Assignments:
a. Navigate to Security > Administrators.
b. Select the Resources tab.
c. Click the Create resource set button.
b. Add the All Identity and Access Management resource to the resource set.
-
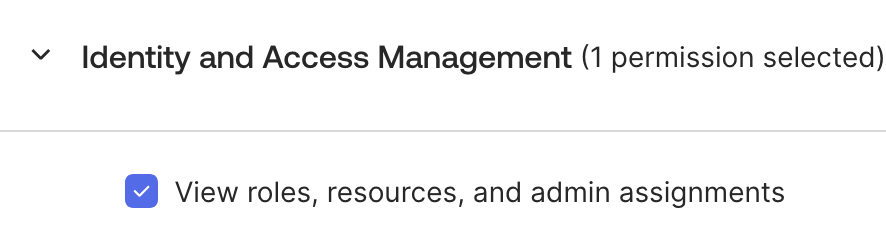
Create a custom role:
a. Create a Custom Role.
b. Assign the permission View roles, resources, and admin assignments to the role.
-
Assign the custom role to the Okta user:
a. Assign the custom role you created to the user account for which the API key was generated.
2. Set up the Okta adapter in Axonius
Create the adapter connection in Axonius. Depending on the authentication method you used, fill in the specific fields and configure any optional settings.
Add a New Connection
-
Navigate to the Adapters page, search for
Okta, and click on the adapter tile.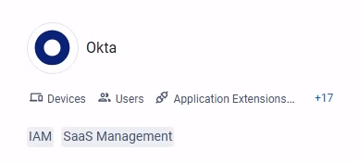
-
On the top right side, click on Add Connection.
-
The Add Connection drawer opens.
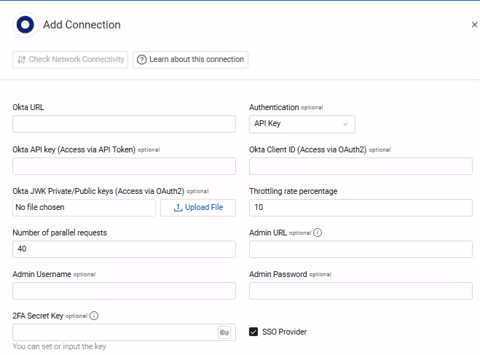
Required Fields
- Okta URL – The hostname or IP address of the Okta server. This field format is '[instance].okta.com'.
- Authentication - Select whether to authenticate this adapter connection with an API Key or OAuth2.
- Connection Label – A name to identify this adapter connection
Note:
The adapter can fetch many of the Application Settings with just an API token/OAuth credentials. However, to fetch high-privilege settings, the adapter requires admin credentials (Admin username/password and 2FA secret key).
- Okta API Key - The generated API key provided by Okta that allows Axonius to fetch data from the Okta API. This is required when API Key is selected in the Authentication drop-down. For details, see API Key in Authenticatoin Methods.
- Okta Client ID - Client ID of the service app. This is required when OAuth2 is selected in the Authentication drop-down.
- Okta JWK Private/Public Keys - The JSON web key which was generated and assigned in the OAuth 2.0 service app integration in the Admin Console of Okta. This is required when OAuth2 is selected in the Authentication drop-down.
- Admin Username – The value you enter in the User Name field in Okta for the new user you created to allow Axonius to fetch Axonius SaaS Applications data.
- Admin Password – The password you set for the new user in Okta.
- 2FA Secret Key – The secret generated in Okta for setting up 2-factor authentication for the Okta user created for collecting Axonius SaaS Applications data.
Optional Fields
Expand/Collapse
- Throttling rate percentage – Specify the threshold percentage of the Okta API rate limit when connecting to the value supplied in Okta URL. Axonius will stop the data fetch when the API rate limit reaches the supplied value.
- Number of parallel requests – Specify the maximum parallel requests that will be created when connecting to the value supplied in Okta URL.
- Admin URL – The hostname or IP address of the Okta admin server. This field format is
[instance]-admin.okta.com. - SSO Provider – If your organization uses Okta for SSO, you can select this check box (selected by default). For more information, see Connecting your SSO Solution Provider Adapter.
- Department Field – This is the mapping of the department value for the Okta authentication object. Check if your organization's 'department' value is different from the default value ('department').
- User Filter Params – You can use the Okta Expression language to filter a subset of users (for example, users who belong to specific departments) to be retrieved by the Okta adapter and displayed in Axonius.
- Filters users by group name – Enter a group name to only fetch users from the specific group. Refer to Configuring a Group in Okta for details.
- Add users inside the devices – Select this option to fetch user information to populate in the relevant device-specific fields.
- HTTPS Proxy – Connect the adapter to a proxy instead of directly connecting it to the domain.
- Notes – Add a note of up to 250 characters for this adapter connection.
- Select Gateway – Select the Axonius Gateway to use when connecting adapters whose sources are only accessible by an internal network. To use this option, you need to set up an Axonius Gateway.
3. (Optional) Configure Advanced Settings
Refer to Okta Advanced Settings.
Updated 5 months ago