
Risk Score Overview
The Axonius Risk Score page offers a robust solution to assess threat levels and prioritize remediation efforts. Use this page to create multiple Risk Scores for different assets and scenarios, and to manage and edit them as needed.
The Risk Score calculation process takes into account risk, business impact, and exploitability considerations, and incorporates custom conditions and data normalization rules to allow for an accurate, transparent calculation process.
A key capability of the Risk Score module it is calculating Risk Score across assets and Security Findings, namely, to calculate the Risk Score of a specific vulnerability in the context of a specific asset. For example, you can compare the risk level of specific CVEs on a laptop with the risk level of the same CVEs on a desktop or a mobile device.
To access the Risk Score configuration page:
- In the Security Findings page, expand the Exposures Tools menu.
- Select Risk Score.
In Axonius New Navigation Experience:
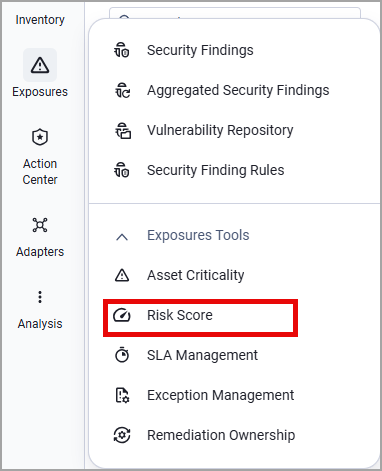
- Select Exposures from the left navigation menu.
- Expand the Exposures Tools menu and select Risk Score.
Required Permissions
To create, edit and run Risk Scores, and edit Risk Score settings, the following Enforcement Center Permissions are required:
- View Enforcement Center
- Add Enforcement Center
- Add & Run Enforcement Center
- Edit Enforcement Center
- Edit & Run - Enforcement Center
- Delete Enforcement Center
- Edit - Enforcement Center
The following pages walk you through the Risk Score configuration process:
Updated 7 days ago