
Infoblox DDI
Infoblox DDI consolidates DNS, DHCP, IP address management, and other core network services into a single platform, managed from a common console.
For on-prem Infoblox NIOS use this adapter
Asset Types Fetched
- Devices, Domains & URLs, Networks
Parameters
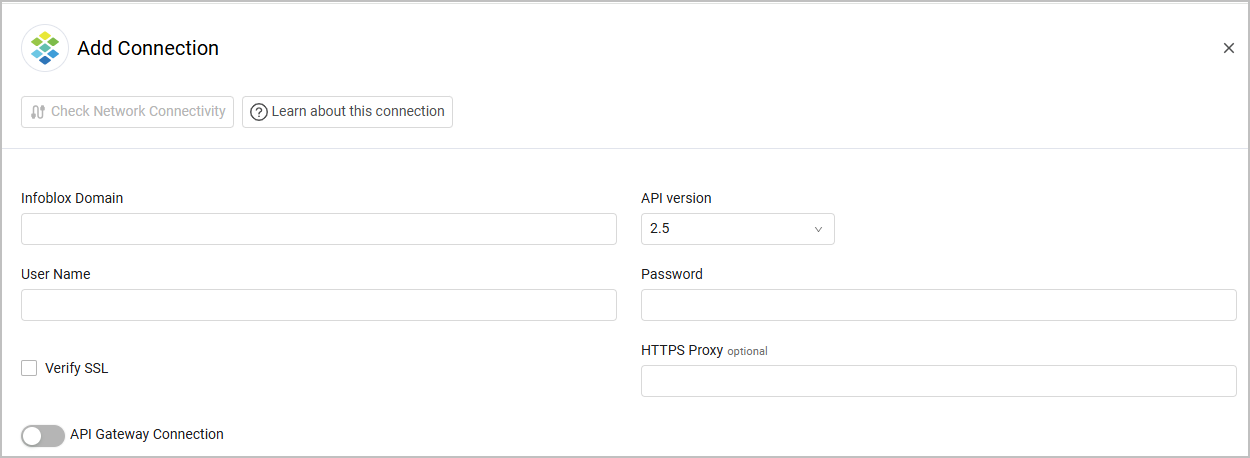
- Infoblox Domain (required) - The hostname or IP address of the Infoblox DDI server.
- API version (required, default: 2.5) - Select the API version from the dropdown.
Note
Additional discovery device objects are fetched, depending on the API version selected. For example, fetching chassis serial number information requires configuring at least API version 2.10.5 and selecting that version from the API version dropdown.
-
User Name and Password (required) - The credentials for a user account that has the Required Permissions to fetch assets.
-
Verify SSL - Select whether to verify the SSL certificate offered by the value supplied in Infoblox Domain. For more details, see SSL Trust & CA Settings.
-
HTTPS Proxy (optional) - A proxy to use when connecting to the value supplied in Infoblox Domain.
-
API Gateway Connection (optional) - Enable this to use API gateway parameters for authentication. After enabling this option, under API Gateway Type, choose Layer7 and fill in the parameters that are displayed (in addition to Infoblox Domain). Read about Layer7 API Gateway Parameters.
Note
When you use an API gateway connection, the other authentication parameters are not required. However, to add the connection successfully, you need to enter placeholder values in these fields.
To learn more about common adapter connection parameters and buttons, see Adding a New Adapter Connection.
Advanced Settings
Note
Advanced settings can either apply to all connections for this adapter, or to a specific connection. Refer to Advanced Configuration for Adapters.
-
CIDR exclude list (optional) - Specify a comma-separated list CIDR blocks to exclude (for example: 192.168.20.0/24,192.168.30.0/24).
-
CIDR include list (optional) - Specify a comma-separated list of CIDR blocks to include (for example: 192.168.20.0/24,192.168.30.0/24).
-
Fetch using Infoblox database download - Select this option to reduce fetch time by downloading a backup of the database instead of making API requests. Note that admin permissions are required for this option. This option only applies to the DHCP Lease and DNS Host Record asset types, the other asset types are still fetched via API requests.
-
Filter results by the Discovered Data field - Specify whether to collect devices from Infoblox if their Discovered Data field has data.
-
Results per page (required, default: 1000) - Set the number of results per page received for a given query to the Infoblox wAPI, to gain better control on the performance of all connections for this adapter.
-
Time in seconds to sleep between each request (optional) - Specify sleeping time in seconds between each API request Axonius sends to Infoblox.
-
Fetch lease information (required, default: true) - Select whether to fetch information from the 'lease' API endpoint. The 'lease' API endpoint is slower than 'ipv4address' API endpoint, but fetches much more information like 'Fingerprint' and discovery information.
-
Fetch networks as assets - Select whether to fetch Infoblox networks as assets.
-
Fetch DHCP ranges - Select whether to fetch DHCP address ranges.
-
Fetch used addresses information - Select whether to fetch information from the 'ipv4address’ API endpoint. The 'ipv4address’ API endpoint is faster than the 'lease' API endpoint.
-
Fetch A records - Select whether to fetch A records from Infoblox. Fetched as: Domains & URLs
-
Fetch shared A records - Select whether to fetch shared A records from Infoblox. Fetched as: Domains & URLs
-
Fetch CNAME records - Select whether to fetch DNS CNAME records. Fetched as: Devices
-
Fetch HOST records - Select whether to fetch data from WAPI/record:host. Fetched as: Devices (with a corresponding Domain & URL asset for DNS information
-
Fetch fixed addresses - Select whether to fetch data from WAPI/fixedaddress. Fetched as: Devices
-
Fetch discovery device objects (optional) - Select to fetch discovery device objects. Additional discovery device objects are fetched, depending on the API version selected.
-
Fetch DNS Members - Select to fetch data from WAPI/member:dns.
-
Fetch IPAM statistics - Select to fetch data from WAPI/ipam:statistics.
Note
When both Fetch IPAM statistics and Fetch networks as assets are enabled, the following IPAM Statistics fields are populated in Network assets:
Network - The network address and CIDR notation
Conflict Count - Number of IP address conflicts detected in the network
Unmanaged Count - Number of unmanaged IP addresses in the network
Utilization Percentage - Network utilization as a percentage
Utilization Update Time - Timestamp of when the utilization was last calculated
-
Do not parse Last Seen of A Records - Select to not parse Last Seen of A Records.
-
Ignore A records discovered by NetMRI - Select to ignore A records discovered by NetMRI. If cleared, the adapter connection will fetch all A records if the Fetch A records is enabled.
-
Use start time as last seen - Select to set the device Last Seen field value based on the fetched device's DHCP start time. If cleared, the adapter connections will use the fetched device's DHCP end time.
Note
If Use start time as last seen is selected, you must also select Fetch lease information.
- Include lease states (optional) - By default, the following lease states of devices are not fetched: ‘ABANDONED', ‘BACKUP', 'EXPIRED', 'FREE', 'RELEASED'. If you want to include one or more of these lease states in the fetch, select the relevant lease states from the dropdown.
- Skip records without Hostname and MAC Address - By default the system skips records without Hostname and MAC Address, clear this option to not skip records without both a Hostname and a MAC Address.
- Merge device records by MAC address - Select to merge records that have the same MAC address. A new device asset will be created, containing the data from each Infoblox asset. This setting can also help with correlation by minimizing the number of records correlated together.
- Ignore all devices without last seen value - Select to ignore all devices without last seen value.
Note
For details on general advanced settings under the Adapter Configuration tab, see Adapter Advanced Settings.
APIs
Axonius uses Infoblox APIs.
Required Permissions
The value supplied in Username must have at least Read-only permissions to access the devices. To create a user with Read-only permissions
- Login to Infoblox as an administrator and select Administration
>Roles..png)
- Click the Plus sign on the right part of the page to add a new role.
.png)
- Give this role an indicative name, and click Next. In the Extensible Attributes page, click Next again, then click Save & Add Permissions.
.png)
- In the Permissions page, click the Plus sign to add permissions to the newly-created role. Axonius needs read-only permissions to the items displayed in the image. Select them and click Save & Close.
.png)
- Navigate to "Groups" and click the Plus sign to create a new group.
.png)
- Specify an indicative name for this group, and click Next.
.png)
- Select the API option to enable API access for this group, and click the Plus sign to add a role to it.
.png)
- Navigate to Custom Roles and click the newly created role.
.png)
- Verify that the role is currently displayed in the Roles list. Verify that "API" is selected, and click Save & Close.
.png)
- Click the newly created group, and then click the Plus sign to create a new user. Fill in the details and click Save & Close.
.png)
Related Enforcement Actions
Updated 16 days ago