
Freshservice
Freshservice is a cloud-based IT help desk and service management solution that enables organizations to simplify their IT operations.
Asset Types Fetched
- Devices, Users, Software, SaaS Applications, Tickets
Before You Begin
APIs
Axonius uses the Freshservice API.
Locate API Key
To locate your API Key
- Log in to your Support Portal.
- Click on your profile picture on the top right corner of your portal.
- Go to the Profile Settings page. Your API Key is displayed below the Change Password section on the right side.
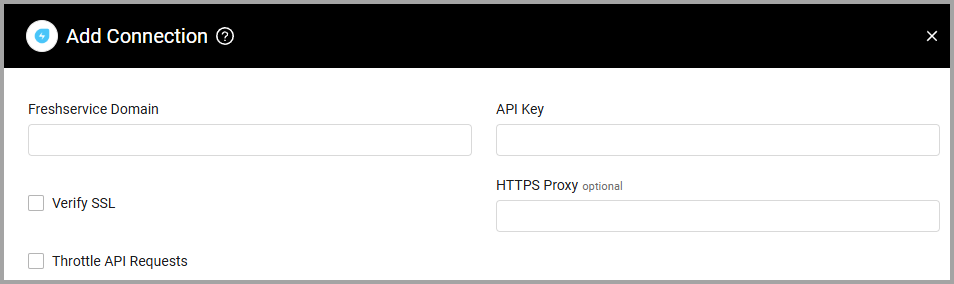
Connection Parameters
-
Freshservice Domain (required) - The hostname of the Freshservice server. The hostname field format is '[instance].freshservice.com'.
-
API Key (required) - Specify the API Key provided by Freshservice. To locate your API Key, see Locate API Key.
-
Throttle API Requests - Select this option to only use 90% of the API total rate limit bandwidth. For example: If a customer has 3000 total API calls allowed per hour, Axonius will only produce 2700 calls and leave the remaining 10% available.
-
Verify SSL - Select whether to verify the SSL certificate of the server against the CA database inside of Axonius. For more details, see SSL Trust & CA Settings.
-
HTTPS Proxy (optional) - Connect the adapter to a proxy instead of directly connecting it to the domain.
To learn more about common adapter connection parameters and buttons, see Adding a New Adapter Connection.
Advanced Settings
Note
Advanced settings can either apply to all connections for this adapter, or to a specific connection. Refer to Advanced Configuration for Adapters.
- Freshservice asset type Include list (optional) - Specify a comma-separated list of Freshservice asset types.
- If supplied, all connections for this adapter will only fetch devices whose asset type is any of the comma-separated list of Freshservice CI types that have been defined in this field.
- If not supplied, all connections for this adapter will fetch devices with any Freshservice asset type.
- Fetch installed software - Select to fetch installed software.
- Fetch disabled users - Select to fetch disabled users. This setting is relevant only if one of the Fetch ___ as Users settings is selected.
- Fetch devices (optional, default: true) - Select to fetch devices.
- Fetch device relationships - Select this option to fetch device relationships from Freshservice (when cleared this data is not fetched).
- Fetch Agent as Users - Select to fetch agents as users.
- Fetch Requesters as Users - Select to fetch requestors as users.
- Fetch Assets as Users - Select to fetch assets as users.
- Use short format to describe OS Builds - Select this option to use short format to describe OS Builds.
- Fetch and resolve Product Fields - Select this option to fetch Freshservice product fields.
- Devices Schema and Users Schema (Custom schema entry (JSON) - Use these settings to add a JSON file to fetch information from one object to another. See Using Custom Schema Entries to add a JSON file to Fetch Information from One Object to Another for details of how to configure these fields.
- Enable Custom Parsing - Enable this option to define how to parse specific fields from the raw data fetched. You can choose to parse the data into an already existing field, or create a new one. This adapter supports User Custom Parsing/ Device Custom Parsing. See Adapter Custom Parsing for more information.
- Enable real-time asset updates (Supported events: New Tickets) (default: disabled)- Select this option to update assets in real-time with New Ticket events.
- Fetch EC Action ticket updates (optional, default: true) - Select whether to fetch EC action ticket updates.
Note
For details on general advanced settings under the Adapter Configuration tab, see Adapter Advanced Settings.
Using Custom Schema Entries to Add a JSON File to Fetch Information from One Object to Another
You can use Custom devices schema, Custom users schema to add a JSON file to fetch information from one object to another. For example - to enrich a laptop with information from another object. You can add more than one JSON file.
The schema below fetches extra information for the entity in the “Assets” table from the “Users” table and it looks up using the value in the “UserID” field. It then inserts the information in the “Advanced View” (JSON view in the Asset Profile page for the specific adapter connection) under the “ax_user” field. The JSON file must be of the format:
{
        "type": "link",
        "link_type": "reference",
        "source_table": "Assets",
        "source_field": "UserID",
        "destination_table": "Users",
        "link_to_field": "ax_user"
}
For more information on custom asset schema and the format of the JSON file, see ServiceNow Advanced Settings - Custom Asset Schema.