Smartsheet
Smartsheet is a cloud-based work management platform that empowers collaboration, drives better decision making, and accelerates innovation.
Asset Types Fetched
Users |
Groups |
Licenses |
Application Settings |
SaaS Applications |
Permissions
Before You Begin
Authentication Methods
- API Token
- OAuth2
APIs
Axonius uses the following APIs:
Required Permissions
-
When authenticating with OAuth2, the required scope for Request an Authorization Code is
READ_USERS. -
(Relevant only to accounts with Axonius SaaS Applications) When adding a Username and Password to the connection parameters, the user must have
administratorpermissions and theSystem Adminrole.Note
While to access SaaS data, Application Settings and Licenses you need to grant roles and/or permissions that include write capabilities, the adapter only actually reads data from the application.
Setting Up the Integration
To fetch Application Settings and Licenses, you must create a user account on Smartsheet.
Guidelines for creating a user account:
- It is recommended to retrieve the Username and Password parameters from the user account created specifically to work with Axonius.
- The password length should be at least 32 characters.
- Configuring user roles:
- Enable:
System Admin - Disable:
System Licensed User
- Enable:
- If Single-Sign-on is enabled and the 'Email + Password option' is disabled, it is recommended to retrieve the Username and Password from a user account maintained by the SSO solution.
Creating an Application Access Token
Note
This process is required only if you authenticate with an API Token.
To retrieve the Token parameter, follow these steps:
- Login to Smartsheet as the user dedicated to working with Axonius.
- Click the user's avatar and select Personal Settings.
- Navigate to API Access and generate a new access token.
- Copy the token and paste it into the Axonius Token field.
Deploying the Adapter in Axonius
Required Parameters
-
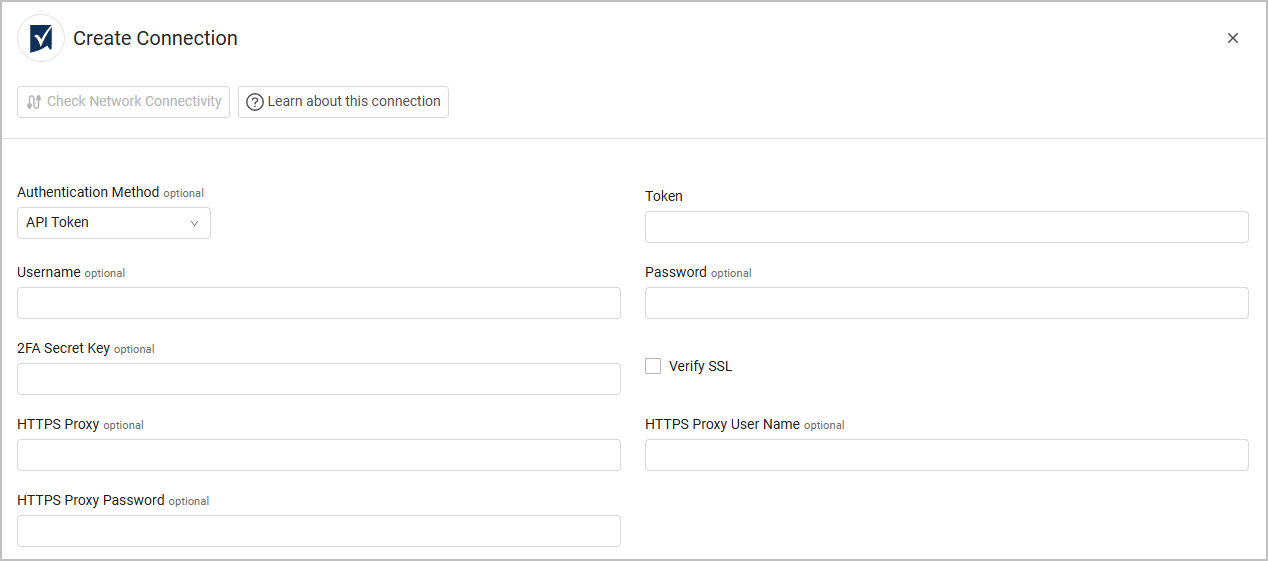
Authentication Method - Select API Token or OAuth2. Select the relevant tab below to view the required fields for each method.
-
Token - The application access token created for the Axonius application.

-
Optional Parameters
-
Verify SSL - Select to verify the SSL certificate offered by the value supplied in Host Name or IP Address. For more details, see SSL Trust & CA Settings.
-
HTTPS Proxy - A proxy to use when connecting to the value supplied in Host Name or IP Address.
-
HTTPS Proxy User Name - The user name to use when connecting to the value supplied in Host Name or IP Address via the value supplied in HTTPS Proxy.
-
HTTPS Proxy Password - The password to use when connecting to the value supplied in Host Name or IP Address via the value supplied in HTTPS Proxy.
To learn more about common adapter connection parameters and buttons, see Adding a New Adapter Connection.
Advanced Settings
Note
Advanced settings can either apply for all connections for this adapter, or you can set different advanced settings and/or different scheduling for a specific connection, refer to Advanced Configuration for Adapters
- Fetch Group Data - Select this option to fetch group data for Smartsheet users.
- Parse Last Logon As Last Seen - Select this option to populate the "Last Seen" field with the value of "Last Logon".
- Fetch Application settings and Licenses (default: enabled) - Disable this option if you don't want to fetch Application Settings and Licenses.
Updated about 1 month ago
