
Managing Custom Relationships
Use the Custom Relationships Management page to create and manage custom relationships between assets. The Asset Graph uses asset relationships automatically defined by Axonius, based on the correlated data fetched via the adapters. You can define your own custom relationships between assets based on your needs and understanding of the environment, business structure, and logical functions.
To manage custom relationships, you need the following permissions:
- Under System Management
- View system settings
- Update system settings
- Under each asset type for which you want to create relationships
- Edit \ relationships
Most relationships are between assets of different types, such as devices and users. You can also create relationships between assets of the same type. For example, you can create a relationship "Managed by" between users that are managed by other users.
All custom relationships are listed on the Custom Relationships Management page.
To access the Custom Relationships Management page:
- Click
.png) in the top right corner of the platform to open System Settings.
in the top right corner of the platform to open System Settings. - In the Categories/Subcategories pane of the System Settings page, expand Data, and select Custom Relationships Management. The Custom Relationships Management page opens.
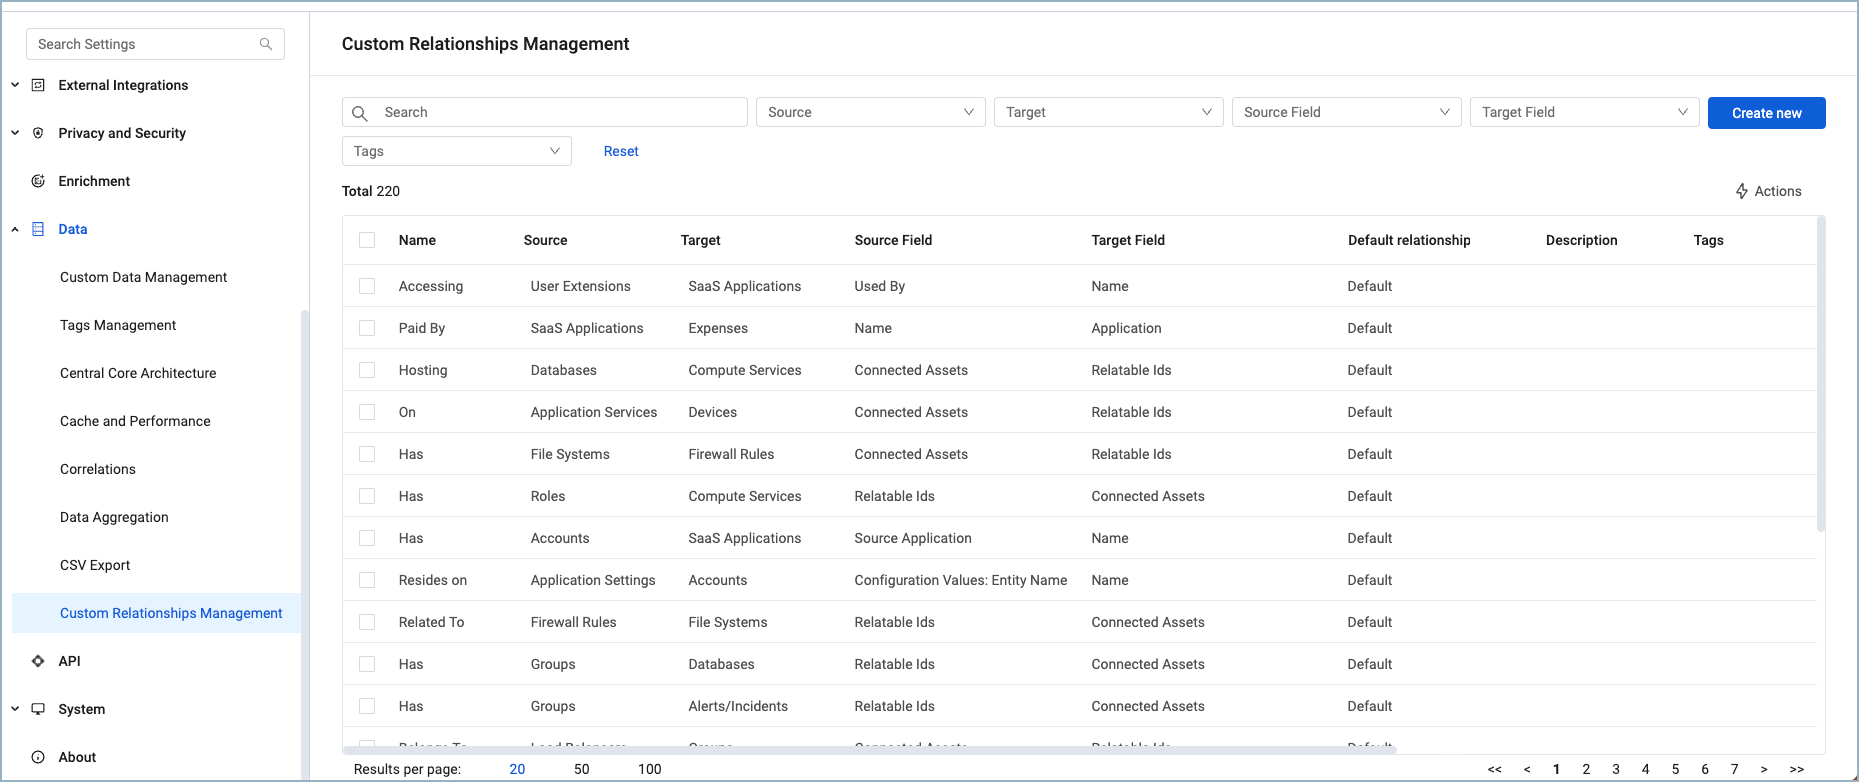
The following information is displayed on the Custom Relationships Management page:
- Relationship Name - The name of the custom relationship.
- Source - The source asset type.
- Target - The target asset type.
- Default Relation - Indicates whether the custom relationship is set as the default for the relationship between the source and target asset types.
- Source Field - The source field.
- Target Field - The target field.
- Description - An optional description.
- Tags - Displays tags assigned to the custom relationship.
- Access - Which data scope/role have access.
See Working with Tables to learn more about tables in Axonius.
About Relationships
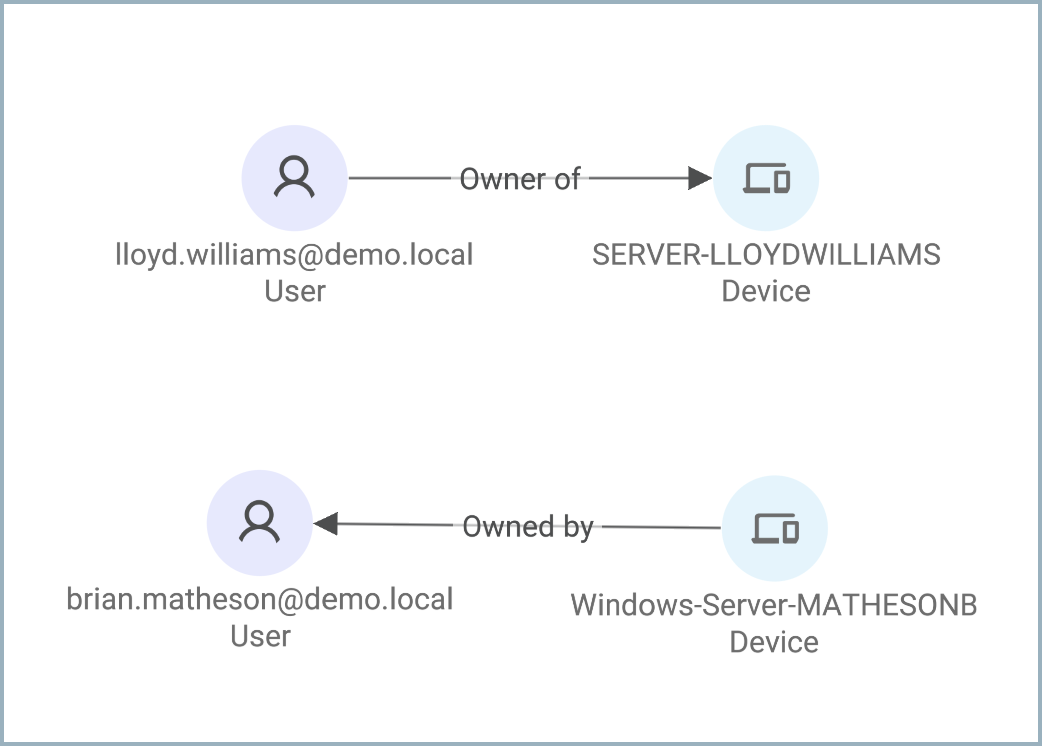
A relationship is how two assets are connected. For example, devices are connected to users based on when they were last used by them. Software is connected to devices if it is installed on them. This connection, the relationship, is visualized in the Asset Graph as an arrow that indicates the type of the relationship.
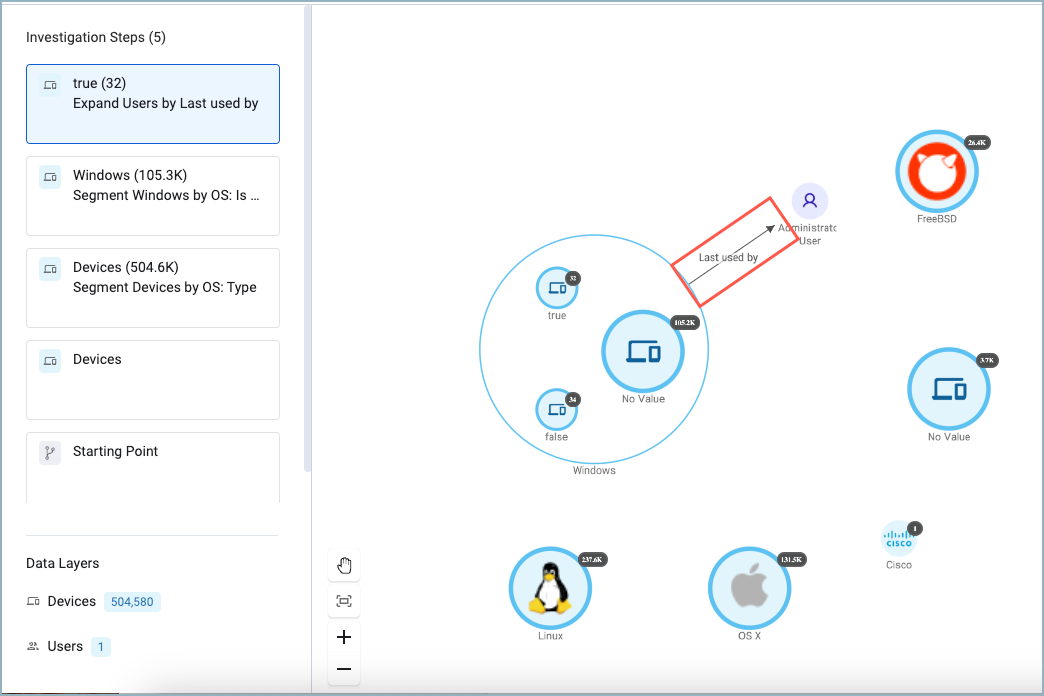
Once a relationship is created, you can visualize connected assets with the Asset Graph. There, you can expand its connections allowing you to investigate environmental dependencies more accurately to help reduce the attack surface.
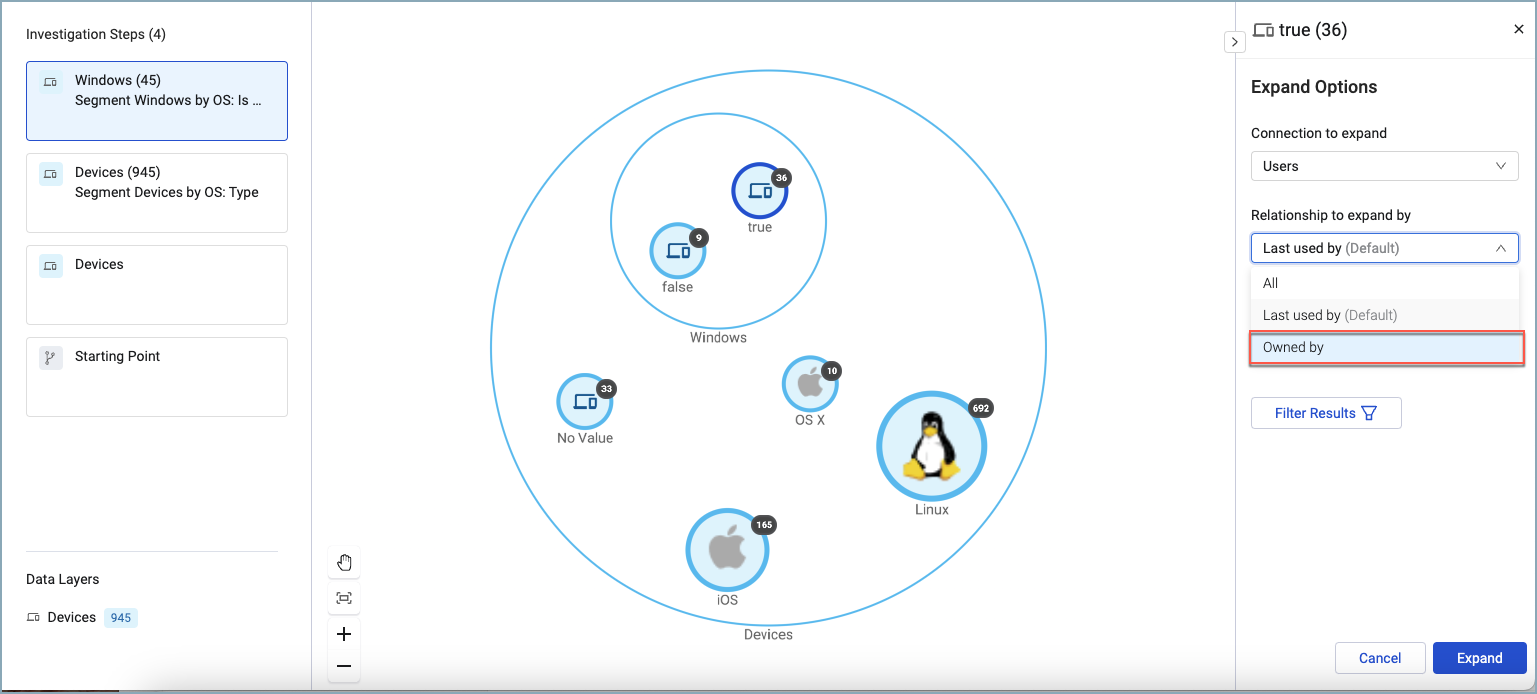
Multiple and Default Relationships
Multiple relationships between asset types can be created by relating the assets using different fields. You can set one of them to be the default relationship to make working with these asset type pairs easier. The default will be selected automatically when you explore connections.
When creating a custom relationship, you actually create two opposite relationships that connect the assets in two directions, or two sides. For example, when creating a relationship between devices and users, you create a relationship from Device to User and from User to Device. A device is "owned by" or 'accessed by" a user while a user is "owner of" a device.
Both relationships are listed in the Custom Relationships Management table.
Creating a Custom Relationship
To create a Relationship:
Note
Once a custom relationship is created, the fields relating the assets cannot be changed.
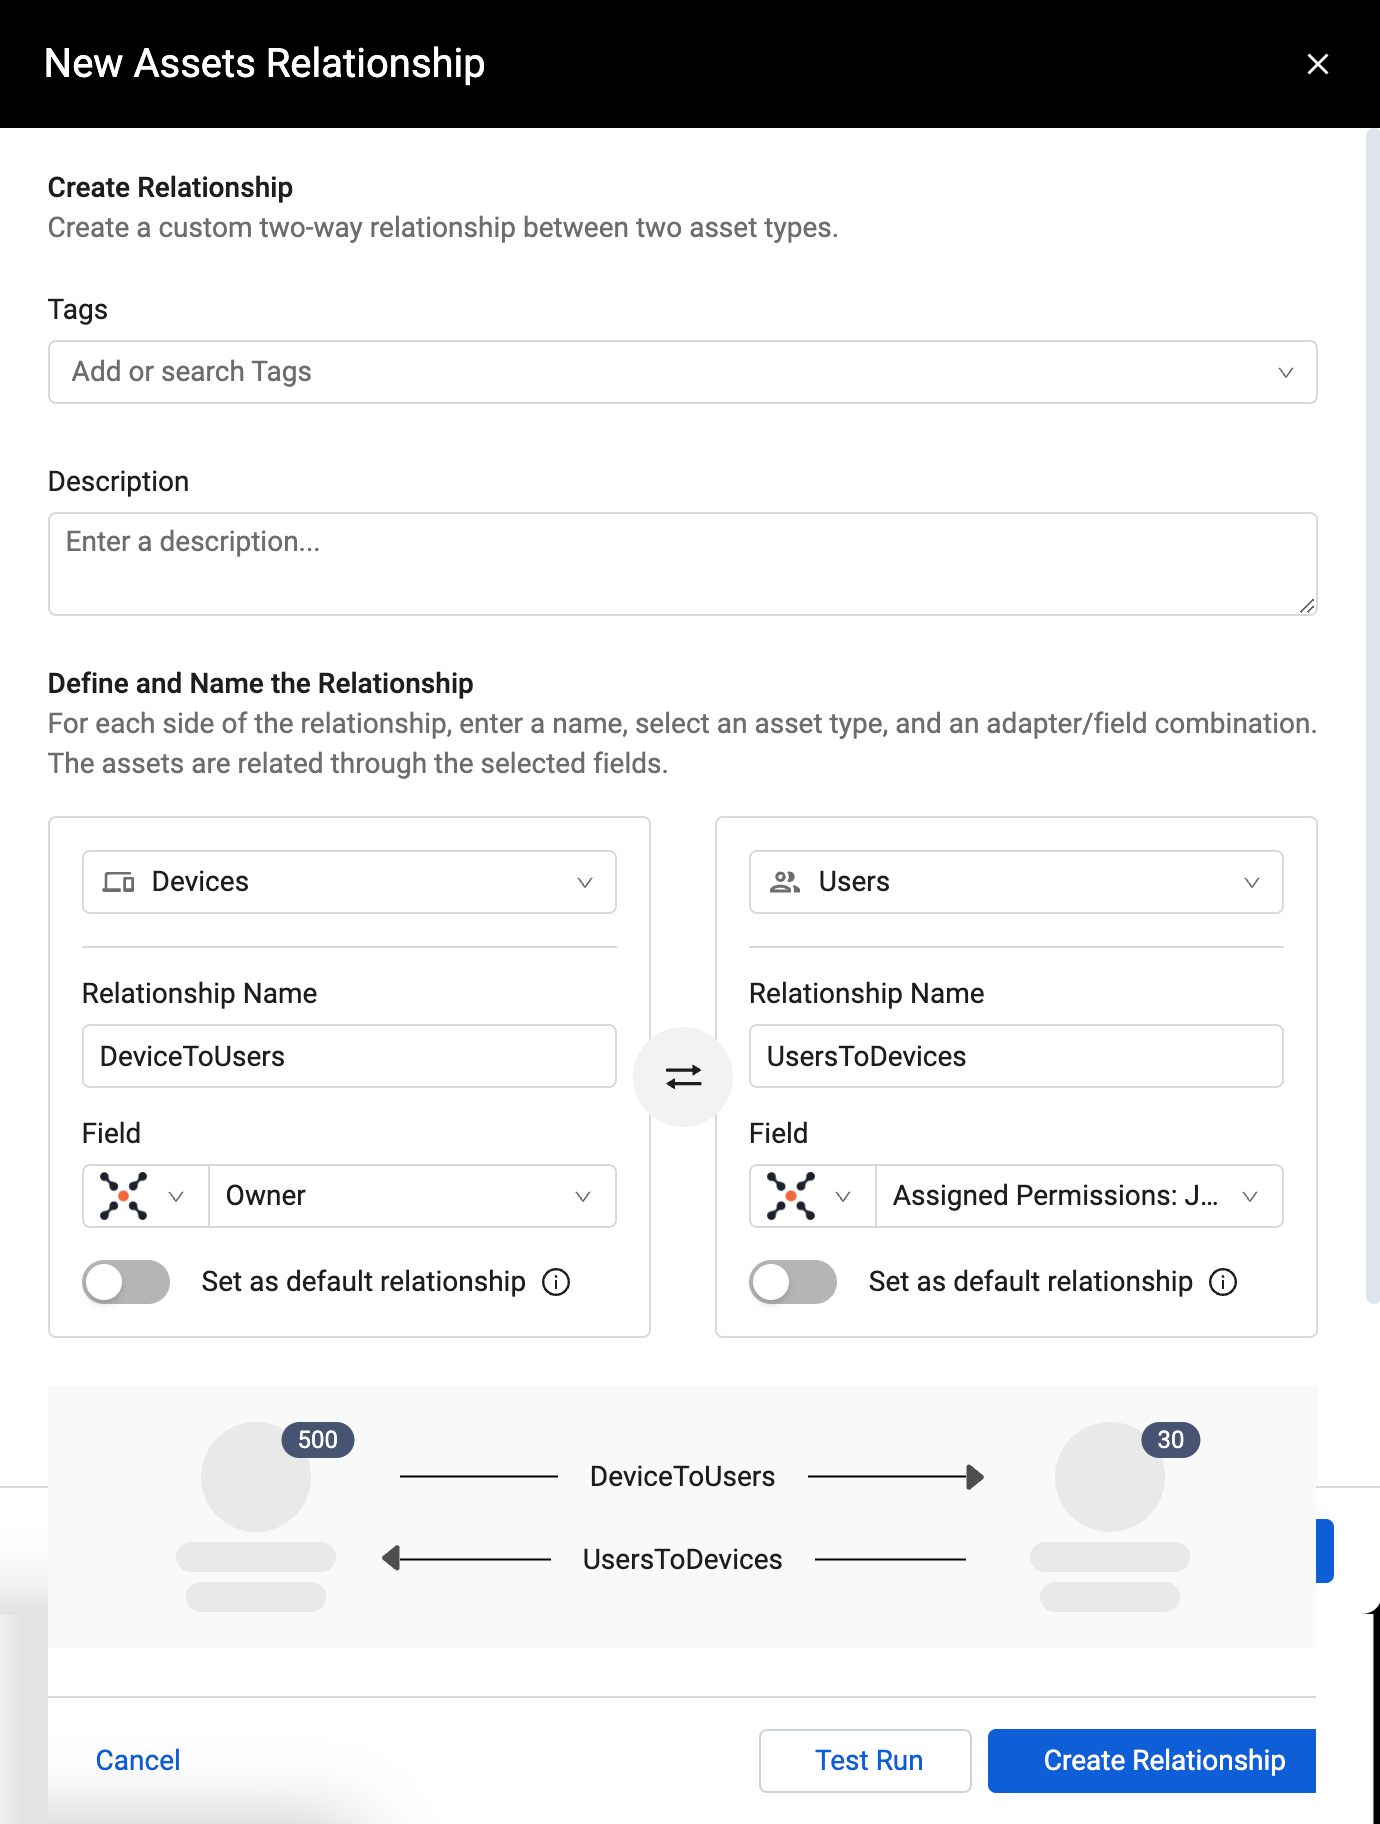
- Click Create New above the Custom Relationships Management table. The New Assets Relationship drawer opens.
- In Tags, select existing tags or create any new tags you want to assign to the relationship.
- Optionally, click Add description to add a description of the relationship. It is recommended to describe the relationship between the two asset types.
- Under Define and Name the Relationship, there are identical sections to enter the details of both "sides" of the relationship. For each side, do the following:
a. Select an asset type. The asset types selected must have a field that identifies the related asset type.
b. In Relationship Name, enter a name that describes how the asset types can be connected. For example, the first relationship between Devices and Users can be "Last used by". The reciprocal relationship, could be named "Has access to" because Users have access to Devices.
c. Under Field, select the field whose value will match the field selected under the opposite relationship. For example, on the Devices side of the relationship, you may choose the Owner field since the value of Owner identifies a user that "owns" the device. For the opposite direction, select a field with a value that identifies the other asset. In the example, choose a field that has a value that identifies the device such as MAC address or device ID. - When Set as default relationship is enabled, that relationship will be the default and selected automatically. Only one of the relationships can be the default.
- Enable Set as default relationship to set this relationship as the default between these asset types.
- To test whether the relationship is valid, click Test Run. The results of the test are displayed in a message box. See Testing a Relationship.
- Click Create Relationship. Both relationships are created and listed in the Custom Relationships Management table. They an be used when exploring connections in the Asset Graph.
Testing a Relationship
When creating a custom relationship, use Test Run to verify the validity of a custom relationship between assets based on the selected matching field values. The relationship is tested on the first found assets for each of the selected fields. Some assets may not have a value for the selected field.
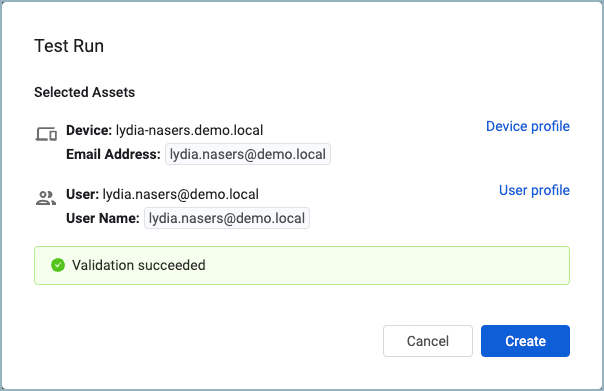
When the Test Run is Successful
The test run is successful when the data types of the selected fields are the same (for example, they are both email addresses) and at least one matching value exists before creating the relationship.
When the test run is successful, a dialog is displayed listing one asset for both the source and target of the relationship. A link navigates to each asset's profile page in a new browser tab. Click Create to create the custom relationship.
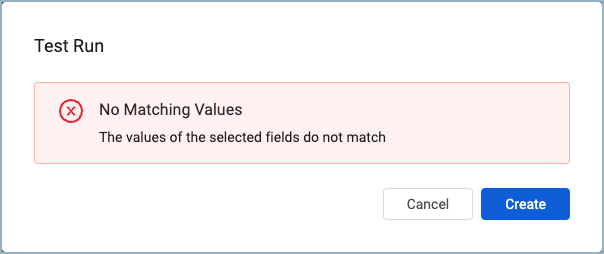
When the Test Run Fails
When the test run fails, a dialog is displayed stating the reason for failure. For example, if there are no matching values for the selected fields, the test will fail. Even if the test fails, you can still create the relationship. This is useful when you are creating relationships for future use. Click Create to create the custom relationship.
Editing Existing Relationships
You can edit the name, description, and tags of existing relationships. Only custom relationships can be edited.
To edit a Relationship:
- Do one of the following:
- Select a Relationship in the Custom Relationships Management table. From the Actions menu, select Edit.
- In the header of the relationship details pane, click
 (Edit).
- Make the changes you want and click Save. Click Test Run before saving to verify the relationship is valid.
Duplicating and Deleting Relationships
You can duplicate any relationship and delete custom relationships when they are no longer needed.
To duplicate a relationship:
- Do one of the following:
- Select a Relationship in the Custom Relationships Management table. From the Actions menu, select Duplicate.
- In the details drawer, click
 (Duplicate) in the drawer header.
- The details of the relationship copy are displayed. "Copy of" is added to the name of the relationship. You can change the name and any other details of the relationship copy.
- Click Create Relationship. The duplicate relationship is created and added to the Relationships table.
To delete a relationship:
- Do one of the following:
- Select a relationship in the Custom Relationships Management table. From the Actions menu, select Delete.
- In the details drawer, click
 (Delete) in the drawer header.
- The relationship is deleted and no longer available.
Updated 9 months ago