
TeamViewer
TeamViewer is remote access and remote control computer software, allowing maintenance of computers and other devices.
Types of Assets Fetched
This adapter fetches the following types of assets:
- Devices
- Users
Required Permissions
The value supplied in Token must be associated with one of the following product plans that have permissions to read user information:
- Business
- Premium
- Corporate
- Tensor
In addition, the following permissions are required:
- Account Management
>View Account Data - User Management
>View Users - Computer & Contacts
>View Entries - Group Management
>Read Groups (Required to fetch Devices; a token without it fetches only Users) - Device Groups
>Read Operations (Required to fetch Devices; a token without it fetches only Users)
When the Fetch managed groups' devices advanced settings is enabled, the adapter also reads the managed device groups with these permissions.
Creating the Token in TeamViewer
Follow these steps to generate a Script Token in TeamViewer to configure the adapter. Refer to TeamViewer API Guide for full details.
1. Generate the Script Token in TeamViewer
-
Log in to the TeamViewer Management Console.
-
Click on your Profile Name/Avatar in the top-right corner and select Edit profile.
-
In the sidebar, navigate to Script tokens (or Apps in some versions).
-
Click Add token (or Create script token).
-
Name: Enter a descriptive name, e.g.,
Axonius-Integration. -
Permissions: You must select the following scopes:
- Account Management: View account data
- User Management: View users
- Computers & Contacts: View entries
-
Click Save.
-
CRITICAL: Copy the generated token string immediately. TeamViewer will not show it again once you close the window.
Parameters
-
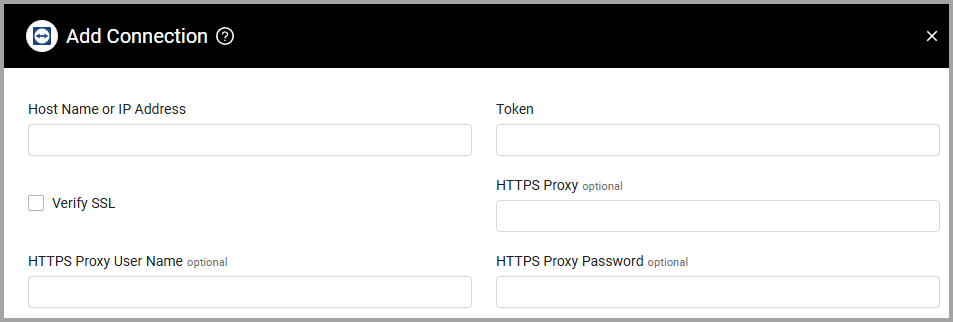
Host Name or IP Address (required) - The hostname or IP address of the TeamViewer server. To work with the TeamViewer Cloud Hosted Application use webapi.teamviewer.com as the Host Name.
-
Token (required) - An access token associated with a TeamViewer script that has the Required Permissions to fetch assets.
-
Verify SSL - Select whether to verify the SSL certificate of the server against the CA database inside of Axonius. For more details, see SSL Trust & CA Settings.
-
HTTPS Proxy (optional) - Connect the adapter to a proxy instead of directly connecting it to the domain.
-
HTTPS Proxy User Name (optional) - The user name to use when connecting to the value supplied in Host Name or IP Address via the value supplied in HTTPS Proxy.
-
HTTPS Proxy Password (optional) - The password to use when connecting to the server using the HTTPS Proxy.
To learn more about common adapter connection parameters and buttons, see Adding a New Adapter Connection.
Advanced Settings
Note
Advanced settings can either apply to all connections for this adapter, or to a specific connection. Refer to Advanced Configuration for Adapters.
- Fetch managed groups' devices - Select this option to fetch devices assigned to all groups.
Note
To learn more about Adapter Configuration tab advanced settings, see Adapter Advanced Settings.
APIs
Axonius uses the:
The adapter should reach the following endpoints:
Supported From Version
Supported from Axonius version 4.5
Updated 12 days ago