
Cases Page
The Cases page is your central hub for managing all Cases within your data scope. You can view and track every Case, including those assigned to others, and create new ones, modify their status and details, or perform bulk actions. Cases can be created manually or automatically via the Create new case enforcement action.
Cases function as in-house tickets in Axonius, allowing you to resolve specific issues without opening a ticket in a third-party system. Create and manage cases based on queries or Monitoring Rules. View all system cases, create new ones, and track existing ones. Cases are viewable in Table view or Kanban (tile) view. Changes made in one view are automatically reflected in the other.
In Axonius New Navigation Experience access Cases from the Action Center menu.
Required Permissions
To access and manage Cases, users must have the following permissions:
-
View Cases
- View user accounts and roles (under Users Management) - Allows you to view Assignees (users).
- View Case Management (under Case Management) - Allows you to open the Case drawer and view Case details.
-
Edit Cases
- Edit Case Management (under Case Management).
Managing Cases in Table View
The Table view provides a detailed, list-based display of all Cases and is ideal for sorting, filtering, and performing bulk actions. Actions available exclusively in Table view include:
- Bulk delete Cases.
- Bulk change the status of Cases.
- Edit Case details.
To access the Table view
In the left menu, click the Case Management icon  .
.
In Axonius New Navigation Experience access Cases from the Action Center menu.
The Case Management page opens in Table view (the default). The total number of saved cases is displayed at the top left of the table (e.g., Total 224). 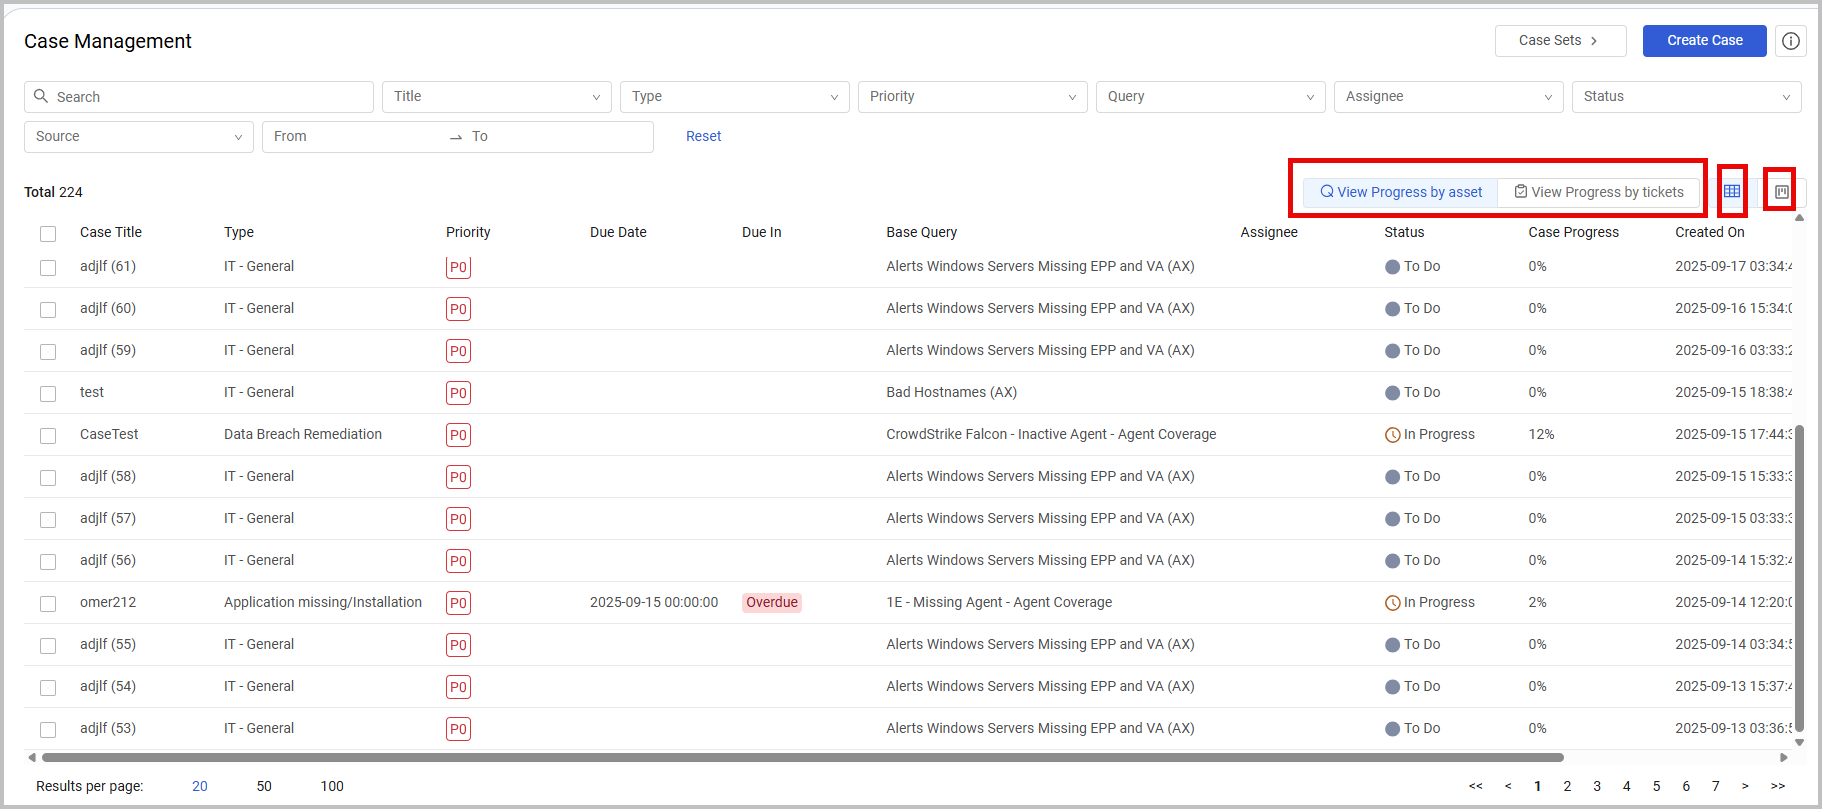
Case Details
The table displays the following information for each Case:
- Case Title - The name of the Case.
- If an Enforcement Set creates a new Case and a Title with the same name already exists, an underscore and code are appended to the Case Title. For example, if the first Case created by the Enforcement Set run is named CaseTestA, the second and third cases created are named CaseTestA_1714909617545976 and CaseTestA_1714959623734099.
- Type - The type of Case.
- Priority - The urgency of the Case, from P0 (highest) to P4 (lowest).
- Due Date - The target date (and optionally, the time) for resolving all assets in the Case.
- Due In - The number of days remaining until the Due Date.
- This value is highlighted in color if the due date is within 10 days or is overdue. If the Due Date has passed, it displays Overdue.
- This value is calculated based on hours remaining, rounded up to the nearest day. For example, if the due date is 30 hours away, it displays as 2 days.
- Base Query – The query on which the Case is based. For Cases created by the Create new case enforcement action, this is the Enforcement Set query.
- Assignee - The user assigned to the Case.
- Status - The current status of the Case.
- Case Progress - The completion percentage of the Case, calculated based on assets or linked tickets. You can switch between these views using the View progress by assets and View progress by tickets buttons above the table. Learn about the Case progress.
- Created on – The date and time the Case was created.
- Source - The origin of the Case. For example, Case Management, Enforcement Set, Bind Case/Ticket Wizard.
- Comments - Displays the total number of comments recorded for the Case. Click the number to access the Comments tab, where you can review all existing comments or add a new one.
Understanding Case Progress
Case progress is calculated in two ways:
-
Case Progress by asset (default view) - Progress is based on the percentage of Case assets that have been resolved, meaning they no longer meet the original query criteria.
-
Case Progress by ticket (additional view) - Progress is based on the percentage of Case assets linked to tickets that have been updated to a 'resolved' status, such as Done, Solved, Resolved, Closed, Canceled, Rejected, or Finished. All assets associated with a solved ticket are counted as resolved.
Note
To enable the Case Progress by ticket view, you must first enable the Show Case progress by tickets status UI setting(Settings> GUI> UI). Once enabled, two buttons appear above the table, allowing you to switch between the two views.
If this option is not enabled, the default view is displayed, and no buttons appear above the table.
Learn more about how the case progress is calculated.
Case Actions in Table View
You can perform the following actions directly from the Table view.
Viewing and Editing
Click the row of any Case to open its Case drawer, where you can view details and make modifications. For more information, refer to Viewing and Editing Case Details.
Deleting Cases
You can delete one or more Cases at the same time.
To delete one or more Cases
-
In the Case Management table, click the Actions button at the right side of a Case row and click Delete.
-
Alternatively, select the checkboxes of one or more Cases (the number of selected records is displayed next to the Total results), and then click Delete on the top right of the table. You can also select all records in the table or clear your entire selection.
-
In the confirmation box that appears, click Delete to permanently remove the selected Cases from the system. This cannot be undone.
Changing the Case Status
You can manually change the status of a single Case or a bulk selection of Cases without first opening the Case drawer.
By default, a newly created Case is in To Do status. You can decide on the Case status and change it accordingly. After beginning to work on resolving the case, you can manually update the status to In Progress. Then, depending on the results of your investigation, you can update the status to Closed or Backlog.
Note
You can also change the status from the Case drawer.
To change the status of one or more Cases
-
In the Case Management table, click the Actions button at the right side of a Case row and click click Change Status.
-
Alternatively, select the checkboxes of one or more Cases (the number of selected records is displayed next to the Total results), and click Change Status at the top right of the table. You can also select all records in the table or clear your entire selection.
-
From the Status dropdown that opens, click a new status: To Do, In Progress, Done, or Backlog. The status is updated in the table.

Searching and Filtering Cases

The following filters are available to help you find specific Cases:
- Search - Enter text to search across multiple Case fields.
- Title - Filter by Case title.
- Type - Filter by Case type.
- Priority - Filter by Case priority.
- Query - Search and select from a list of queries used in Cases. From the list of Queries containing the string entered, select the relevant Query name. Once you start typing, up to 150 items are displayed.
- Assignee - Filter by the user assigned to the Case.
- Status - Filter by Case status. Available statuses: To Do, Backlog, In Progress, Done. From - To - Filter by the creation date within a specified time period.
* Click **From** and select the date and optionally the time (right pane) from which to display results. Repeat for **To** and then click **OK**.
* Both **From** and **To** dates must be filled in and be earlier than or on the current date.
* Click the arrows to the left/right of the Month/Year header to open the previous/next month's or year's calendar page.
* To filter results only for a specific date, select the same date twice.

<Image align="center" border={false} src="https://files.readme.io/6b19ca195289e1ee67a949b991005bec6fc46d86a40a9b080d92b17d01ead376-FromToFilter.png" />
You can click the following to perform quick actions on filters:
- Select All - Selects all options in a specific filter.
- Clear All - Clears all selections in a specific filter.
- Reset - Clears all filters and displays the entire table.
Managing Cases in Kanban View
The Kanban view displays cases in columns corresponding to their current status (Backlog, To Do, In Progress, or Done), providing a visual way to track progress.
To access the Cases in Kanban view
- From the Table view, click the Kanban
 icon at the top right of the table. The system's Cases are displayed in Kanban (tile) view, organized into columns: Backlog, To Do, In Progress, and Done.
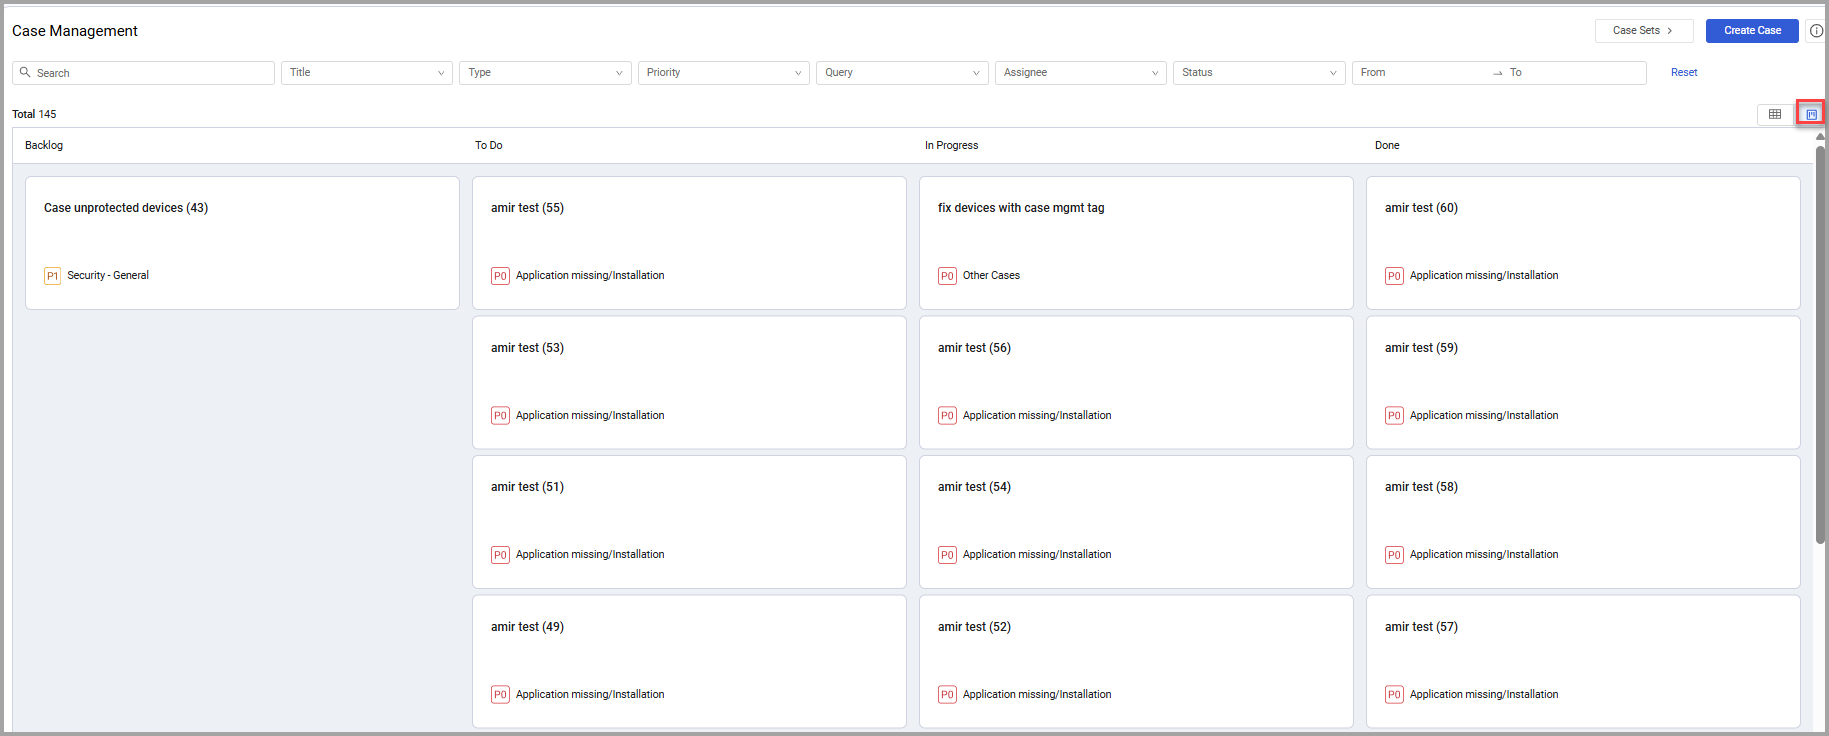
Kanban View Actions
-
Change Status - Drag and drop a case tile from one column to another to update its status.
-
View Assignee - If a Case has an assignee, the Assignee icon
 appears at the bottom right of the Case tile. Hover over it to see the assignee's name.
 -
Hide/Show Columns - Click Hide Column to collapse the Done column and focus on active cases (in Backlog, To Do, and In Progress states). Click Show all Columns to view Cases of all statuses again.


-
Delete a Case - Hover over a Case tile, click the Delete icon
 in the top-right corner, and then click Delete in the confirmation box. The selected Case is completely deleted from the system. This cannot be undone.
 -
Return to Table View - Click the Table icon
 to switch back to the Table view.
 -
Filter the Cases - The Kanban view uses the same filters as the Table view.
Creating a New Case
To manually create a new case
-
Click Create Case above the filter area on the right.
-
The Create Case drawer opens, allowing you to configure a new, one-time Case.
-
Click Create Case. The new Case appears immediately on the Case Management page (Table and Kanban views).
Note
You can also create an automated ongoing Case using the Create new case enforcement action in the Action Center.
Viewing Case Sets
You can access all your Case Sets directly from the Case Management page.
To access your Case Sets from the Case Management page
- Click Case Sets in the upper right corner to navigate to the Case Sets page, which lists all Case Sets created in the system. Learn about Case Sets.
For general information about working with tables, refer to Working with Tables.
Updated 8 days ago