
Reports
Use the Reports page to generate pre-defined reports in PDF format, as CSV files, or as both. The reports you create can include all or some of the following:
- Complete dashboards or selected individual charts
- Data Analytics reports
- Data from saved queries
Use email and scheduling to send reports according to a set schedule. The report also links to the relevant Axonius pages to provide additional details.
To open the Reports page, from the left navigation panel, click the  icon.
icon.
In Axonius New Navigation Experience access Reports from the Analysis menu.
The Reports Table
Reports in each folder are listed in the Reports table. Click on one of the folders in the folders pane to see the list of reports in that folder.
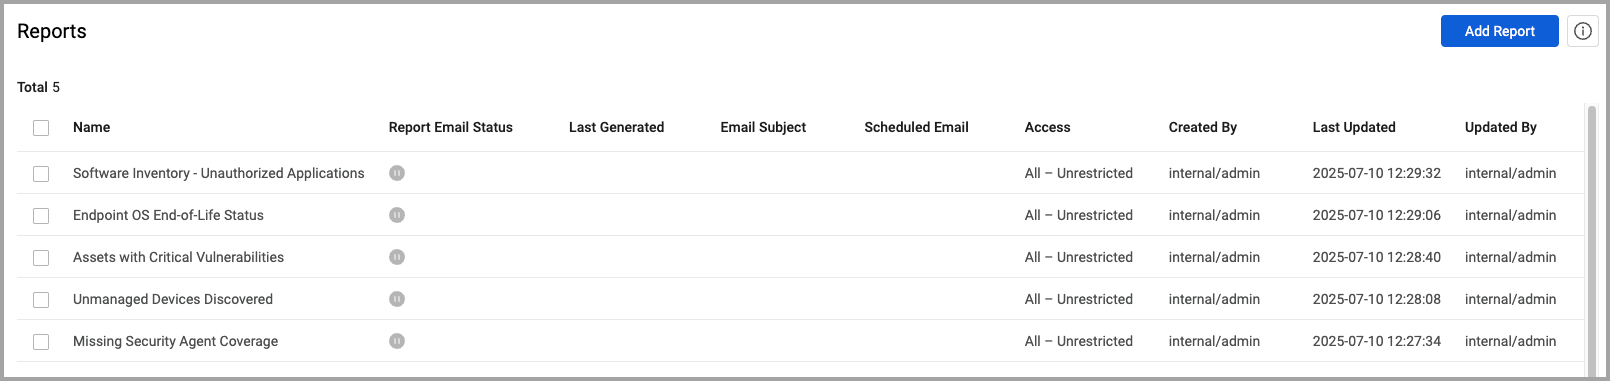
The Reports page displays the list of configured reports, and provides the following details:
- Name - report given name.
- Report Email Status - The status of the email schedule for the report. Email scheduling for a configured report can be activated or deactivated.
- Last Generated - The timestamp of the last time the report was generated.
- Email Subject - Email subject, if configured.
- Scheduled Email - Email scheduling, if configured: Daily, Weekly or Monthly.
- Access - Who can access the report, whether it is private or public.
- Last Updated - The timestamp of the last configuration changes on the report.
- Updated by - The name of the last user who updated the report. The user name is displayed with a prefix:
- Internal - A user defined internally in Axonius by one of the system admins.
- SAML or LDAP - A user who logged in using the LDAP or SAML based login options.
- If the user no longer exists in the system, the displayed user name is displayed with a “(deleted)” suffix.
- Hover over the field to display the user's first and last name in addition to the user name, if it exists.
Adding New Reports
- To add a new report, click Add Report.
- To view and edit an existing report, click a specific report record in the table. The Report Editor page opens, enabling you to configure the report content and scheduling.
See Configuring Reports to learn more about configuring reports.
Deleting Reports from the Reports Page
From the Reports page You can delete one or more reports at once from the Reports page.
- To delete one or more reports, select one or more reports in the table. The number of selected records is then displayed next to the total results. You can also select all records in the table, or clear your selection.
- Select Actions.
- From the menu that opens select Delete to delete the selected reports; the system asks you to confirm your choice. Once you confirm, the reports are completely deleted from the system.
Activating Scheduled Emails
When you configure a report, you can configure the report to send emails at scheduled times. You can activate and deactivate sending of scheduled emails from the Report Status toggle on the Report Configuration page. You can also activate and deactivate sending of one or more emails from the Reports page.
-
To deactivate or activate one or more reports, select one or more reports in the table. The number of selected records is then displayed next to the total results. You can also select all records in the table, or clear your selection.
-
Select Actions.
-
From the menu that opens select Deactivate Reports to deactivate email sending of the selected reports; the system asks you to confirm your choice. Once you confirm, scheduled email sending of the reports is deactivated. Activate again from the Actions menu or from the Reports Configuration page.
-
To Activate scheduled email sending of the reports, from the menu that opens select Activate Reports; the system asks you to confirm your choice. Once you confirm, the reports are activated, and scheduled email sending of reports is resumed.
For general information about working with tables, refer to Working with Tables.
Updated about 2 months ago