
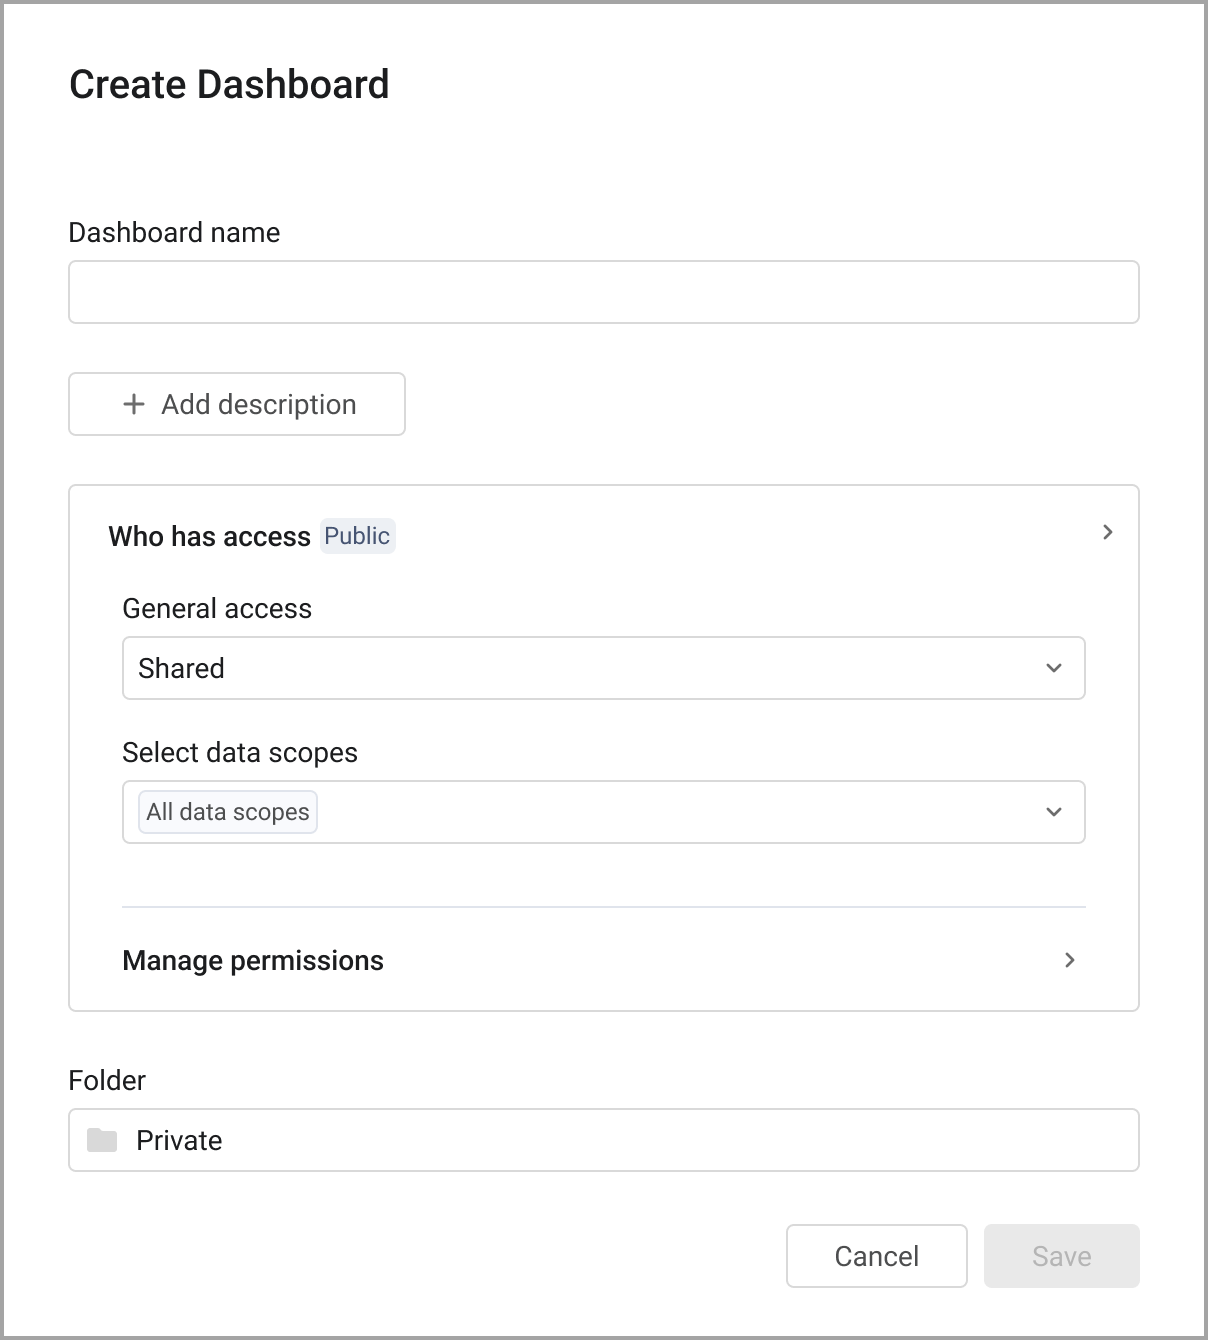
Who Has Access
Whenever you create a new resource in Axonius—such as a query, dashboard, or enforcement action—you must assign access privileges. These privileges determine:
- The data scopes in which the resource can be used.
- The users and roles that are granted specific access levels.
When creating or editing these resources, the dialog box or drawer page has a section named Who has access where access permissions are configured.
The steps below describe how to use these options.
If you came to this page from another procedure, when you are finished configuring Who Has Access, go back to that page.
-
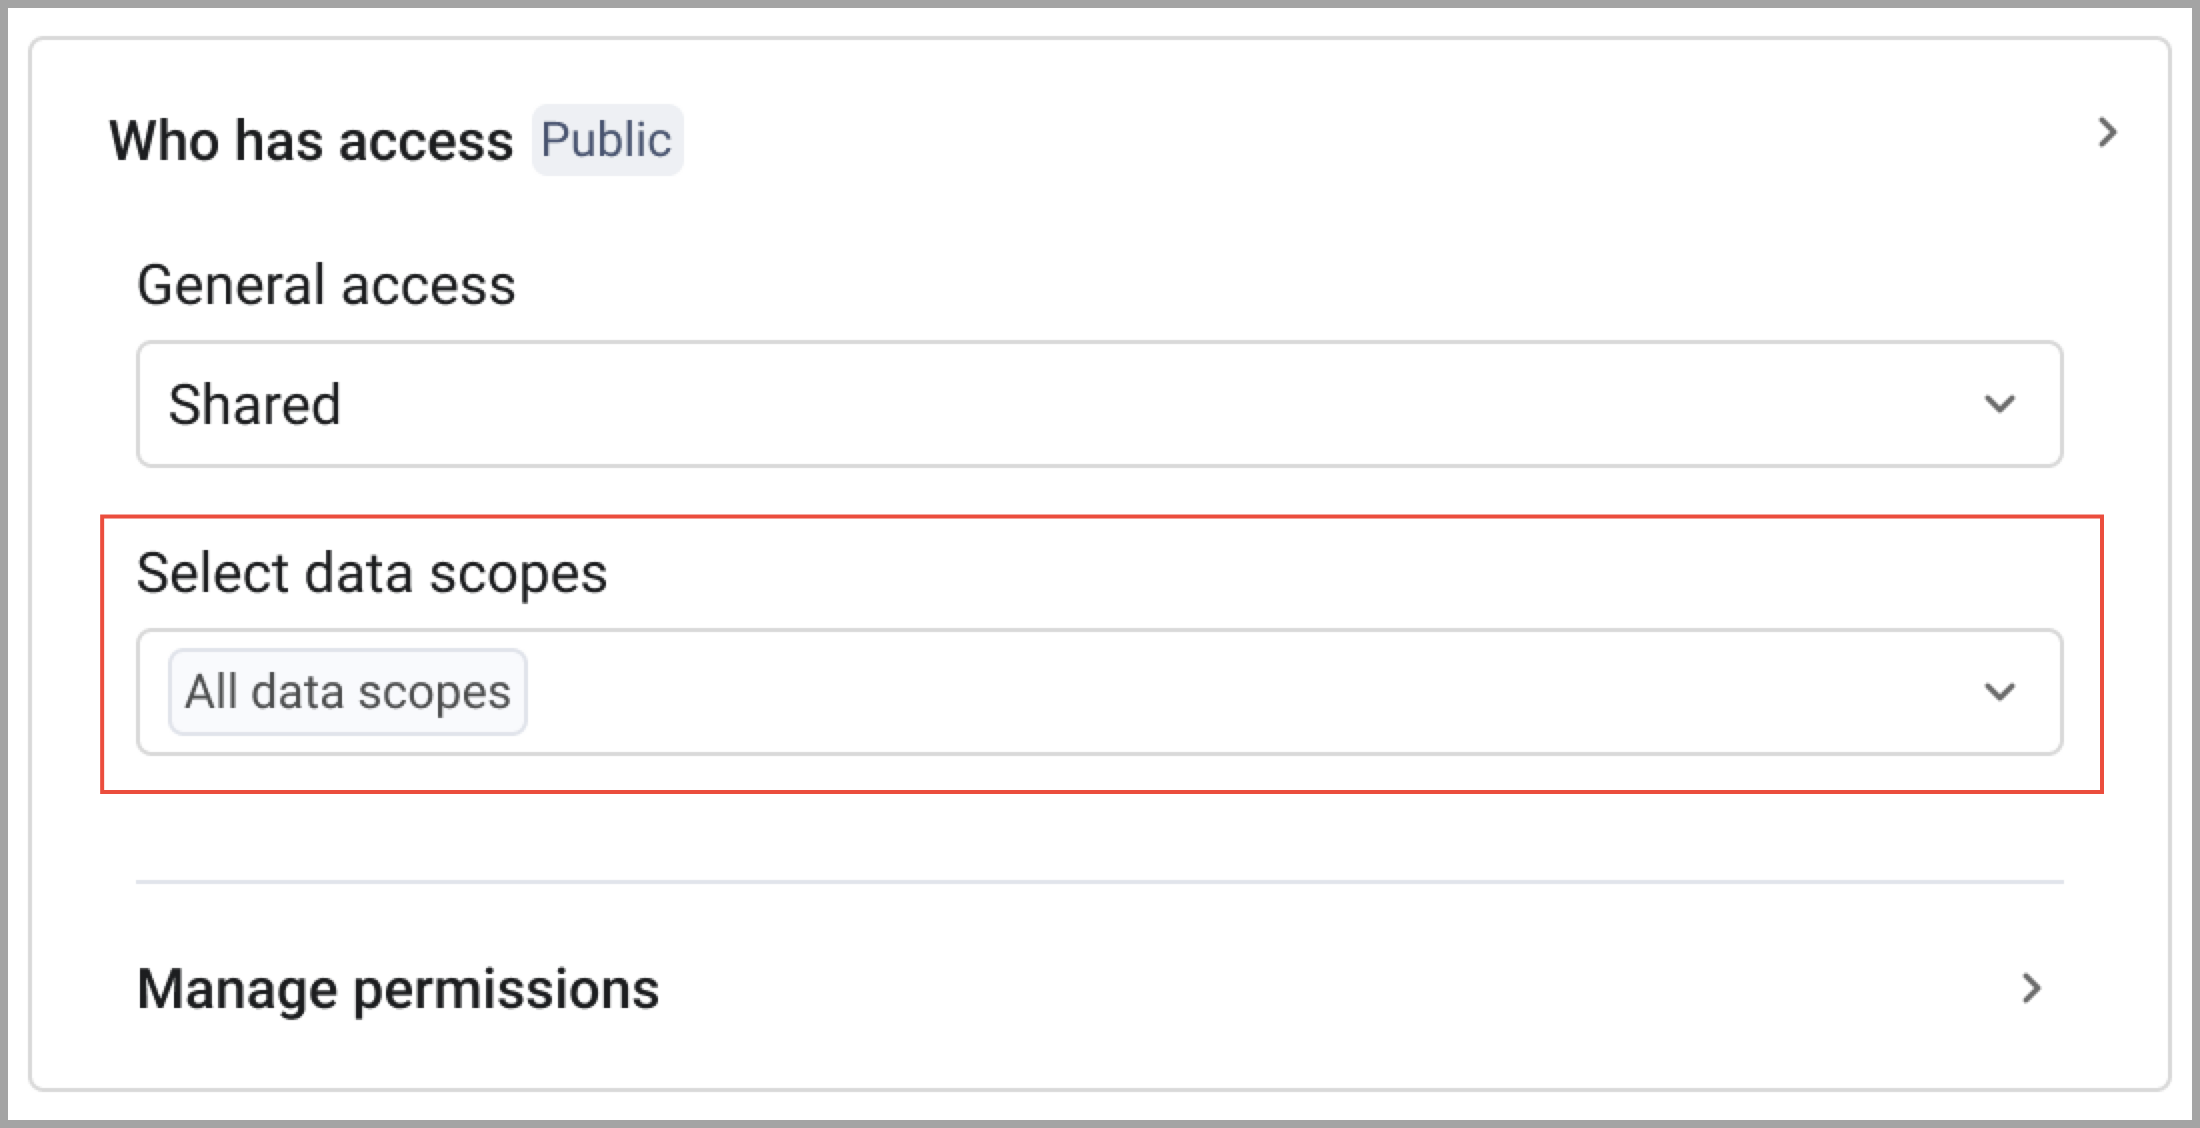
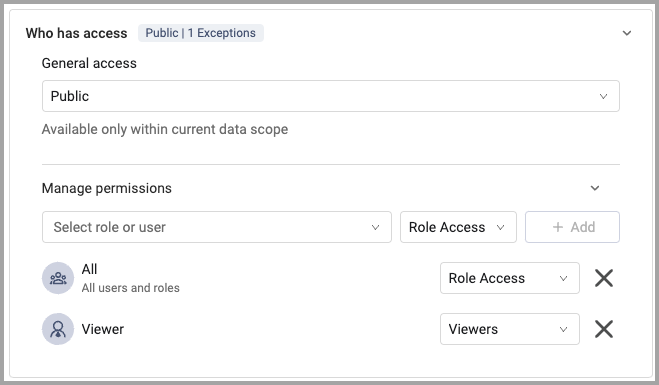
In the Who has access section, under General access, select one of the following:
-
Private - The resource will only be available to you within the data scope it is created. When Private is selected, “Manage permissions” is not available.
-
Public - The resource will be available to the selected roles and users within the data scope it is created.
-
Shared - The resource will be available to the selected roles and users in all data scopes. When creating a dashboard and Shared is selected, the Select data scopes list appears. Select the data scopes where you want the dashboard to be available.
-
-
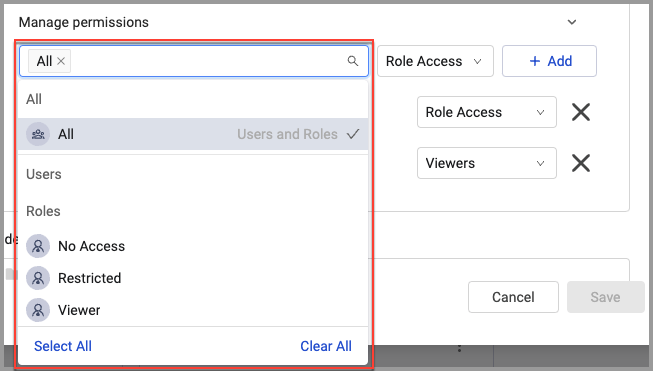
Under Manage permissions, select the users and roles who will have access and then select their access types. You can select a combination of users and roles. Admins and the query creator always have Editor access.
- From the list, select one or more users/roles. The list shows the first 5 users and the first 5 roles. To find those not shown, start typing in the search field. Select All to give the selected access to all users and roles.
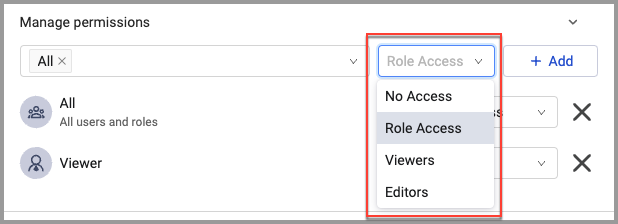
- Select an access type to apply to the selected users/roles:
- Role Access - The selected users and roles are granted access according to the permissions configured for each role. You can select a mixture of roles and users.
- No Access - The selected users and roles will have no access.
- Viewers - The selected users and roles only have permission to view, regardless of the permissions configured for each role.
- Editors - The selected users and roles have permission to view and edit, regardless of the permissions configured for each role.
See Managing Roles for more information about assigning permissions to roles at the system level.
- From the list, select one or more users/roles. The list shows the first 5 users and the first 5 roles. To find those not shown, start typing in the search field. Select All to give the selected access to all users and roles.
-
Click Add to assign the selected permissions to the selected users and roles. You can change the access for each individual role or user after adding them from the list by selecting the access level from the list to the right of the role or user name.

Repeat these steps to give different users and roles the appropriate access permissions. For example, select all the individual users and roles that you want to have 'System Access' and click Add. They are added to the list of allowed users and roles. Then, if you want other users and roles to have a different level of access, select them, their access level, and click Add. They are also added to the list of allowed users and roles. Do this for each access level you want to assign.
-
Continue with the procedure you were working on.
Updated 7 months ago