
Mapping Roles in Axonius to Okta Groups in SAML
This procedure describes how to map roles in Axonius using groups in Okta with SAML. Note that you need access to both Axonius and Okta to complete this process.
In Axonius
1. Create an Admin role
- Ensure you have the Admin role.
- From the top right corner of any page, click
 to navigate to System Settings.
 - Go to User and Role Management > Roles.
- Click Add Role.
- Enter a descriptive name for your new role (for example:
Auditor). Note this name for a later step. - Update the permissions as required and click Save Changes.
2. Configure User Assignment Rules
-
Navigate to Access Management > LDAP & SAML.
-
In SAML-Based Login Settings, scroll down to the User Assignment Rules section.
-
Set Apply on to New Users Only or New and Existing Users depending on whether you want roles updated for existing users or only applied on new account creation. You can also apply a data scope to the role here.
-
Click + to add a new rule.
-
In the first text field, enter
axoniusRole. -
In the second text field, enter the name of the role you will be passing from Okta (for example,
okta_axonius_auditor). Note this name for a later step. -
In the third field, select the corresponding Axonius role from the dropdown (this can be a default role or the custom role you created earlier, for example,
Auditor).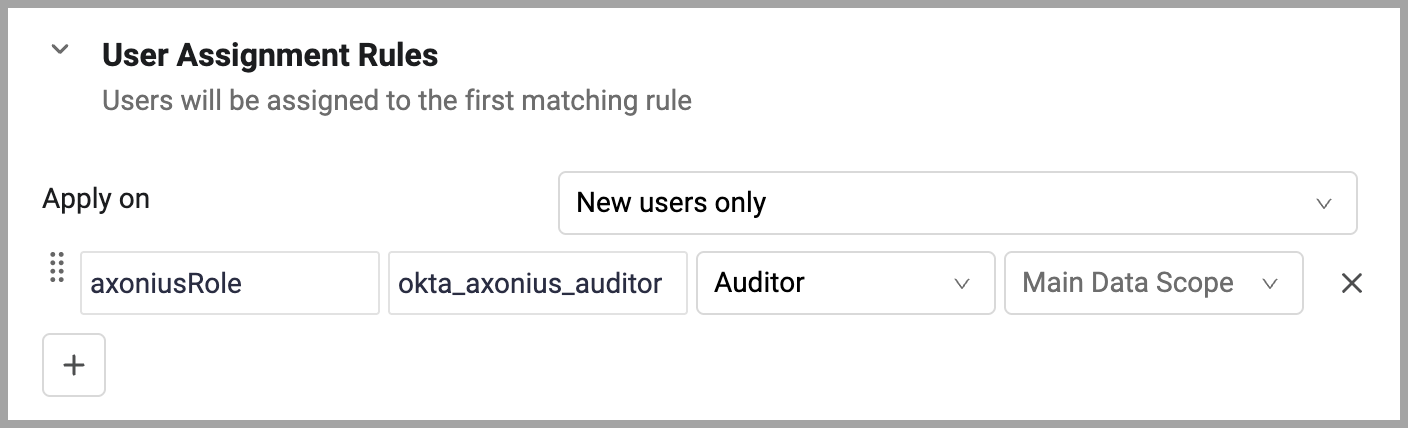
In Okta
1. General Configuration
-
Ensure you have Super Admin or Application Admin privileges in Okta.
-
Navigate to your Axonius Application and click on the Sign On tab.

-
In the SAML Settings section, click Edit.
-
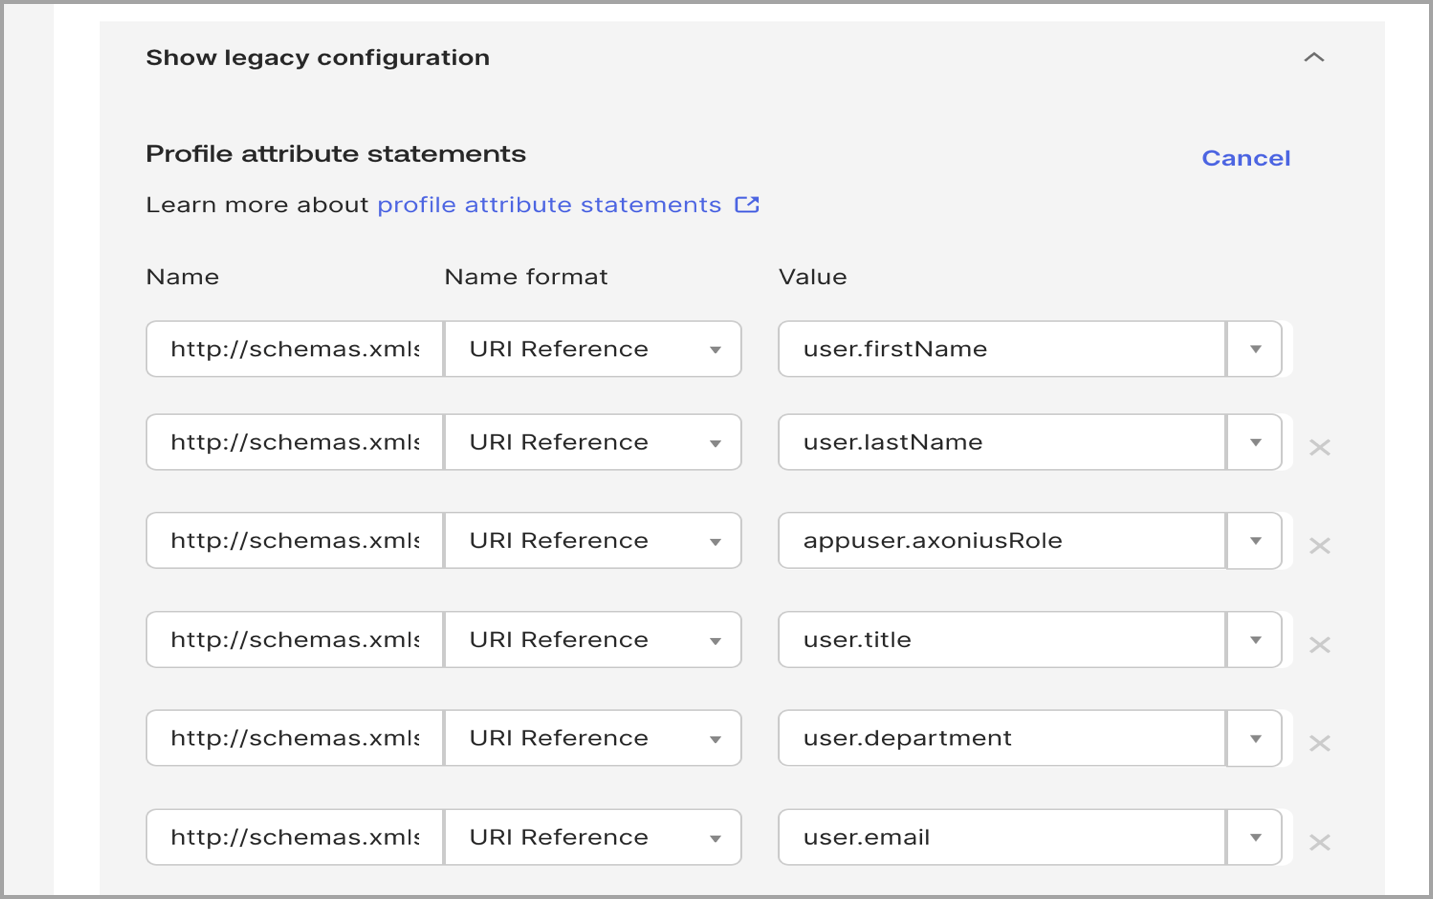
(Optional) Under Attribute Statements, scroll down and click Edit.
-
Add a new attribute statement:
- Name:
http://schemas.xmlsoap.org/ws/2005/05/identity/claims/axoniusRole - Name format: Unspecified
- Value:
appuser.axoniusRole(This assumes you will map the role from a custom user attribute or a group in a later step.)
- Name:
-
Click Save.
If you want additional information synced to the System User table, add the following attribute statements and click Save.
-
Given Name
- Schema Name:
http://schemas.xmlsoap.org/ws/2005/05/identity/claims/givenname - Attribute: firstName
- Name Format: Unspecified
- Value:
user.firstName
- Schema Name:
-
Surname
- Schema Name:
http://schemas.xmlsoap.org/ws/2005/05/identity/claims/surname - Attribute: lastName
- Name Format: Unspecified
- Value:
user.lastName
- Schema Name:
-
Title
- Schema Name:
http://schemas.xmlsoap.org/ws/2005/05/identity/claims/title - Attribute: title
- Name Format: Unspecified
- Value:
user.title
- Schema Name:
-
Department
- Schema Name:
http://schemas.xmlsoap.org/ws/2005/05/identity/claims/department - Attribute: department
- Name Format: Unspecified
- Value:
user.department
- Schema Name:
-
Email Address
- Schema Name:
http://schemas.xmlsoap.org/ws/2005/05/identity/claims/emailaddress - Attribute: emailaddress
- Name Format: Unspecified
- Value:
user.email
- Schema Name:
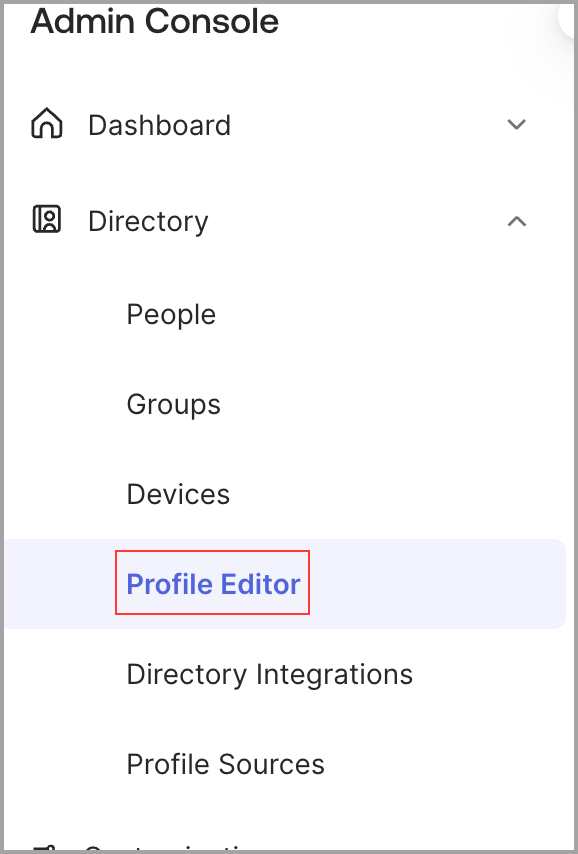
2. Configure the Custom Attribute in Profile Editor
-
Navigate to Directory > Profile Editor.
-
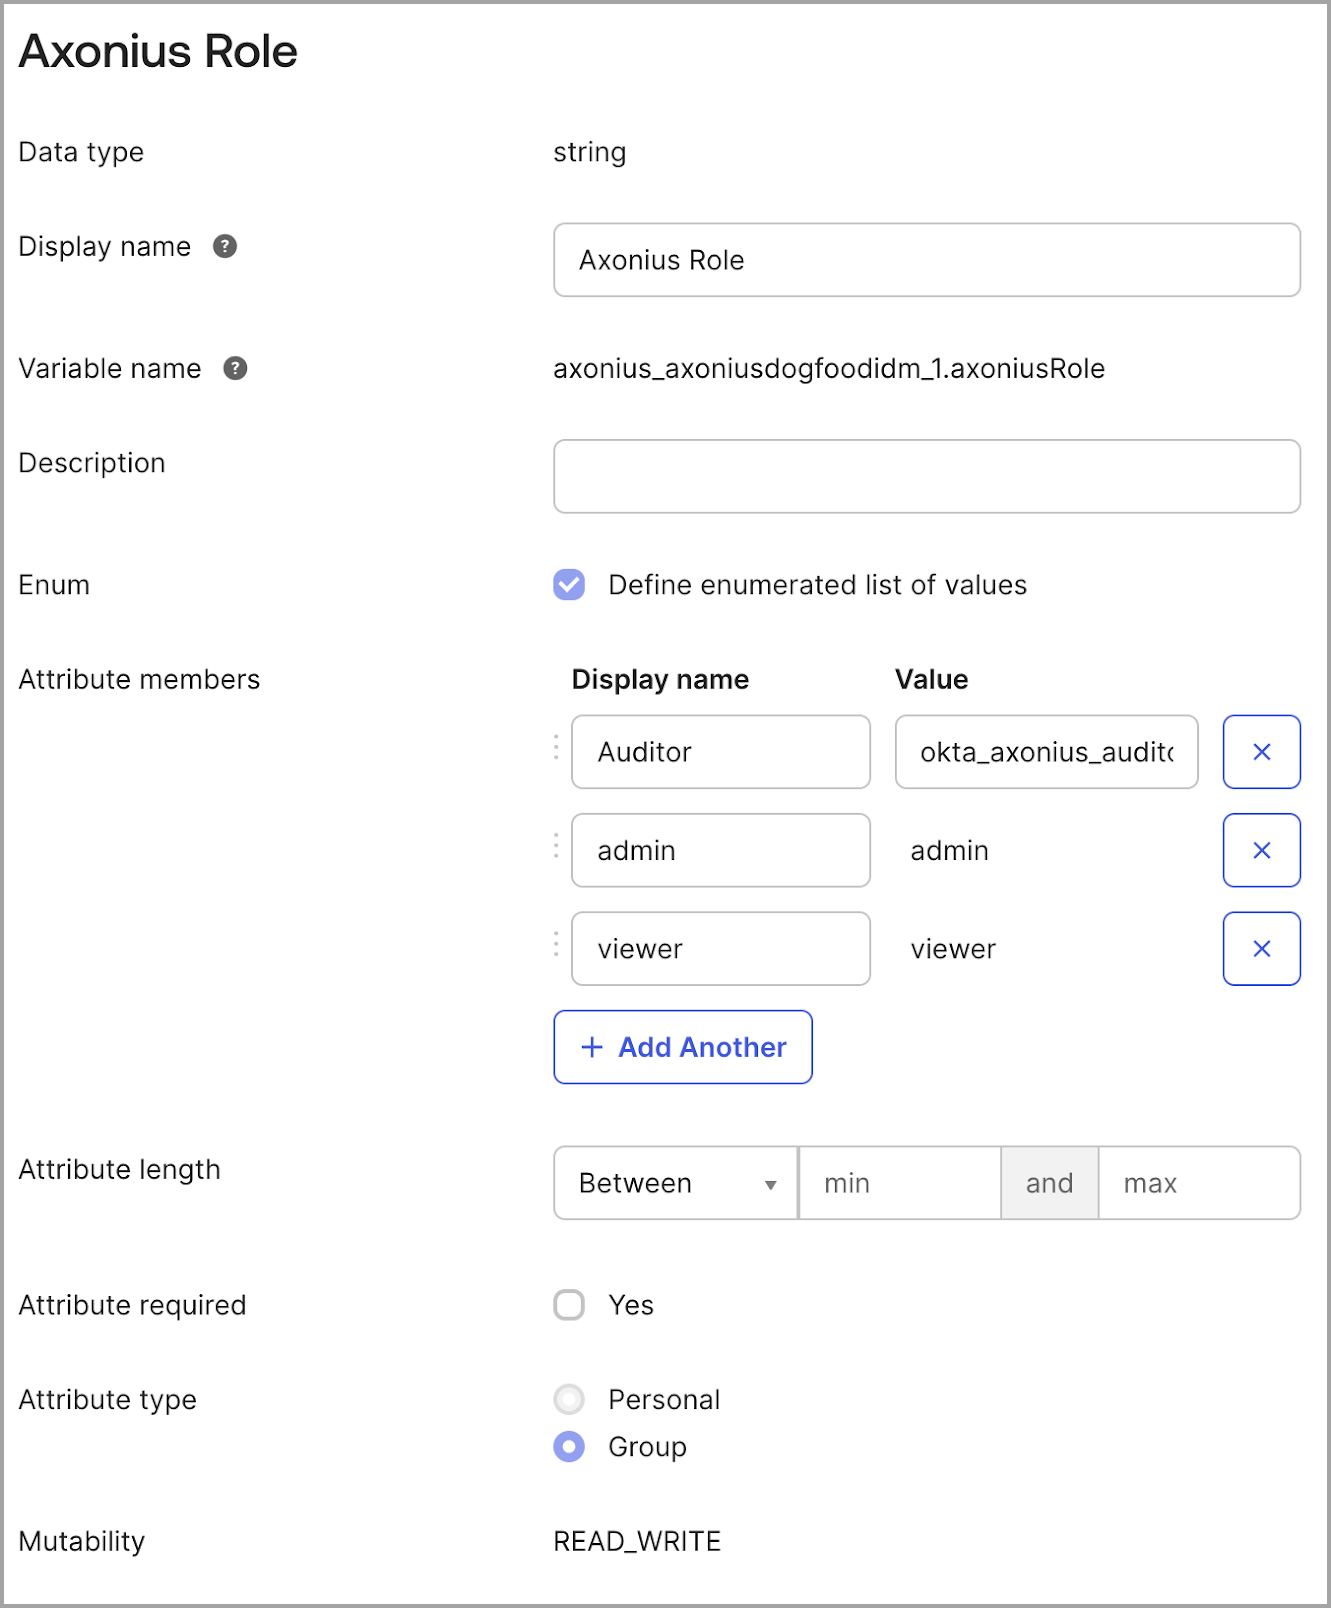
Search for your Axonius Application and open its profile.
-
Click Add Attribute.
-
Configure:
- Data Type: string
- Display Name: A name for the attribute as it appears in Okta (for example,
Axonius Role) - Variable Name:
axoniusRole
-
Check the box for Define enumerated list of values (if you want a controlled list of roles).
-
(Optional) Enter the Display Name and Value for your roles. The Value must match the name you entered in the Axonius User Assignment Rules (for example,
okta_axonius_auditor). -
Attribute type: Select Group (This is the most common way to map Axonius roles from Okta groups).
-
Click Save.
3. Create and Assign the Entitlement Group
-
Create a new Group in Okta (e.g.,
Axonius_Role_Auditor). -
Assign this group to the Axonius Application.
-
Map the role to the group: In the Axonius app assignment settings for the group, set the appropriate role attribute to the value you noted earlier (e.g.,
okta_axonius_auditor).
Note
If a user is in multiple groups, Okta will pass the role from the group with the highest priority level, as configured in your Okta Group Priority settings.
- Add the users who should have this role to the group.
Validation
Instruct users to sign in to Axonius via Okta and validate that they are receiving the correct role in Axonius.