Using Workflow Event Nodes
You can configure any node within a Workflow with an Event, when relevant. Events can originate from third-party systems or from within Axonius, triggered by asset pool changes. See the supported Workflow Events documentation for more information. To learn how to use trigger events as workflow triggers, see Configuring Workflow Triggers.
A Workflow configured with a triggering event initiates the workflow and runs only on assets associated with that event (one at a time). A non-trigger Event used within a workflow operates on the asset from the preceding node.
To select and configure a non-triggering Workflow event
-
Select an Event - From the Event pane,select the desired event.
-
Configure the Event - Configure the event and any necessary prerequisite settings.
- Refer to Configuring Event Webhooks for third-party events.
- Refer to the Events Library for details on each supported event.
-
Review the Event structure - Review the Event structure](#viewing-event-fields) for use in Event Conditions based on event criteria.
-
(Optional) Enable field parsing - Enable parsing an Event field into additional fields.
-
(Optional) Set timeout settings - Configure event timeout settings.
Selecting a Workflow Event
You can select triggering Events (from the Trigger Type pane) and non-triggering Events (from the Event pane) within your Axonius workflows.
For detailed information on each available event, refer to the Events Library.
When you select an Event for a Workflow, the following elements appear:
- In the Canvas pane: The selected event is displayed in the Event node, showing the retrieved asset. This node is assigned a system-generated UUID (preceded by #), which is used to reference the node in the Workflow Data repository.
- In the Configuration pane:
-
A ? icon appears next to the Event name. Click it to navigate directly to the Event's documentation.
-
An Event Fields button appears. Click it to view a table listing all fields associated with the event. This helps you understand the data structure and potential filtering options. Learn more on Event fields.

-
The Trigger Type or Event pane opens in Cards view, displaying available Workflow Events by category.
To select a Workflow Event
-
Toggle View: Switch between List view and Cards view using the Cards
 and Tiles
  icons.
 -
Filter Events:
-
Search: Type all or part of the event name in the Search Event box. The list automatically filters as you type. From the search results, select an event.
-
Category: Use the Category dropdown to filter events by category. Available categories include:
- Generic Webhook Events
- Axonius Utilities
- Message Received
- Message Responses
- User Onboarded or Offboarded
- Incident Created or Updated
- Group Created or Updated.
-
-
Expand/Collapse:
- Click Collapse All/Expand All to hide/show all events across all categories.
- Click Collapse
 / Expand icons next to individual categories to hide or show events within that specific category.
-
Select Event: Click the Event card or name to add it to the Workflow.
Example - Triggering Event Node
The following is an example of a triggering Event node - a Slack Message event that retrieves User assets.

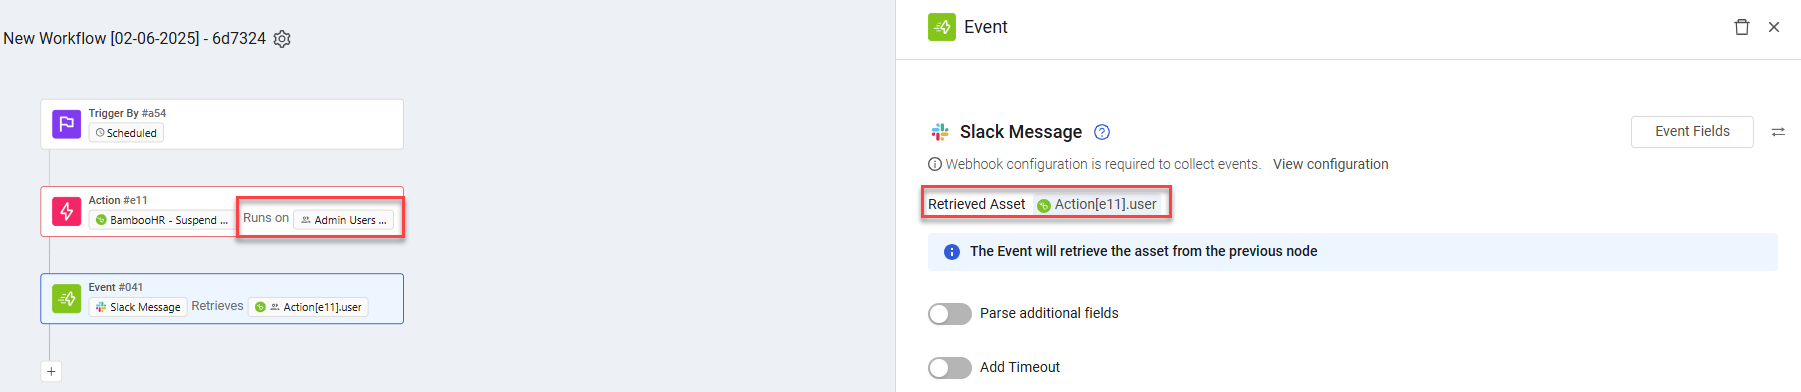
Example - Non-Triggering Event Node
The following shows a non-triggering Event node - a Slack Message vent that retrieves an asset from the previous Action node.
Configuring Event Webhooks
Before using a third-party event in a Workflow for the first time (or after its URL or signing secret changes), both Axonius and the vendor must be configured to exchange webhook events. Axonius needs to receive events and the vendor needs to send them.
Configuration Methods
Axonius can receive webhook events in two ways, depending on the vendor:
- Product's adapter - Enable event collection directly in the product's adapter within Axonius.
- Webhook URL and Signing Secret - The product must be configured in Axonius with a dedicated URL to receive Webhook events. If the product requires, also configure a signing secret. Ensure that this URL and signing secret are configured in the third-party vendor's webhook settings.
- The URL is predefined and you cannot modify it.
- The signing secret is used for security verification. Axonius and the vendor exchange this secret before event transmission to ensure events originate from a trusted source. If relevant, modify the Signing Secret.
Accessing Webhook Configuration
You can access and configure webhook details from:
- Workflow Events settings - Navigate to System Settings> External Integrations> Workflows. Learn how to view and configure Webhook settings.
- Workflow Event pane - Access the configuration directly from the Workflow Event.
Configuring the Webhook From the Workflow Event
Note
For triggering Events, the link to the webhook configuration is under the Event name in the Trigger Type pane; for non-triggering Events, it's in the Event pane.
The following sections describe how to view, configure, and enable Event Webhook configurations:
-
For products that require enabling events in their adapters.
-
For products that require copying their Webhook URL and if relevant, their signing secret, into the vendor's configuration.
Using Webhook URL and Signing Secret
Some third-party products require the Axonius dedicated Webhook URL and signing secret (if specified) before sending Webhook events to Axonius.
-
Viewing Configuration: When the Webhook URL and if relevant, the signing secret, are already configured in the product's Workflow Settings in Axonius, a message indicates that Webhook configuration is required for event collection.

- Click View configuration.
- Verify that the URL and if relevant, the signing secret in the Webhook Configuration Details dialog are also configured in the vendor's settings.
The following is the Webhook Configuration of the Slack Message event.
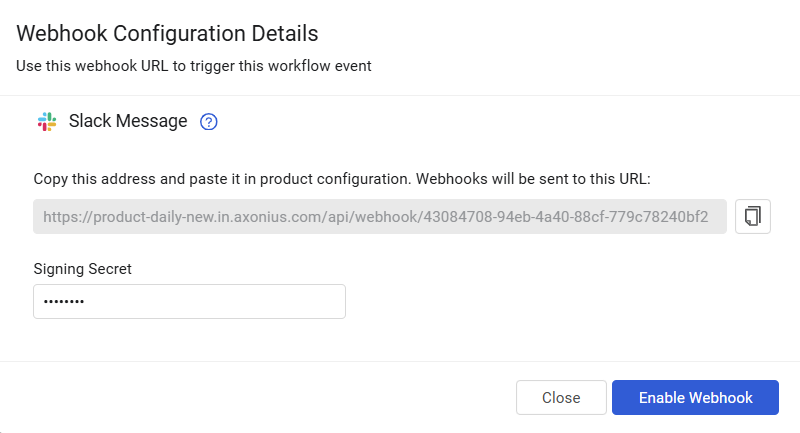
-
If needed, modify the signing secret in both Axonius and the vendor's configuration.
-
Click Enable Webhook.
-
Adding Signing Secret: When the Webhook URL is configured in the product's Workflow Settings, but the signing secret is missing, a pink message is displayed:

-
Click View Webhook Configuration.
-
In the Webhook Configuration Details dialog, enter the signing secret.
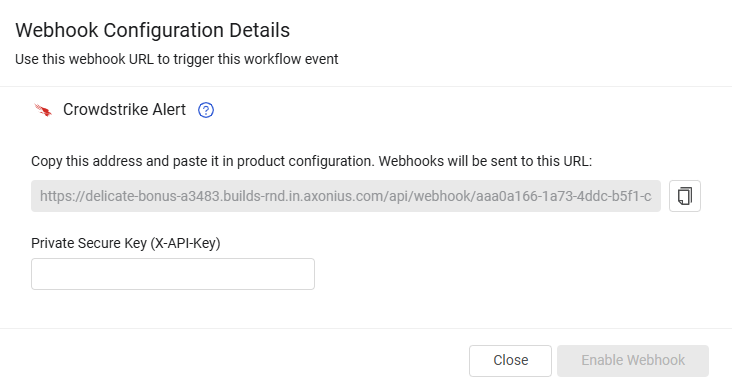
-
Ensure the URL and secret are also configured in the vendor's settings.
-
Click Enable Webhook.
-
Enabling Events in the Product Adapter
Some third-party products require enabling event collection in the product's adapter (by default, disabled) before sending webhook events to Axonius.
-
Enabled Adapter: When Events are already enabled in the product
s adapter (in Workflow Settings), a green messageEvent collection is enabled on the adapter' is displayed. The webhook is configured and the vendor can send events to Axonius.

-
Invalid Connection: When there is no valid adapter connection, a pink message is displayed:

- Click View Adapter Settings.
- In the Adapter Settings page that opens in a new tab, click Add Connection, and configure a valid adapter connection.
-
Valid Connection, Events Disabled: When there's a valid adapter connection but events are not enabled for the adapter, a pink message is displayed:
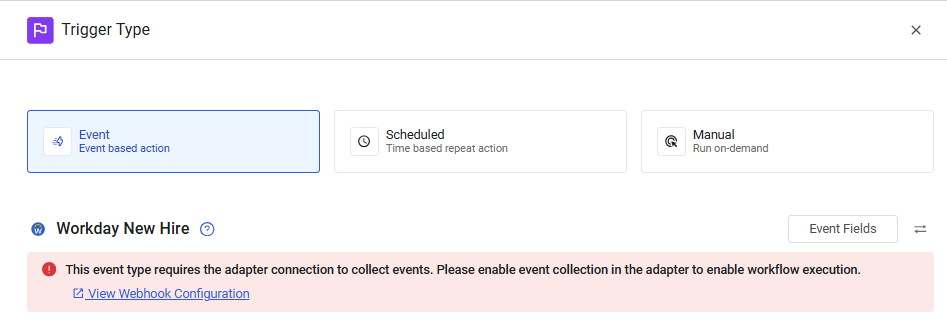
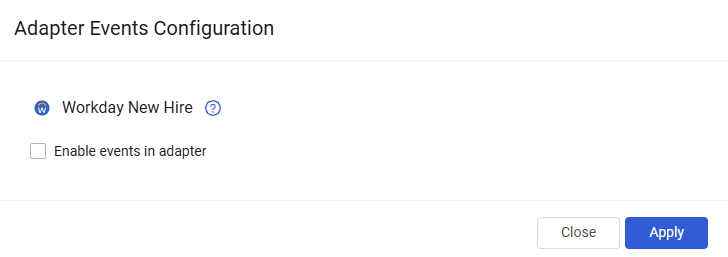
- Click View Webhook Configuration.
- In the Adapter Events Configuration dialog that opens, select Enable events in adapter and click Apply.
Viewing Event Fields
You can click the Event Fields button in the configuration pane of any workflow Event node to view a table that lists all the fields associated with that event. This information is useful for:
- Understanding the Event's data structure and available filtering options.
- Creating effective filters for triggering Events.
- Defining conditions for Event Condition nodes.
To view Event fields
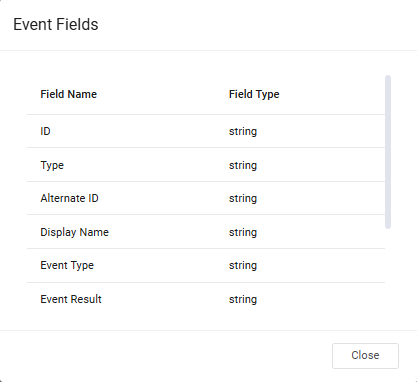
- In the Trigger Type or Event pane, click Event Fields.
A table appears, listing the Field Name and Field Type of each Event field.
Example:
Parsing an Event Field
You can configure an Event (including the triggering event) to automatically parse a string field into key-value pairs during Workflow execution.
Parsing Requirements:
- Only String type fields are supported for parsing.
- The field must contain the "magic word" AXONIUSPARSER (case-insensitive) followed by a valid single-level JSON object.
- Only single-level JSON objects are supported. Nested JSONs are not supported (although some may parse successfully).
- Ensure there are no spaces between the curly brackets and the JSON object.
Example:
AXONIUSPARSER {"key1": "value1", "key2": "value2"}Parsing Failure:
-
If the field does not contain AXONIUSPARSER, parsing is skipped, and the Workflow continues. The Run History does not include information about parsing.
-
If the field contains AXONIUSPARSER and invalid JSON syntax, parsing fails, but the Workflow continues. The Run History indicates a parsing failure.
Parsed Data:
-
The Run History drawer lists the data of each Event that was executed in the Workflow, under Data. This includes all fields in the original schema and their values. When parsing is enabled for an Event field, the field name and all its parsed key-value pairs are also listed.
-
Parsed fields do not appear in the Syntax Helper. However, you can configure a Dynamic Value Statement in an Action with these parsed fields.
To parse an Event field
-
In the Workflow, click the Event you want to configure for parsing.
-
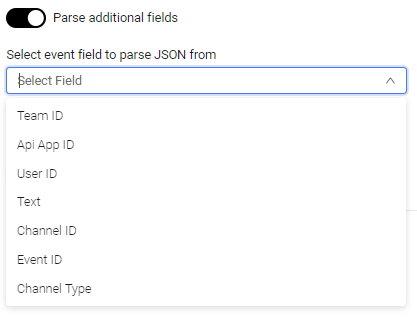
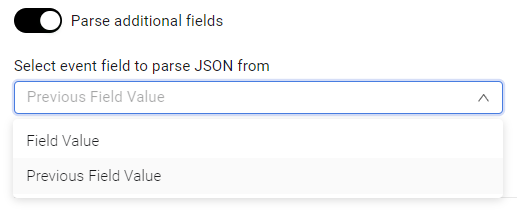
In the Event pane, toggle on Parse additional fields.
-
From the Select event field to parse JSON from dropdown, select the field to parse. Only string fields appear in the dropdown, as only they can be parsed.
-
For the Asset value changed Event, choose to parse the current Field Value or Previous Field Value.
Configuring Event Timeout Settings
Note
The first event in a workflow (i.e., the triggering event) does not have timeout settings.
- By default, timeout is disabled, and the event runs indefinitely until you change its settings or delete it.
- To enable timeout, set a duration (seconds, days, weeks, or months.
- Then choose one of the following:
- Define a Timeout condition: Use an Event Conditions node below the Event node with two branches:
- True branch - For when the Event times out after the defined amount of time.
- False branch - For when the event completes successfully before the timeout.
- Terminate on Timeout: Do not define a Timeout condition, so that the Workflow run terminates when the timeout is reached.
- Define a Timeout condition: Use an Event Conditions node below the Event node with two branches:
To configure an event's timeout
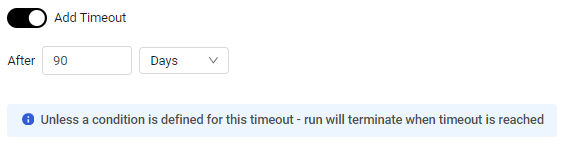
- In the Event pane, toggle on Add Timeout to enable timeout for the event.
- In After, set the timeout to a specific number of Days, Weeks, or Months. The default is 90 days.