Puppet
Puppet is an open-source software configuration management tool.
Types of Assets Fetched
This adapter fetches the following types of assets:
- Devices
- Software
- SaaS Applications
Parameters
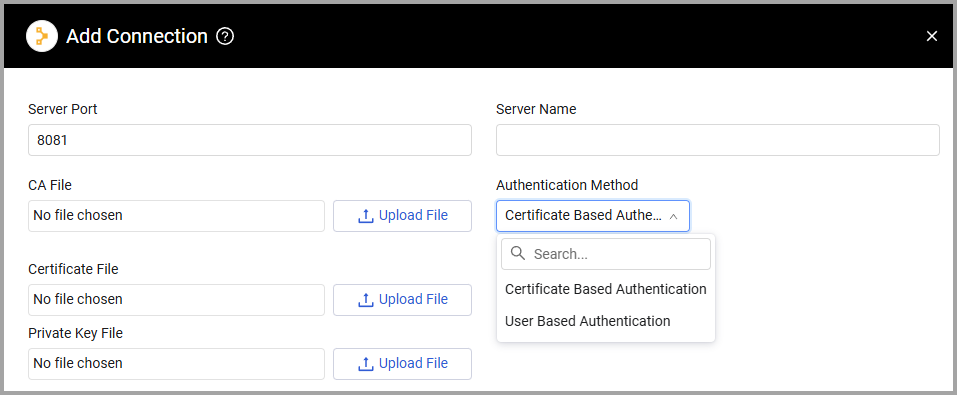
- Server Port (required) - The port used for the connection.
- Server Name (required) - The hostname or IP address of the Puppet server along with port 8081.
- CA File (required) - The Certificate Authority certificate for the Puppet master instance.
- Authentication Method - Select an authentication method, either Certificate Based Authentication (default) or User Based Authentication.
- Certificate Based Authentication:
- Certificate File (required) - The certificate file containing the public key for the keypair being used to authenticate. Please see instructions below for generating the certificate in Puppet.
- Private Key File (required) - The private key file for the certificate being used to authenticate.
- User Based Authentication:
- RBAC Token (required) - A user-based authentication token. For more information, see Configure security settings.
- Certificate Based Authentication:
To learn more about common adapter connection parameters and buttons, see Adding a New Adapter Connection.

Advanced Settings
Note
Advanced settings can either apply to all connections for this adapter, or to a specific connection. Refer to Advanced Configuration for Adapters.
- Exclude IPv6 addresses - Select whether to fetch IPv6 addresses.
- If enabled, all connections for this adapter will fetch only IPv4 addresses.
- If disabled, all connections for this adapter will fetch both IPv4 and IPv6 addresses.
- Exclude Loopback addresses - Select whether to exclude any loopback addresses from fetching devices.
- Enter prefix to fetch dynamic Puppet fields - Enter a prefix used on your system for dynamic Puppet fields. Axonius will then fetch all Puppet fields with this prefix and add them to the devices.
- Facts Fields to Include - Enter a comma-separated list of fact fields to include.
Note
For details on general advanced settings under the Adapter Configuration tab, see Adapter Advanced Settings.
Creating Certificate
It is highly recommended to create a dedicated certificate for the Puppet adapter. The name used for the certificate (“axonius" in this example) must be unique and not currently in use. Please follow the steps below to generate a certificate in Puppet and upload the needed files to Axonius:
-
Connect to the Puppet master instance with SSH.
-
Run the following command to remove any previous instances of the certificate:
sudo /opt/puppetlabs/bin/puppet cert clean axonius_ -
Run the following command to create the certificate:
sudo /opt/puppetlabs/bin/puppet cert generate axonius -
Copy the following files to your workstation:
- CA cert: /etc/puppetlabs/puppet/ssl/certs/ca.pem
- Public key cert: /etc/puppetlabs/puppet/ssl/certs/axonius.pem
- Private key file: /etc/puppetlabs/puppet/ssl/private_keys/axonius.pem (you will need to chmod the private key file to copy it)
- Upload the respective files to the Axonius adapter configuration page and click Save.
Certificate Permissions
In cases where there are certificate permission issues that require generating a new CA. On Puppet v.6 and above, use the following commands:
-
Clear old certificate
puppetserver ca clear axonius -
Generate new certificate
puppetserver ca generate --certname axonius -
Copy over the files (as described in step 4 above)
-
Make sure that the certificate name is in the PuppetDB certificate-allowlist (by default, in /etc/puppetlabs/puppetdb/certificate-allowlist )
Note
Depending on your Puppet version, it may be either "certificate-allowlist" or "certificate-whitelist".
-
Reload the PuppetDB to save the change to the certificate-allowlist:
[sudo] puppetdb reload
Required Ports
- Port 8081
Updated 4 months ago
