
Configuring a Query Node
A Query node in an Axonius workflow is a powerful tool for dynamically fetching and using data from your environment. It allows you to build automations that require up-to-date information without needing to change the workflow's original trigger. The Query node enables you to perform lookups and conditional checks on your data, making your workflows more intelligent and adaptable. This node can be configured to fetch data for various asset types, such as Users, Devices, or Software, using saved queries and those that you customize. The results are then used for subsequent actions, such as bulk transformations or conditional logic.
Note
You can place a Query node after any triggering node (e.g., Manual or Scheduled) or another processing node.
Key Features
-
Dynamic Data Retrieval - Fetch data from Axonius based on dynamic conditions. This is useful for workflows where the user input or a previous step's output determines what data is needed.
-
Flexible Configuration - Configure the Query node to work with different asset types (e.g., Users, Devices, Software) and use dynamic expressions within the query's filters, allowing for complex, multi-faceted data lookups in a single node.
-
Actionable Output - The node's output provides the number of returned assets and the full result set. This data can be used in subsequent steps, like foreach loops to run an action on each asset, or in condition nodes to perform checks based on the query results.
-
Bulk Operations - When placed at the start of a workflow and followed by an action, a Query node supports bulk operations, enabling you to process large sets of data efficiently.
Use Cases
- Getting all users in a specific department.
- Checking if an email or username already exists in your organization.
- Using asset data to calculate the next available identity.
Configuring the Query Node
You can configure a Query node with one or more queries, each of which can be a saved or a new custom query. The assets resulting from all queries in the node are combined (ORed), and the subsequent nodes in the Workflow are processed on this final asset list.
To configure the Query node
-
Click the Query node to open its configuration drawer.
-
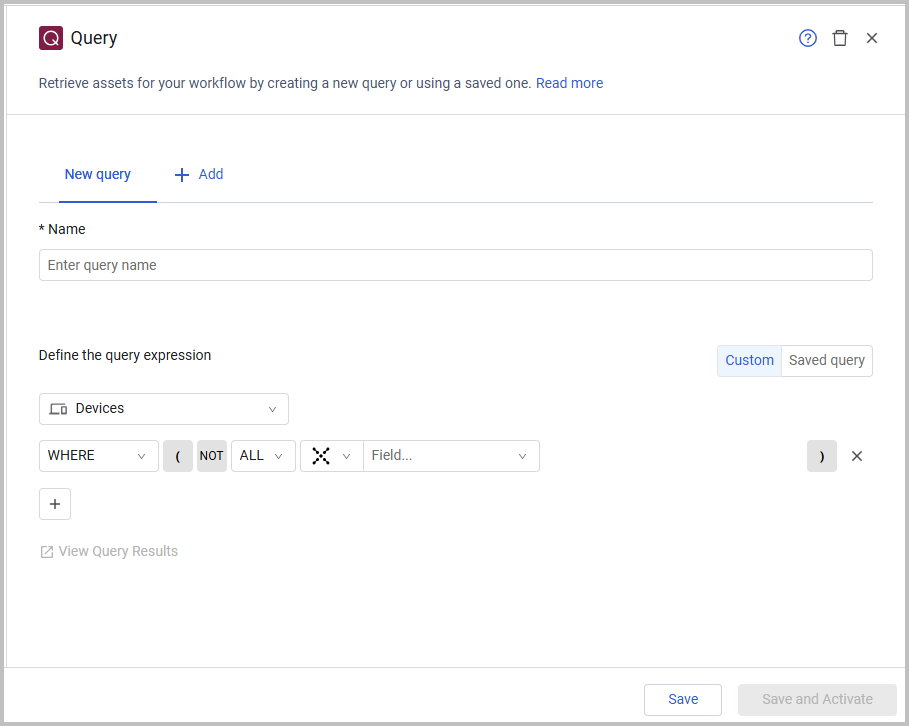
In Name, type a name for your query. The tab and node are automatically updated with this name.
-
Under Define the query expression, choose to configure a Custom query using the Query Wizard or select a saved query. To confirm your criteria, click the View Query Results link; the Assets page opens in a new tab, displaying the list of assets matching your query’s criteria (displayed in the Search bar). This process ensures you can validate your query without interrupting the node's configuration.
-
To add another query to the Query node, click the + Add button and repeat step 3 for either a custom or saved query.
Configuring a Custom Query
Use this method to configure a Query node with a new query tailored to your workflow's dynamic needs. Subsequent nodes will run on the assets resolved from this customized query.
- In the Queries section, click Custom.
- From the Module dropdown, select an asset type (such as Users, Devices, or Software). This opens the Workflow Data repository, allowing you to use data from previous nodes when configuring the query (in the next step).
- Configure your query using the Query Wizard. In the Field Value box, you can type a value or copy a field value from the Workflow Data dialog to set dynamic conditions.
Using a Saved Query
- In the Queries section, click Saved query.
- From the Module dropdown, select an asset type (such as Users, Devices, Software).
- From the Query Name dropdown, do one of the following:
- Select a saved query from the list.
- Click + Add Query to create a new query.
Testing a Query Node
Test Query nodes to verify that queries return the expected assets and asset counts are correct.
Prerequisites
Before you test a Query node:
- Any upstream nodes must be tested first.
- Configure query filters and criteria.
To test a Query node
- In the canvas, select the Query node.
- Click Run Test.
- The Test Results panel shows:
- Asset Count — Shows "Query Name (N)" where N is the number of matching assets.
- View Query Results — A link to open the full query in the Assets view for detailed inspection.
Understanding test results
Success — Query returned the expected number of assets. The asset count determines how many assets downstream nodes will process.
Empty Results (0 assets) — Query matched no assets. Either your query filters do not match any assets in the system, or the test asset does not produce results. Verify your filter criteria are correct.
Unexpected Count — More or fewer assets than expected. Review query filters and verify they match your intent.
Multiple Queries — If your Query node contains multiple queries, each appears in its own tab with its asset count. Review each tab to understand what each query returns.
Query Execution Error — Query syntax contains errors or references data that does not exist. Review the error message and correct the filter syntax.
Common testing scenarios
Scenario 1: Simple query filter
Query devices by status:
Query name: Active Devices
Filter: status = "active"
Entity type: devices
Test result: Shows the number of active devices (for example, "Active Devices (42)").
Scenario 2: Query with upstream data reference
Query using a value from an upstream Event node:
Query name: User Devices
Filter: user_id = {USER_ID}
Entity type: devices
Test result: Shows devices for the selected user (for example, "User Devices (8)").
Scenario 3: Multiple queries in one node
A Query node with two separate queries:
Query 1: Active Devices (45)
Query 2: At-Risk Devices (12)
Test result: Two tabs showing results for each query.
Next steps
After you test a Query node and verify it returns the correct assets:
- Add downstream nodes that process the returned assets.
- Verify that conditions and actions reference the correct asset fields.
- Test downstream nodes to ensure they work with the returned assets.
- Run a full workflow test to verify asset processing across all returned assets.
Updated about 2 months ago