Managing Tags
Use Tags Management to manage all tags in the system from one central location without viewing the details of a specific asset. This includes tags added in the following ways:
- From the assets page Actions menu, on selected assets, filter results, or query results.
- Using an Action Center action, such as Axonius - Add Tag to Assets to add tags to query results.
Only users assigned the Update system settings permission (default for admins) can manage tags.
Tags are supported for all asset types.
You can view and manage tags in two views:
- Table - Lists detailed information on all tags in the system.
- Hierarchical structure - A structure where related tags are grouped together.
Managing Tags From a Table
To manage tags from a table
- From the top right corner of any page, click
.png) . The System Settings page opens.
. The System Settings page opens. - In the Categories/Subcategories pane of the System Settings page, expand Data, and select Tags Management. The Tags table opens.
Note
You can click the Management Table icon
to open the Tags Management page directly from the Tag Hierarchy page.

The Tags table shows all tags in the system that match the filter or search criteria, including all tags added to assets in their details page or by Enforcement Actions.
The following information is included for each tag in the table:
- Tag Name - The name of the tag.
- Asset Type - The asset type to which the tag applies.
- Affected Assets - The number of assets tagged with this tag. Click the number of Affected Assets to see a list of assets with their details.
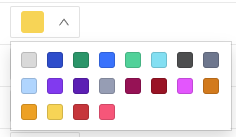
- Tag Color - The selected color for the tag. A color can be selected from the color palette. Changes are global and will appear wherever the tag is used.
- Created On - The date and time that the tag was created.
- Last Updated - The date and time that the tag was last updated.
- Used In - Indicates whether or not the tag is used in the Action Center.
-

- Indicates that the tag is used in the Action Center. Hovering over this Action Center icon opens a table showing where the tag is used in the Action Center.
-
... - Indicates that the tag is not used in the Action Center.
-
Note
It can take a while for the information in the Tags Management table to be updated. You can refresh the table at any time to bring the table up to date, including the Used In table.
Viewing the Enforcement Sets and Workflows that Use the Tag
For each tag in the Tags Management table (with ![]() under the Used In column), you can view the Enforcement Sets and/or Workflows that add or remove this tag. It is helpful to know the tag dependencies, for example, which tags would be affected by running Enforcement Sets and Workflows.
under the Used In column), you can view the Enforcement Sets and/or Workflows that add or remove this tag. It is helpful to know the tag dependencies, for example, which tags would be affected by running Enforcement Sets and Workflows.
To view the Enforcement Sets and Workflows that use the tag
- In the Tags Management table, under the Used In column, hover over the
 icon. The following table opens:
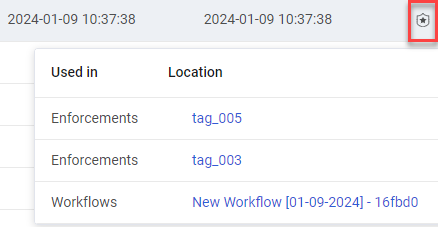
The table has two columns:
- Used in - Displays Enforcements - one row per Enforcement Set that uses this tag (add or remove) followed by Workflows - one row per Workflow that uses this tag (add or remove).
- Location - Enforcement Set or Workflow name link. Clicking the link opens the configuration page of the Enforcement Set or Workflow that uses this tag.
Refreshing the Table
You can manually update the Tags Management table at any time by clicking the Refresh icon 

Filtering and Searching for Tags
Use the filter bar at the top of the page to select criteria to filter the Tags table. The table can be filtered by:
- Asset Type - The asset type to which the tag applies.
- From the Asset Type dropdown, select one or more asset types to return the Tags that apply to these asset types. The assets in the dropdown are listed according to asset category (as on the Assets page). In addition, it is possible to type and search to easily locate in the dropdown, the asset type required.
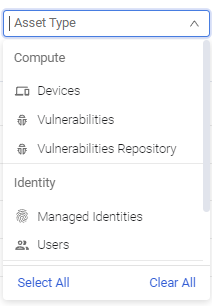
- From the Asset Type dropdown, select one or more asset types to return the Tags that apply to these asset types. The assets in the dropdown are listed according to asset category (as on the Assets page). In addition, it is possible to type and search to easily locate in the dropdown, the asset type required.
You can also search the table according to Tag Name and Asset Type by entering a search string in the Search field. This list is updated as soon as filter criteria are selected or a search string is entered.
Click the column headers to sort the list.
Creating a Tag Directly from the Tags List
Click + Create Tag to create a tag without binding it to specific assets. After you choose a name, an asset type an a color for the new tag, it is immediately listed in the table.
You can assign the new tag to the required assets from the relevant Asset page, as explained in Working with Tags.
Editing Tags from the Tags List
You can edit tags from the Tags list.
Note
When editing tags, once you click to execute the change, the edit window closes and, if necessary, the process continues in the background.
Changing the Tag Color
From the Tags Management table, you can change the color of a tag. The tag's color changes on all assets where it is used.
To change the tag color
- In the row of a tag, under Tag Color, select the down arrow adjacent to the color, and from the choice of colors that opens, click the new color.
Exporting the List of Tags to CSV
The list of tags can be exported to a CSV file. Only the currently listed items are exported.
To export the list of tags
- On the top right above the Tags Management table, click Export CSV. The file is generated and downloaded to the local computer.
Renaming a Tag
From the Tags Management table, you can rename a single tag and repeat for each tag
that you want to rename. Once renamed, the new tag name replaces the old tag name on all assets. For example, when TagA is renamed to TagAA, all assets that had TagA now have TagAA.
Note
Renaming tags does not trigger any migrations, such as query migrations. For example, if a Query is created to search for devices with TagA and some time after TagA is renamed to TagAA, the Query is not updated automatically to search for devices with TagAA. In this case, you have to manually edit the Query to search for TagAA.
To rename a tag
- In the Tags Management table, hover over one tag, or select one or more tags.
- Select Rename.
- In the Rename Tag dialog that opens, enter a new name for the tag.
- Click Save Changes. To see the changes, you may need to click the Refresh Data
 icon.
icon.
Deleting Tags
You can delete one or more selected tags from the Tags Management table. When you do so, only the selected tags are removed permanently from all affected assets. The remaining tags are ungrouped, if relevant (i.e., if the deleted tag is a parent tag). Learn more about grouped tags in a hierarchical structure. This action may take some time to complete.
To delete a tag
-
In the Tags Management table, hover over one tag, or select one or more tags.
-
Select Delete. If required confirm the deletion in the dialog box that opens. The tags are deleted permanently from all assets. This might take some time.
-
Click Refresh to refresh the table to see the updated data. The Total records is reduced by the number of deleted tags.
Note
Tags whose assets are removed from the system are not automatically deleted. They remain in the Tags Management table even though they are not bound to any specific asset. To delete such a tag, hover over it and select Delete.
Managing Tags From the Tag Hierarchy
Tags can be nested to create hierarchies where assets with children tags also inherit the parent tag. In the Tag Hierarchy page, you can view nested tags and move tags from one tag group to another. You can also move one group of tags to another group of tags.
For example, you can have a first-level North America tag with several country tags under it, including USA (second-level). Under the USA tag, you can have state tags (third-level), including Virginia, Washington, Maryland, Florida, and more.
You can then search for assets with these tags and child tags using Queries.
To manage tags from the tag hierarchy
- From the top right corner of any page, click
.png) . The System Settings page opens.
. The System Settings page opens. - In the Categories/Subcategories pane of the System Settings page, expand Data, and select Tags Management. The Tags table opens.
- Click the Tag Hierarchy icon

Note
You can click the Tag Hierarchy icon
to open the Tag Hierarchy directly from the Tags Management table.
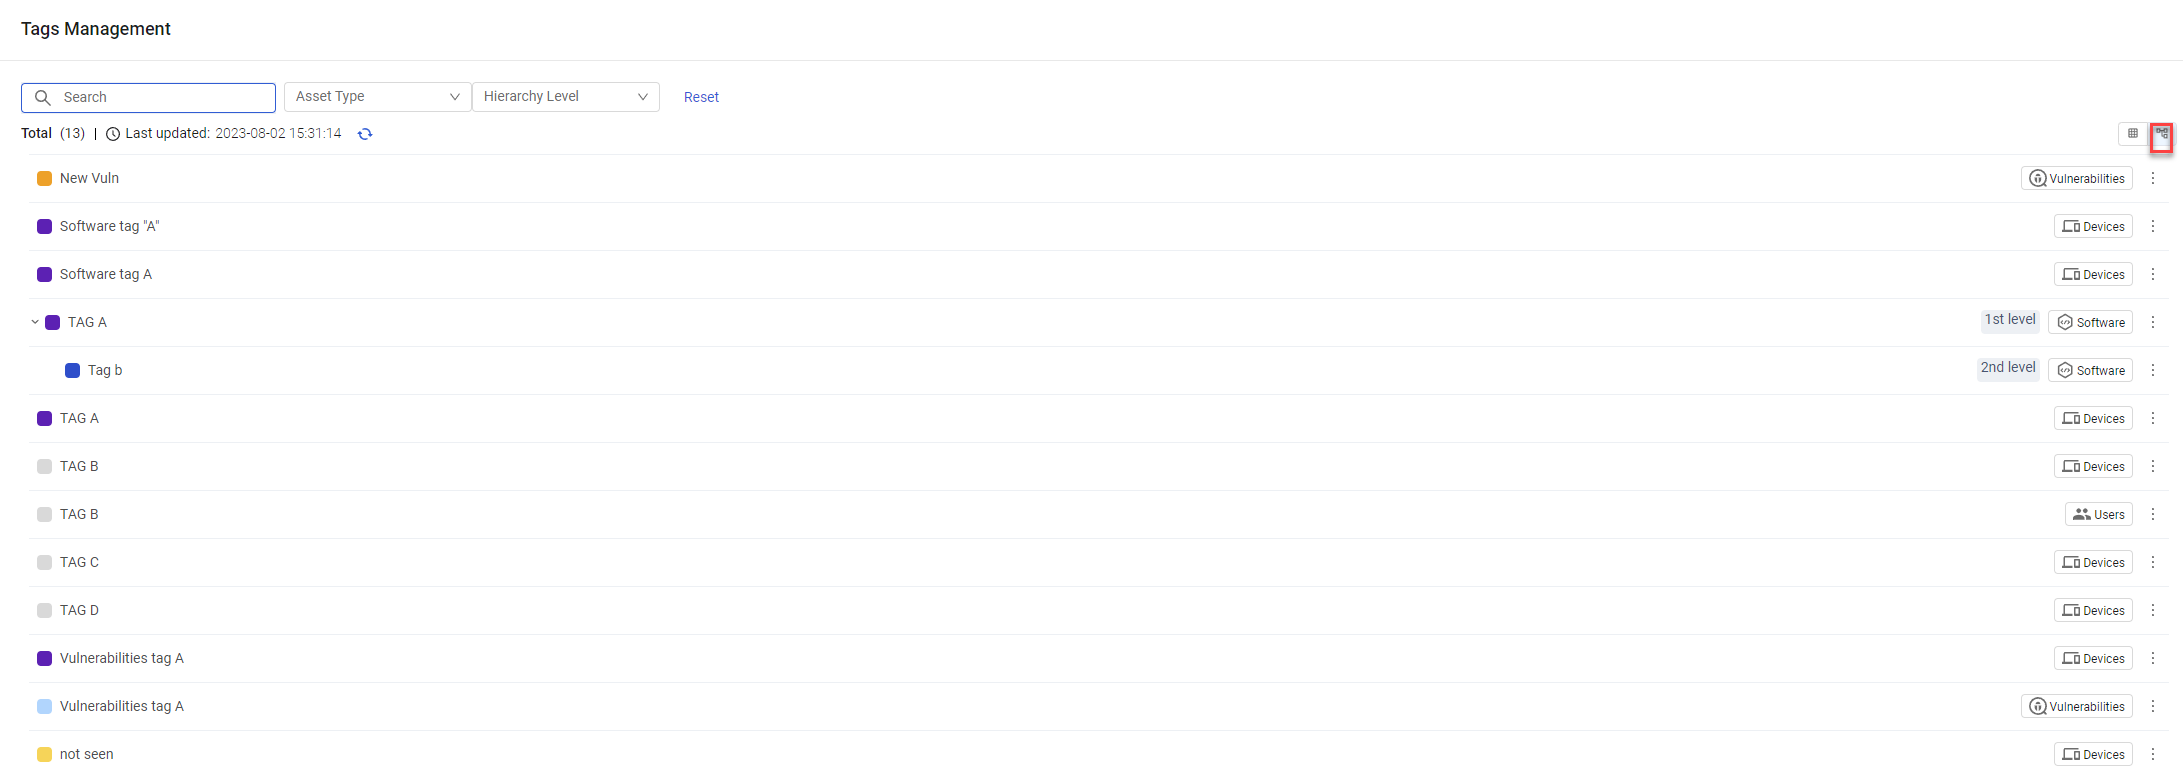
The Tag Hierarchy shows all tags and their relation to other tags in the system. If a tag is nested, the level of the tag is indicated.

The following information is included for each tag in the hierarchical structure:
- Tag Name - The name of the tag.
- Level - The level of the tag in the hierarchy.
- Asset Type - The asset type to which the tag applies.
- Actions menu - For grouped tags, includes the following actions: Rename, Move, Change color, Rename tag level, and Delete. For ungrouped tags, includes the same actions with the exception of Rename tag level.
Refreshing the Hierarchy View
To manually update the hierarchy view, click Refresh 

Filtering and Searching the Tags Hierarchy
Use the filter bar at the top of the page to select criteria to filter the Tags hierarchy. The hierarchy can be filtered by:
- Asset Type - The asset type to which the tag applies. Learn more how to filter the tags by asset type.
- Hierarchy Level - The level of the tag in the hierarchy.
You can also search the hierarchical structure according to the Tag Name by entering a search string in the Search field. This hierarchical structure is updated as soon as filter criteria are selected or a search string is entered.
Editing Tags in the Tag Hierarchy
Moving Tags
You can move tags of the same asset type by dragging and dropping or by using the Move command. You can move a tag to be a child of another tag or to be a lone tag without child tags. When you move a tag, its child tags move together with it. You cannot move a tag to be a parent of another tag. You cannot create hierarchies between asset types. For example, you cannot move tag2 (Users) below central part (Devices).
Note
It is not possible to drag and drop when the Tag Hierarchy view is filtered by Hierarchy Level. In this case, a notification pops up: 'Drag and drop is not supported in hierarchy level filtered view.'
To move a tag using the Move action
- Click the 3-dot Open Actions Menu of the tag that you want to move, and click Move.
- In the hierarchy that opens, click the tag under which you want to move the selected tag, and then click Move.
To move a tag to be a child of another tag using Drag and Drop
- Click the tag to move and drag it to the parent tag until a purple rectangle encloses both tags. In the screen below, the central part tag is being dragged to below the manhattan tag.

- Release the mouse to drop it in place. In the screen below, central part is now a child tag of manhattan.

To move a child tag to be a lone tag using Drag and Drop
- Click the tag and drag it to overlap the purple line that appears below the parent tag. In the screen below, the manhattan tag is being dragged to a level on its own.

- Release the mouse to drop it in place. In the screen below, manhattan is now a parent tag and was moved together with its child tag central part.

Renaming a Tag in the Tag Hierarchy
You can rename a tag. The name change is global. View the note in Renaming a Tag from the Tags Table.
To rename a tag
- Click the 3-dot Open Actions Menu of the tag that you want to rename, and click Rename.
- In the Rename Tag dialog that opens, type a new name for the tag and then click Save Changes. To see the changes, you may need to click the Refresh Data
 icon.
icon.
Changing the Tag Color
You can change the color of a tag using Change color . The tag's color changes on all assets where it is used.
To change the tag color
- Click the 3-dot Open Actions Menu of the tag whose color you want to change, and click Change color.
- In the Change color dialog that opens, click the Down arrow to open a selection of colors, and click the new color.
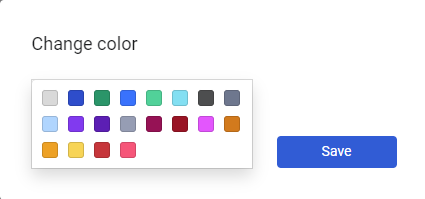
- Click Save. To see the changes, you may need to click Refresh.
Renaming the Level
You can rename the hierarchy level of a tag. This changes the level name throughout the system. For example, if you change the hierarchy level name from '1st level' to 'First level', all tags at the 1st level will now have the new level name 'First level'. This does not change the location of the tag in the hierarchy structure.
To rename the hierarchy level
- Click the 3-dot Open Actions Menu of the tag whose hierarchy level you want to rename, and click Rename tag level.
- In the Rename Hierarchy Level dialog that opens, type the name of the new level. The hierarchy level name must be different than the original name.
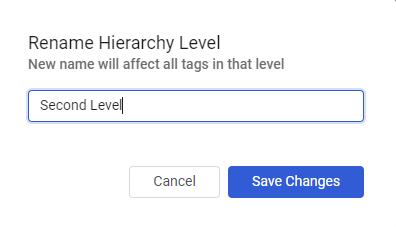
- Click Save Changes. To see the changes, you may need to click Refresh.

Deleting a Tag
You can delete a tag from the Tag Hierarchy. When you do so, the selected tag and all its child tags are removed permanently from all relevant assets. This action may take some time to complete.
To delete a tag
- Click the 3-dot Open Actions Menu of the tag that you want to delete, and click Delete.
- Click Delete Tags to confirm the deletion. It may take a little while to complete.
- To see the changes, you may need to click Refresh.
Updated about 1 month ago
