
CyberArk Integration
The integration between Axonius and CyberArk enables Axonius to securely pull privileged credentials from the CyberArk Vault using CyberArk’s Application Access Manager (AAM). The integration helps ensure that privileged credentials are secured in the CyberArk Vault, rotated to meet company guidelines, and meet complexity requirements.
Note:
License for Central Credential Provider (CCP) is a prerequisite for the CyberArk integration.
Description of Product Integration
Axonius uses the Agentless AAM method (called Central Credential Provider (CCP)) to integrate with CyberArk. The Agentless AAM method allows an application (e.g., Axonius) to use a REST API to securely retrieve the credentials from the Vault.
A client certificate is required as it provides protection for the credential while in transit from the agent to the application. The credential is encrypted while in transit from the vault to the AAM shared agent. The application is authenticated by the client certificate serial number and machine address.
In order to securely retrieve credentials from the Vault, the authorized application only requires an Application ID and a Query. The Application ID identifies an application to the CyberArk Vault. It needs to be granted sufficient privileges to retrieve all the credentials it needs.
Axonius uses the Agentless AAM method (called Central Credential Provider (CCP)) to fetch credentials from CyberArk Vault. Axonius uses the REST API when:
- Creating a new adapter connection
- Updating an existing adapter connection
- Running an enforcement set
- During a discovery cycle, to fetch asset information from the various adapters
Axonius does not store the credentials anywhere and deletes any trace of credentials.
To enable fetching credentials from your CyberArk Vault, you need to:
- Install and configure CyberArk’s Application Access Manager (AAM).
- Enable and configure the External Password Managers - Enterprise Password Management Settings in Axonius.
- Configure adapter connection credential to fetch passwords from CyberArk vault.
AAM Installation and Configuration
AAM Installation and Configuration
Axonius uses the Agentless AAM method (called Central Credential Provider (CCP)) to integrate with CyberArk.
In the below section, the term “Application” refers, in this case, to Axonius.
NOTE
License for Central Credential Provider (CCP) is a prerequisite for CyberArk integration
Central Credentials Provider Installation
- For installation and configuration, please refer to the CyberArk’s “Central Credential Provider Implementation guide”.
- No specific steps are required to configure Central Credential Provider (CCP) with Axonius.
Defining the Application ID (APPID) and Authentication Details
To define the Application, here are the instructions to define it manually via CyberArk’s PVWA (Password Vault Web Access) Interface:
-
While logged in as a user allowed to manage applications (this requires Manage Users authorization), click Add Application in the Applications tab; the Add Application page appears.
(120).png)
-
Specify the following information:
- In the Name edit box, specify the unique name (ID) of the application. The recommended Application ID for this integration is: APPID = Axonius
- In the Description, specify a short description of the application that will help you identify it.
- In the Business owner section, specify contact information about the application’s Business owner.
- In the lowest section, specify the Location of the application in the Vault hierarchy. If a Location is not selected, the application will be added in the same Location as the user who is creating this application.
-
Click Add; the application is added and is displayed in the Application Details
page.(121).png)
- Allowing extended authentication restrictions. This enables you to specify an unlimited number of machines and Windows domain OS users for a single application.
-
Specify the application’s Authentication details. This information enables the Credential Provider to check certain application characteristics before retrieving the application password.
-
In the Authentication tab, click Add; a drop-down list of authentication characteristics is displayed.
- Protect the Application ID with a client certificate serial number. Specify the Certificate Serial number:
(122).png)
- Protect the Application ID with a client certificate serial number. Specify the Certificate Serial number:
Provisioning Accounts and Setting Permissions for Application Access
For the application to perform its functionality or tasks, the application must have access to particular existing accounts, or new accounts to be provisioned in CyberArk Vault (Step 1). Once the accounts are managed by CyberArk, make sure to setup the access to both the application and CyberArk Application Password Providers serving the Application (Step 2).
-
In the Password Safe, provision the privileged accounts that will be required by the application. You can ¬do this in either of the following ways:
-
Manually – Add accounts manually one at a time, and specify all the account details.
-
Automatically – Add multiple accounts automatically using the Password Upload feature.
For this step, the Add accounts authorization in the Password Safe is required.
For more information about adding and managing privileged accounts, refer to Add Accounts -
-
Add the Credential Provider and application users as members of the Password Safes where the application passwords are stored. This can either be done manually in the Safes tab, or by specifying the Safe names in the CSV file for adding multiple applications.
-
Add the Provider user as a Safe Member with the following authorizations:
-
List accounts
-
Retrieve accounts
-
View Safe Members
Note: When installing multiple Providers for this integration, it is recommended to create a group for them, and to then add the group to the Safe with the above authorization.(126).png)
-
-
Add the application (the APPID) as a Safe Member with the following authorizations:
-
Retrieve accounts
(125).png)
-
-
If your environment is configured for dual control:
- In PIM-PSM environments (v7.2 and lower), if the Safe is configured to require confirmation from authorized users before passwords can be retrieved, give the Provider user and the application the following permission:
- Access Safe without Confirmation
- In Privileged Account Security solutions (v8.0 and higher), when working with dual control, the Provider user can always access without confirmation, thus, it is not necessary to set this permission.
- In PIM-PSM environments (v7.2 and lower), if the Safe is configured to require confirmation from authorized users before passwords can be retrieved, give the Provider user and the application the following permission:
-
If the Safe is configured for object level access, make sure that both the Provider user and the application have access to the password(s) to retrieve.
For more information about configuring Safe Members, refer to the CyberArks' Privileged Access Security Implementation Guide.
-
Enable CyberArk Integration
Enable CyberArk integration and allow Axonius to securely pull privileged credentials from the CyberArk Vault using CyberArk’s Application Access Manager (AAM).
Following the guidelines in Enterprise Password Management Settings.
Working with CyberArk Vault
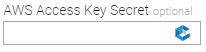
Once CyberArk integration is enabled in Axonius, a new CyberArk icon will appear in all password fields when configuring adapters or configuring Enforcement sets, allowing you to enter a password manually or to fetch the password from CyberArk Vault.
To fetch the password from CyberArk Vault:
-
In a password field, click the CyberArk icon. If you have configured more than one password manager, click the vault icon
 and select CyberArk Vault from the drop-down. A CyberArk popup opens.
-
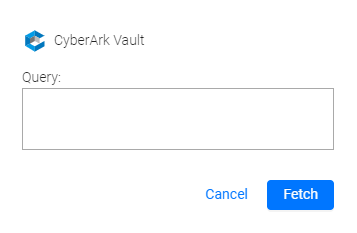
In the popup, specify a query. This query represents a location of the Password Object within a Safe in a Vault. The query has the following format:
Property=Value;Property=Value; ... Property=ValueFor example:
Safe=Test;Folder=root\OS\Windows;Object=windows1- Safe: This is the name of the safe where the account resides.
- Folder: This is the folder inside the safe where the account resides.
- Object: This is the Object Name of the account (referred to as Name in the account properties).
-
Click Fetch.
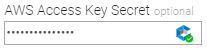
- If the fetch is successful, a green indication will be displayed. Hovering over the CyberArk icon will show the Query defined.
-
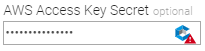
If the fetch is unsuccessful, a red indication will be displayed. Hovering over the CyberArk icon will show the error.
Note:
Typing or deleting any character in the textbox will change the password field back to a manual password input.
Updated 9 months ago