Tanium Client Status
The Tanium Client Status adapter provides an inventory of all clients that have registered with the Tanium platform.
Asset Types Fetched
-
Devices
Before You Begin
Ports
-
TCP port 443: REST API
Authentication Method
- User Name/Password
- API Token ID/API Token
Permissions
You must Create a Micro Admin Role since none exists that grants these Micro Admin Permissions:
- Read System Status
Create a Micro Admin Role
These are the steps to create a role that grant the required Micro Admin Permissions:
- Log in to the value supplied in Hostname or IP Address with an account that has the permissions necessary to edit roles.
- In the navigation menu:
- Go to the Permissions
>Roles page.
- Go to the Permissions
- In the Permissions Page:
- Click New Role.
- Select Grant Micro Admin Role.
- In the Create Role page in the Role Details section:
- Fill in the Name field. (for example: System Status Read Only)
- In the Create Role page In the Micro Admin Permissions section click the plus sign next to the following permissions:
- Read System Status
- The Create Role page should look like:
.png)
- At the bottom of the Create Role page:
- Click Save.
- In the Notice dialog window:
- Click Continue.
Assigning Required Permissions
These are the steps to assign the Required Permissions to the value supplied in User Name:
- Log in to the value supplied in Hostname or IP Address with an account that has the permissions necessary to edit users.
- In the navigation menu:
- Go to the Administration
>Users page.
- Go to the Administration
- In the Users Page:
- Select the value supplied in User Name from the list of users.
- Click View User.
- In the User Administration page in the Roles and Effective Permissions section:
- Click Edit Roles.
- In the Assign Roles page in the Role Management
>Grant Roles section:- Click Edit.
- In the Edit Grant Roles dialog window:
- Select the name of the role created in Create a Micro Admin Role.
- Click Save.
- In the Assign Roles page:
- Click Show Preview to Continue.
- Click Save.
- In the Notice dialog window:
- Click Continue.
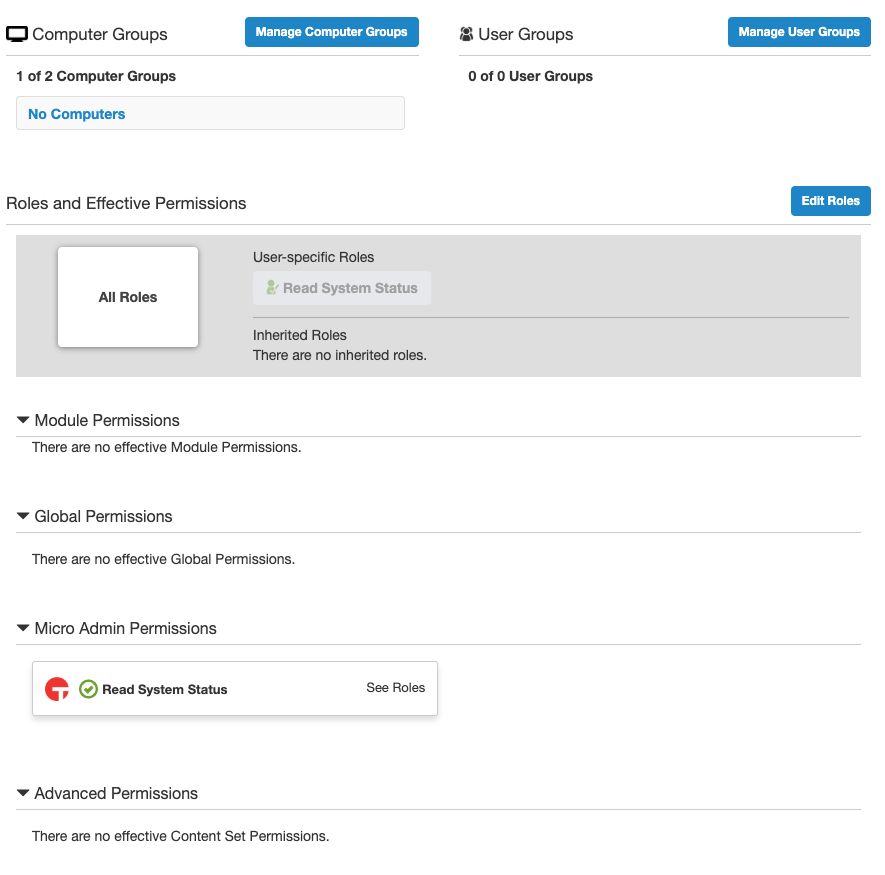
- The User Administration page should look like this:

- Perform the steps in Verifying Permissions.
Verifying Permissions
- Log in to the value supplied in Hostname or IP Address with the values supplied in User Name and Password.
- In the navigation menu:
- Go to the Administration
>System Status page.
- Go to the Administration
Connecting the Adapter in Axonius
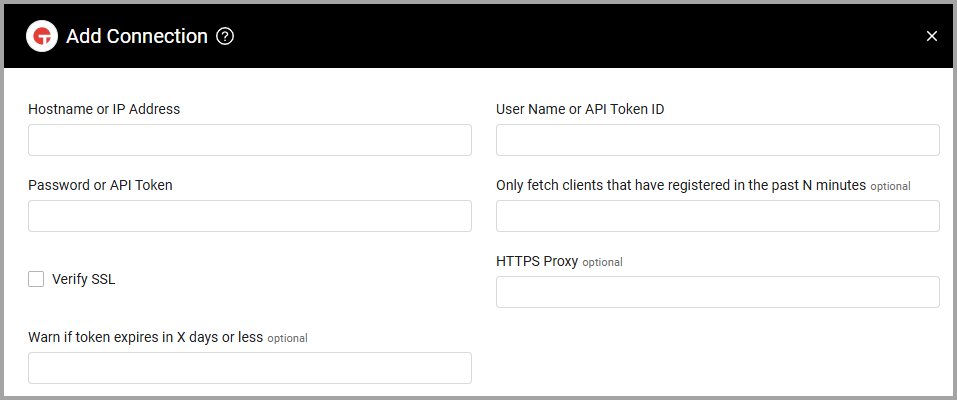
To connect the adapter in Axonius, provide the following parameters:
Required Parameters
- Hostname or IP Address - The hostname or IP address of the Tanium server. This adapter supports both on-premise and Tanium Cloud instances. When connecting to a Tanium Cloud instance, "-api" must be added to the end of the subdomain of your Tanium Cloud instance. For example: "domain.cloud.tanium.com" should be entered as "domain-api.cloud.tanium.com".
- User Name or API Token ID - The credentials for a user account that has the Required Permissions to fetch assets. If an API token is being used for authentication, this must be the ID of the API token. The Token ID column in Tanium may be hidden.
- Password or API Token - The credentials for a user account that has the Required Permissions to fetch assets. If an API token is being used for authentication, this must be the API token string.
More information on API Tokens
- When connecting to a Tanium Cloud instance, an API token must be used.
- The API Token string contains the word token; when copying this, ensure that
tokenis included in your input and not just the numbers within the string.- When creating an API token in Tanium, the default value for "Expire in Days" is 7. It is recommended to set this value to the maximum allowed value of 365.
- Please see the Tanium Documention on Managing API tokens for more information.

Optional Parameters
-
Only fetch clients that have registered in the past N minutes - Only fetch assets that have registered with the Tanium platform within the past minutes supplied by this value. Tanium considers any agent that has not reported in the past 5 minutes as "broken", however leave this value empty if you want to be able to build queries in Axonius that check for "broken agents". A value of "0" will disable this filter.
-
Verify SSL - Select whether to verify the SSL certificate of the server against the CA database inside of Axonius. For more details, see SSL Trust & CA Settings.
-
HTTPS Proxy (optional) - Connect the adapter to a proxy instead of directly connecting it to the domain.
-
Warn if token expires in X days or less - Specify how many days before the token expiration to start generating fetch events warning about it.
To learn more about common adapter connection parameters and buttons, see Adding a New Adapter Connection.
Advanced Settings
Note
Advanced settings can either apply to all connections for this adapter, or to a specific connection. Refer to Advanced Configuration for Adapters.
- Number of assets to fetch per page (required, default: 1000) - Control the number of assets that are fetched per page.
- Number of seconds to wait in between each page fetch (required, default: 10) - Control the number of seconds to wait in between each page.
- Devices to exclude by host name (optional) - A comma-separated list of device host names to exclude.
- Devices to exclude by model (optional) - A comma-separated list of device models to exclude.
- Devices to exclude by domain (optional) - A comma-separated list of device domain names to exclude.
- Deduplicate devices - Select this option to deduplicate devices.
Note
To learn more about Adapter Configuration tab advanced settings, see Adapter Advanced Settings.
Related Enforcement Actions
Version Matrix
This adapter has only been tested with the versions marked as supported, but may work with other versions. Please contact Axonius Support if you have a version that is not listed and it is not functioning as expected.
| Version | Supported | Notes |
|---|---|---|
| Tanium versions prior to 7.3.314.3424 | No | This adapter utilizes the REST API, which was added in Tanium 7.3.314.3424 |
| Tanium 7.3.314.3424 | Yes | |
| Tanium 7.3.314.3668 | Yes | |
| Tanium 7.3.314.4147 | Yes | |
| Tanium 7.3.314.4250 | Yes | |
| Tanium Cloud | Yes |
Updated 4 months ago
