
Installing and Configuring the Network Inspector
This topic details the Axonius Network Inspector device installation and configuration steps.
Installation and Configuration Steps
- Place the device on a flat, stable surface.
- Plug in the power cable and then power on the device.
- Connect a monitor and keyboard to the device and verify that the system is initializing.
- Connect a laptop directly to the Management port of the device using an Ethernet cable with an RJ-45 connector.
- Configure your laptop to the following IP and subnet:
192.168.0.2/ 255.255.255.0. - Verify that the green link LED lights up on the Management NIC card.
- On your laptop, open a browser and enter the management address:
https://192.168.0.1:8080. The Login page appears in the browser. - Log in to the application using the username and password that you received from your account manager.
After a successful login, the Setup Wizard is displayed.
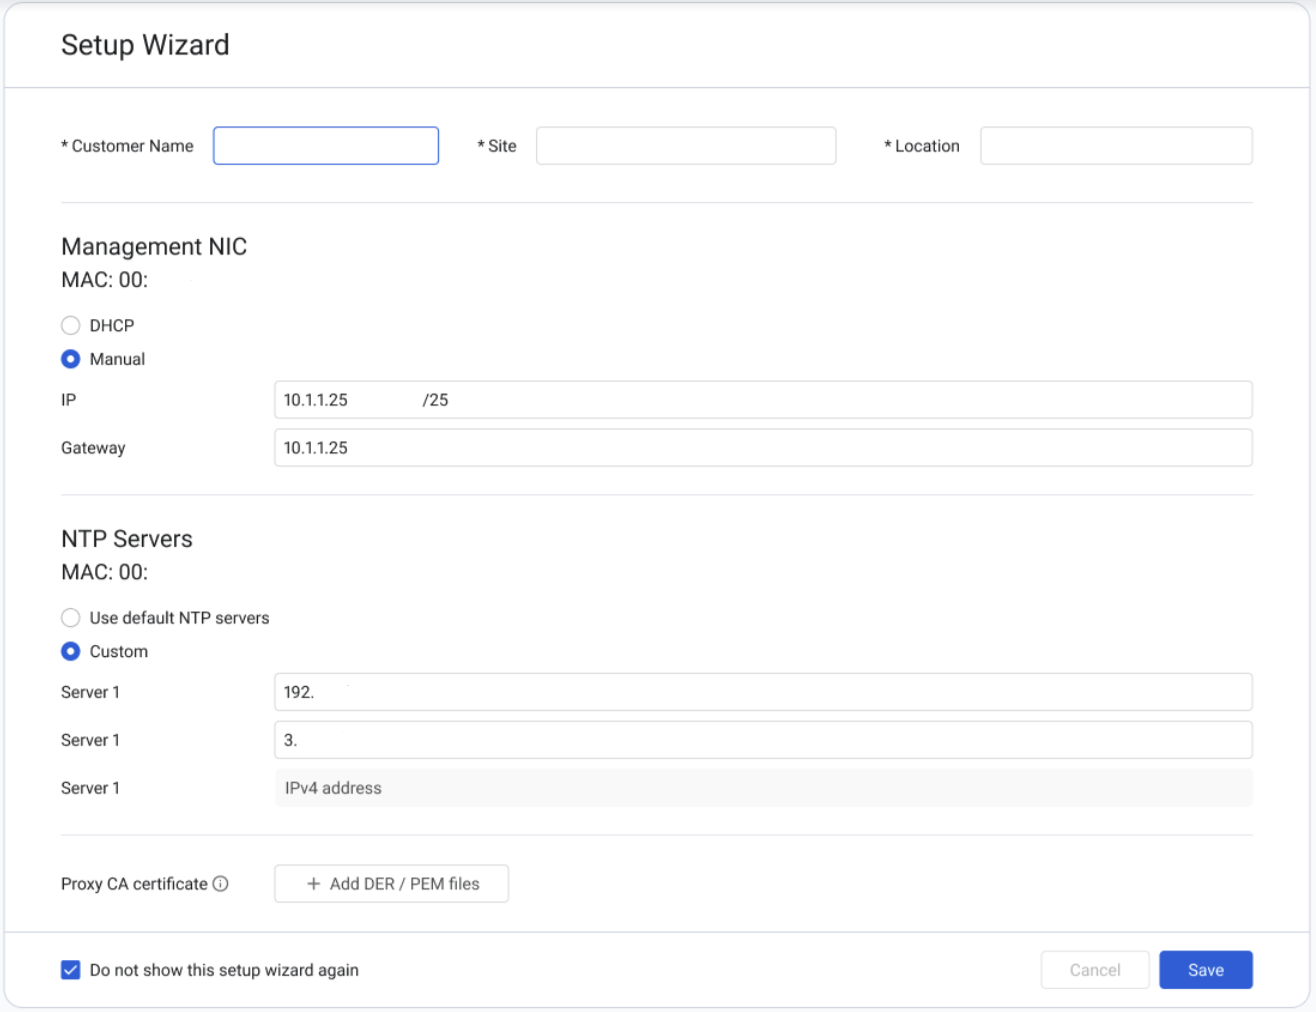
- Enter the Customer Name, Site, and Location.
- In the Management NIC section, select the management IP address assignment method: DHCP or Manual (default). If you select Manual, then:
a. Either leave the default IP address as-is or specify a new IP address and subnet (recommended) in CIDR format (for example: 192.168.0.0/24). Keep a record of the IP address that you assigned.
b. Enter the Gateway address. - In the NTP Servers section, select the NTP servers assignment method: Use default NTP servers (default) or specify Custom servers. If you select Custom, then either leave the pre-configured server as-is or specify one or more NTP servers.
- In the iDRAC NIC section, select the iDRAC IP address assignment method: DHCP (default) or Manual. If you select Manual, then:
a. Enter the IP address and subnet in CIDR format.
b. Enter the Gateway IP address. - Click Save. A confirmation page shows the configuration changes that you made.
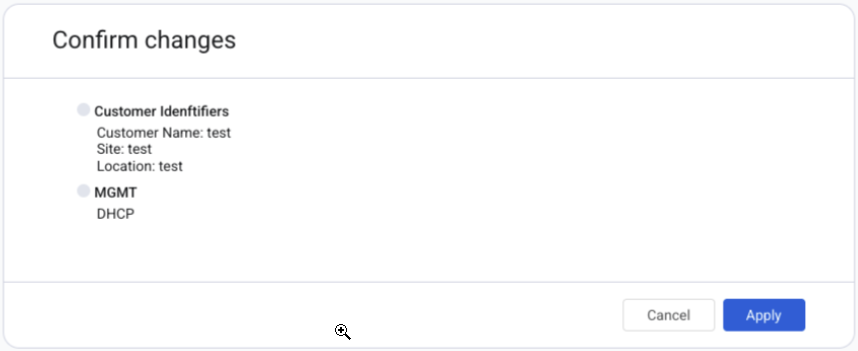
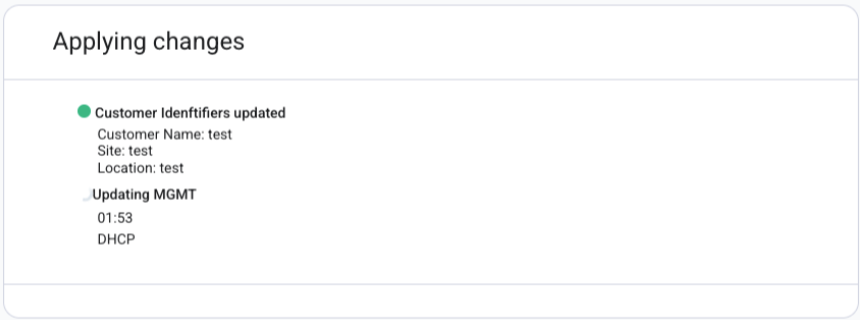
- Click Apply.
The changes are applied. It takes approximately 2 minutes for the updates to take effect, while the Applying Changes page is shown.
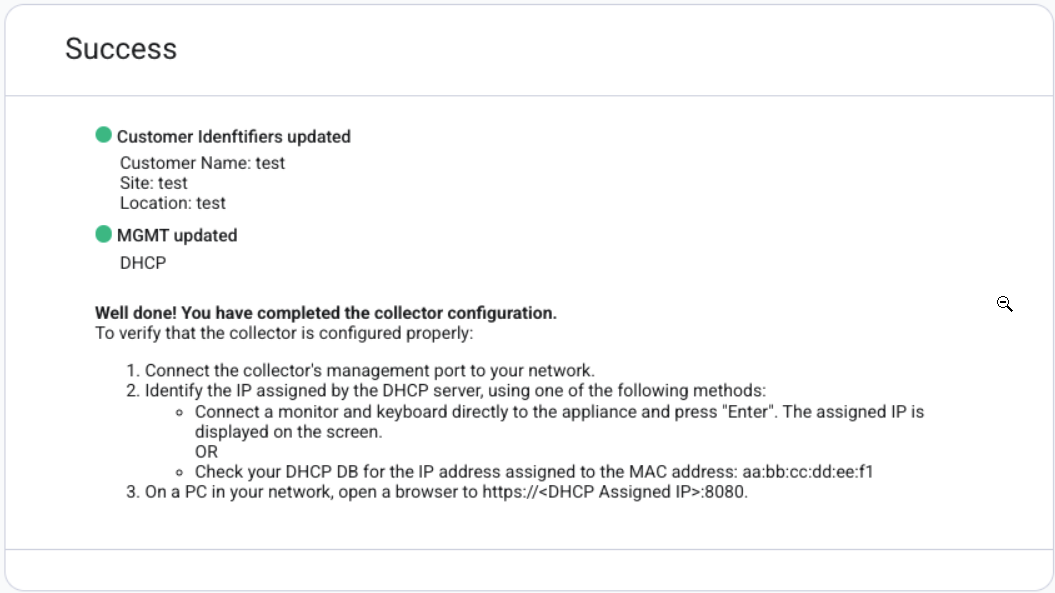
When the configuration is completed, the Success page is shown.
Updated 9 months ago
Did this page help you?