
Deploying the Microsoft Entra ID (Azure AD) and Microsoft Intune Adapter
To deploy the Microsoft Entra ID adapter, perform the following steps:
1. Create Entra ID credentials with the appropriate permissions
Note:
If you already have an Application registered for Axonius, you do not need to create a new one. You can reuse the existing application and add the required additional permissions.
1.1 Register the Application in Entra ID
Follow the steps below:
Prerequisites
-
Log in to the Azure Portal with an administrator account.
-
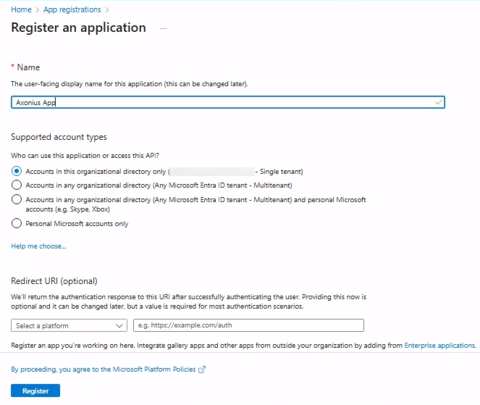
In the App registrations click on New registration.
-
Fill in the details:
a. Enter the name
Axonius Appfor the application.
b. Select Single tenant as the supported account type. -
Click Register to create the application.
-
After you have created the app, the Application (client) ID and Directory (tenant) ID values are displayed. Copy these values to use when you configure the adapter in Axonius.

-
Assign Directory Permissions (Entra ID)
- Go to Microsoft Entra ID and select Enterprise applications.
- Select the application you created.
- Navigate to Roles and administrators.
- Go to the Azure portal and search for 'Microsoft Entra roles and administrators'
- Select Directory Readers.
- Navigate to Add assignments.
- Select Enterprise applications, then search for and select the application you created to assign this permission to it.
1.2 Authentication Methods
Axonius supports the following authentication methods for connecting to Microsoft Entra ID adapter:
Enterprise Application (Client ID / Client Secret)
-
Create a Client Secret
a. Open the application you registered.
b. Within the app registration, navigate to Certificates & secrets, then go to Client secrets and select New client secret.
c. Choose an expiration period for the client secret.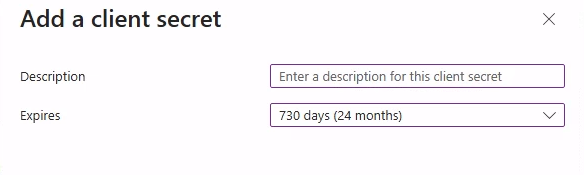
d. Click Add and copy the Client Secret Value to use when you configure the adapter in Axonius. Note that you cannot view it again once you leave the page.
-
Assign Required Roles
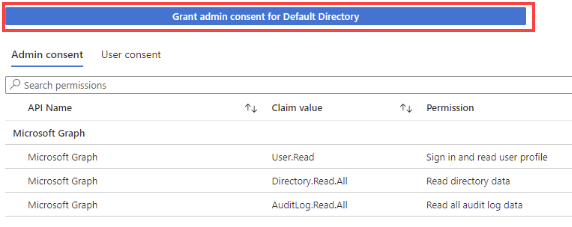
a. Navigate to API Permissions in the application menu. Click Add a permission, select Microsoft Graph, and then choose Application permissions.

b. Add all the permissions required for the adapter and click Grant admin consent.
Enterprise Application (Certificate)
-
Upload a Certificate
a. Open the application you registered.
b. In the app registration, navigate to Certificates & secrets, then go to Certificates and select Upload certificate.
c. Upload your public certificate file (.cer,.pem, or.crt).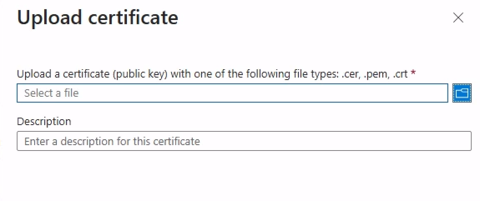
d. The certificate’s thumbprint will be used as the authentication key for the adapter.
-
Assign Required Roles
a. Navigate to API Permissions in the application menu. Click Add a permission, select Microsoft Graph, and then choose Application permissions.
b. Add all the permissions required for the adapter and click Grant admin consent.
OAuth
-
Configure Redirect URI
a. Open the application you registered in Entra ID.
b. Search and select Manage, then Authentication.
c. In the Web area, copy the redirect URL. The recommended value ishttp://localhost:8080..png)
d. Configure the Redirect URI if required. Open Authentication, click Add a platform, select Web, and enter the redirect URL for your OAuth flow.
-
Generate OAuth Authorization Code
a. Copy and paste the following URL into a browser window, replacing Tenant ID, Client ID, and Redirect URI accordingly:
https://login.microsoftonline.com/[TENANT]/oauth2/v2.0/authorize?client_id=[CLIENT_ID]&scope=https://graph.microsoft.com/.default&redirect_uri=[REDIRECT_URL]&response_mode=query&response_type=codeb. Authorize if required.
c. Copy the value for thecodeparameter in the URL to use when you configure the adapter in Axonius.
-
Create a Client Secret
a. Open the application you registered.
b. Within the app registration, navigate to Certificates & secrets, then go to Client secrets and select New client secret.
c. Choose an expiration period for the client secret.d. Click Add and copy the Client Secret Value to use when you configure the adapter in Axonius. Note that you cannot view it again once you leave the page.
-
Assign Required Roles
a. Navigate to API Permissions in the application menu. Click Add a permission, select Microsoft Graph, and then choose Application permissions.
b. Add all the permissions required for the adapter and click Grant admin consent.
1.3 (Optional) SaaS Applications
This method is only required when fetching SaaS Applications data for the following Asset Types:
User and Application Extensions, Licenses, Application Settings, SaaS Application and Accounts.
Username / Password
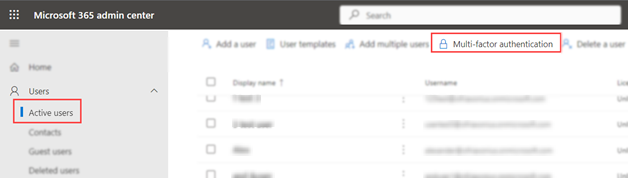
- Open the Microsoft 365 Admin Center and navigate to Users then Active users.
- Click Add a user to create a new account.
.png)
- Enter a display name for the new user.
- Enter a username (e.g.,
usr_axonius). - Back in Axonius, enter the username in the format:
username@domainname(e.g.,[email protected]). - Enter a strong password for the account. A 32-character password is recommended.
- Copy the password securely into Axonius.
- Clear Require this user to change their password on first sign-in to allow automatic login.
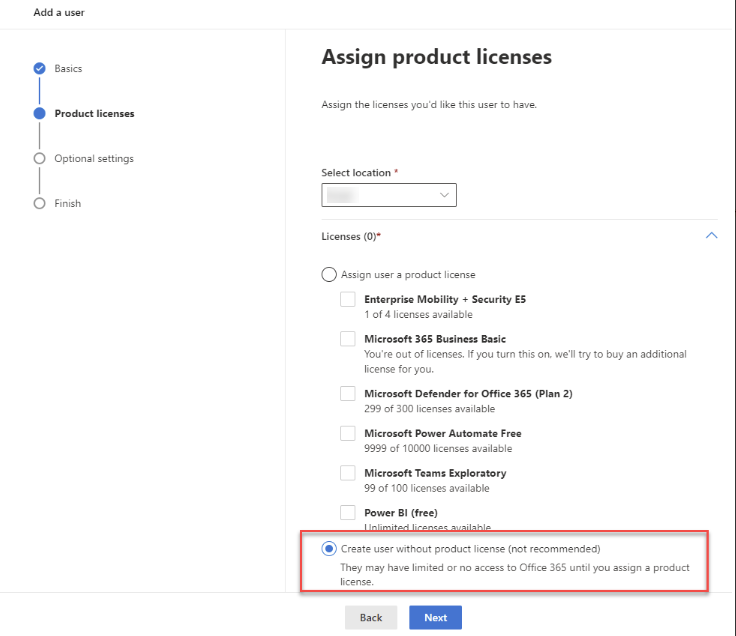
- In the user creation workflow, select Create user without product license, then proceed to the next step.
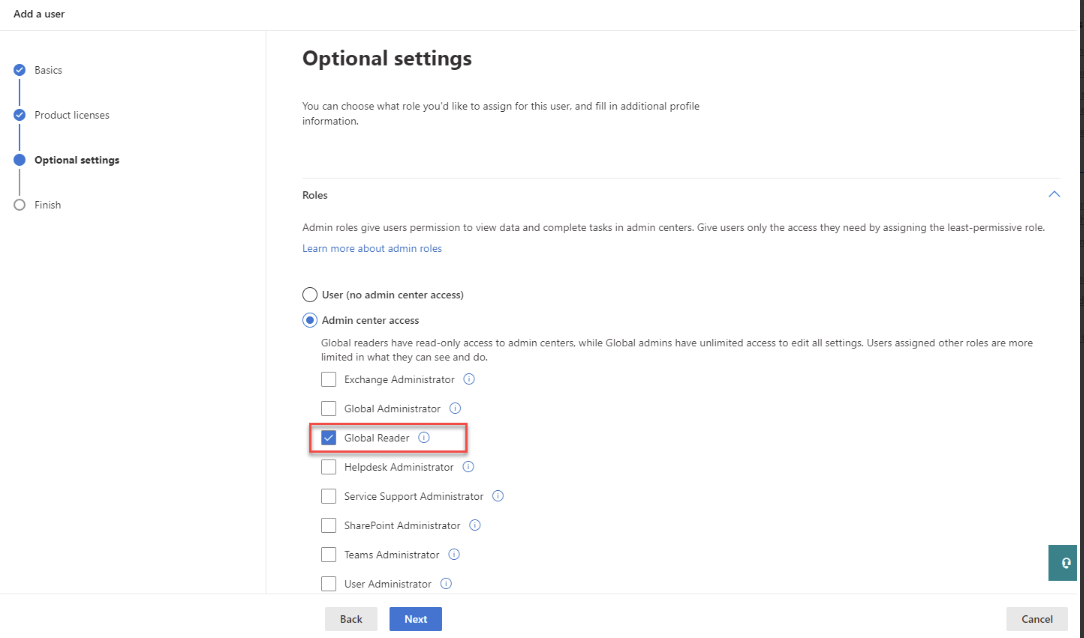
- Assign the user the required roles. Open the Roles section, access the Admin center access options, and choose the Global reader role for the user.
- Click Finish adding, then close the dialog.
- Log into this account at https://login.microsoftonline.com.
- Record the following values for Axonius:
- Username – Dedicated service account username
- Password – Account password
- Tenant ID – Azure directory tenant ID
- If Multi-Factor Authentication (MFA) is required:
- Configure the Authenticator app in Microsoft 365 then Security Info.
- Generate and copy the 2FA Secret Key to use in Axonius.
Steps to Enable MFA
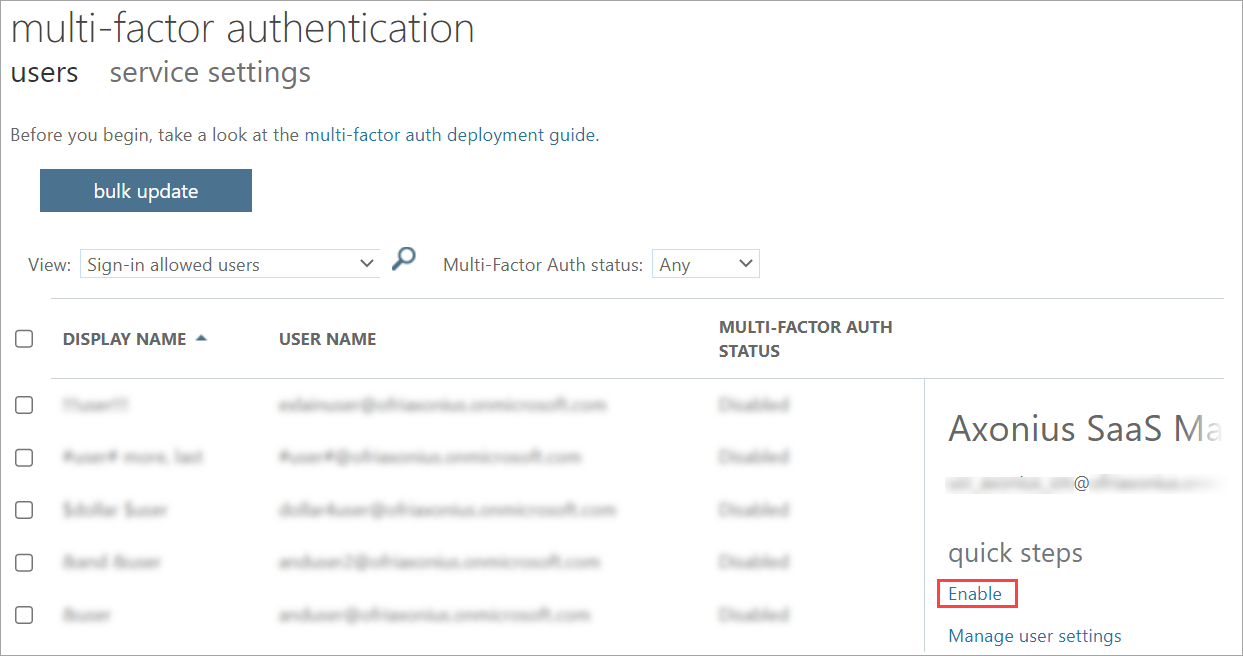
- Navigate to Microsoft 365 Admin Center → Users → Active users → Multi-Factor Authentication.
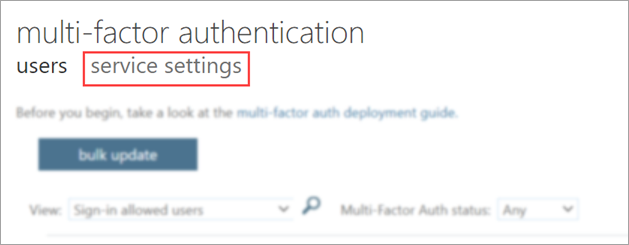
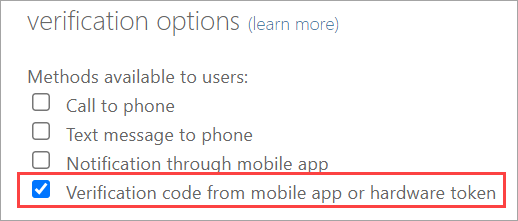
- Open the Service settings tab.
- Select Verification code from mobile app or hardware token → Save.
- Go to the Users tab → select the new user → Enable MFA.
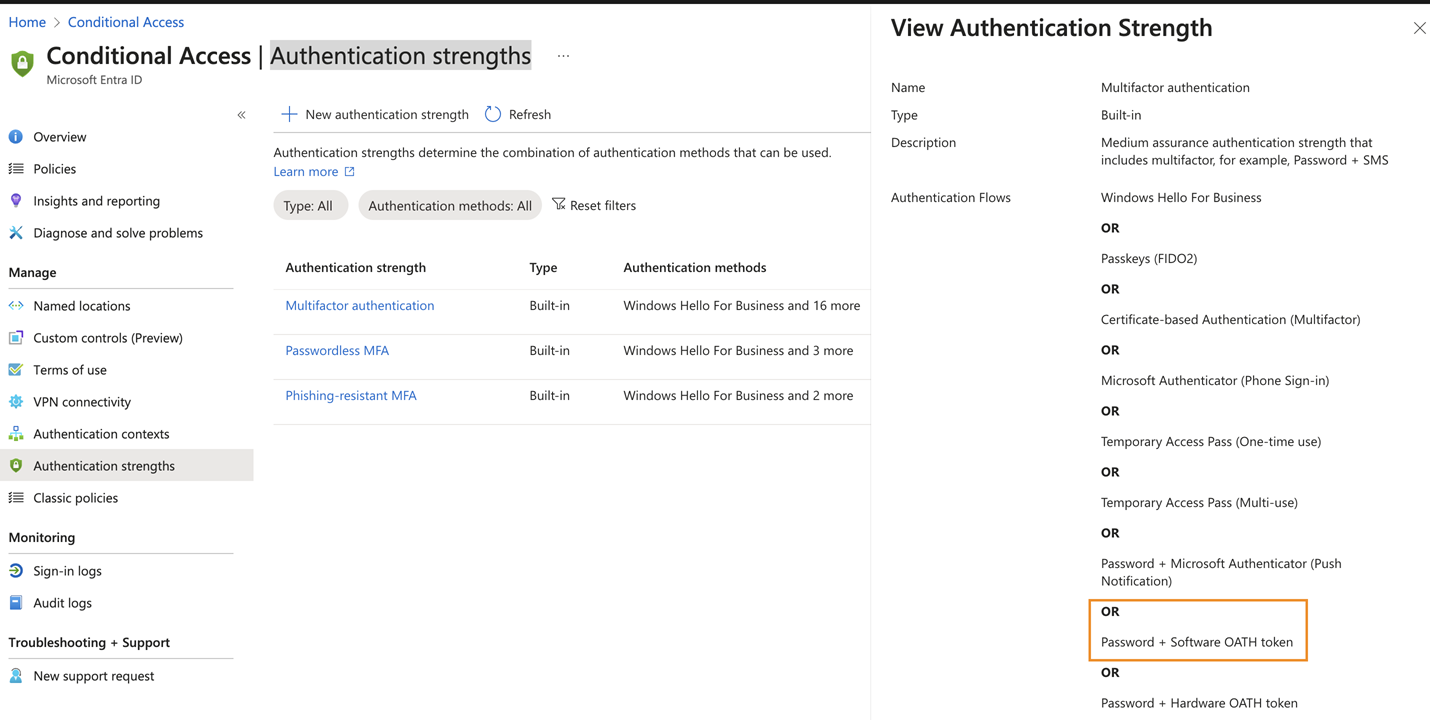
- Configure conditional access authentication strength: Overview of Microsoft Entra Authentication Strength
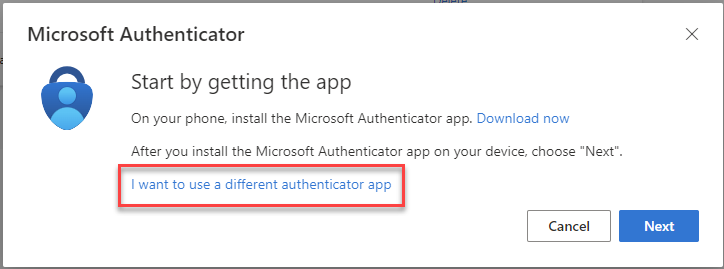
- Configure the Authenticator app and generate a secret key: - Log in → View account → Security Info → Add sign-in method → Authenticator app → Add click Next until a QR code is displayed.
 - Copy the Secret Key:
  - Paste into Axonius 2FA Secret Key field.
 - To generate the verification code:
a. Back in the Azure MFA Configuration panel, click Scan QR Code to display the QR Code again.
b. On your personal mobile device, download and open the Google Authenticator and click +.
c. Scan the QR code. Google Authenticator displays a verification code.
d. Copy the verification code that appears in the field below.
e. Enter the verification code in Azure MFA Configuration and click Verify.
Steps to Exclude MFA
- Ensure Enable 2FA checkbox in Axonius is cleared.
- Go to Microsoft Azure Admin Center → Entra ID → Security → Named Locations → Configure multifactor authentication trusted IPs.
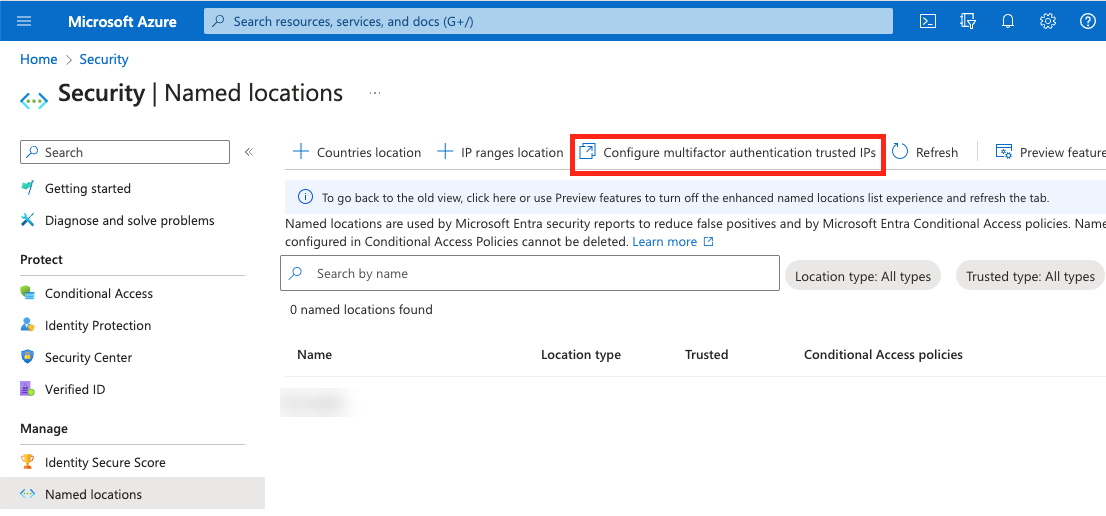
- Add Axonius IP ranges → Save.
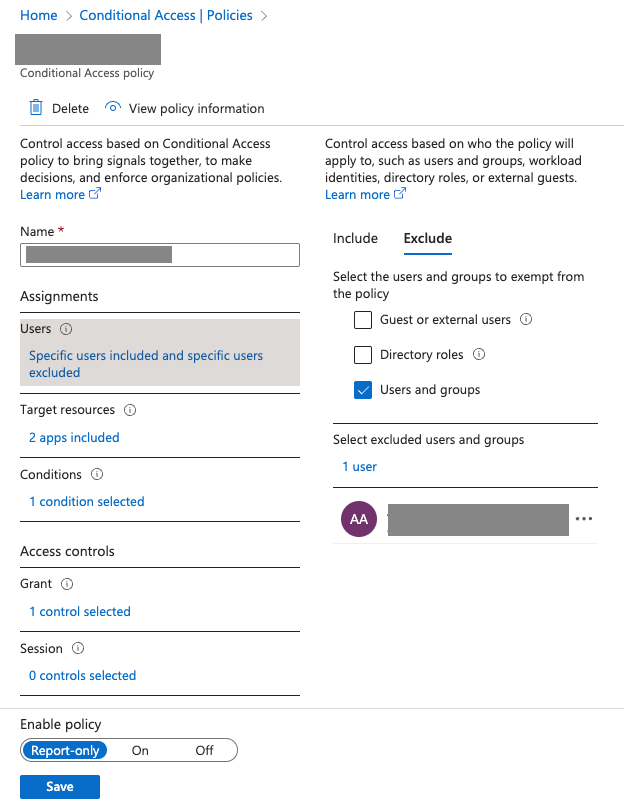
- Exclude the user from Conditional Access policies: - Entra ID → Security → Conditional Access → Policy → Users and groups → Exclude → Select user → Save
2. Set up the Entra ID adapter in Axonius
Create the adapter connection in Axonius. Depending on the authentication method you used (Client Secret, Certificate, OAuth, or Username/Password), fill in the specific fields and configure any optional settings.
Add a New Connection
-
Navigate to the Adapters page, search for
Entra ID, and click on the adapter tile.
-
On the top right side, click on Add Connection.
-
The Add Connection drawer opens.

Required Fields
- Azure Client ID – The Application ID of the Axonius application.
- Azure Tenant ID – The ID for Microsoft Entra ID.
- Connection Label – Name to identify this adapter connection.
- Authentication Method
- Azure Client Secret – Specify a non-expired key generated from the new client secret.
- Enable Certificate-Based Authentication – Select to enable Axonius to send requests using the Azure certificates uploaded to allow secure Azure authentication for this adapter. To add the certificate to the App registration in Azure, see Register an app in Microsoft Entra ID.
- Click Upload file next to Private Key File to upload an Azure private key file in PEM format.
- Click Upload file next to Certificate File to upload an Azure public key file in PEM format.
- Azure OAuth Authorization Code – The authorization code to connect to Microsoft Intune.
- Azure OAuth - Redirect URI/Reply URL – The location where the authorization server sends the user once Azure has been successfully authorized and granted an authorization code or an access token. For more information, see Redirect URI (reply URL) restrictions and limitations.
Required Fields for SaaS Applications
- Account Sub Domain – The Microsoft account's sub domain (.onmicrosoft.com).
- User Name and Password – The credentials for a user account that has the permissions needed to fetch Axonius SaaS Applications data.
- 2FA Secret Key – The secret generated in Microsoft Entra ID for setting up 2-factor authentication for the Microsoft user. For more information, see Enable or Exclude Multi-Factor Authentication.
Optional Fields
Expand/Collapse
- Verify SSL – Select whether to verify the SSL certificate of the server against the CA database inside of Axonius. For more details, see SSL Trust & CA Settings.
- SSO Provider – If your organization uses Microsoft Entra ID for SSO, you can select this check box. For more information, see Connecting your SSO Solution Provider Adapter.
- Cloud Environment (default - Global) – Select Microsoft Azure cloud environment type.
- Is Azure AD B2C – Select this option to cause Axonius to consider that this Microsoft Entra ID adapter connection is configured as B2C.
- Account Tag – Specify a tag for Axonius to tag all devices fetched from this adapter for the Azure Cloud instance ("nickname").
- Device groups blocklist – Enter a group or groups whose devices will be ignored and not fetched. If you want to enter more than one group, separate with commas.
- HTTPS Proxy – A proxy to use when connecting to the selected Microsoft Azure/Entra ID cloud environment.
- HTTPS Proxy User Name and Password – The user name and password to use when connecting to the selected Microsoft Azure cloud environment via the value supplied in HTTPS Proxy.
- Notes – Add a note of up to 250 characters for this adapter connection.
- Select Gateway – Select the Axonius Gateway to use when connecting adapters whose sources are only accessible by an internal network. To use this option, you need to set up an Axonius Gateway.
3. (Optional) Configure Advanced Settings
Refer to Entra ID Advanced Settings.
Updated about 2 months ago