
Cisco Meraki
Cisco Meraki solutions include wireless, switching, security, EMM, communications, and security cameras, all centrally managed from the web.
Asset Types Fetched
- Devices, Software, Application Settings, SaaS Applications, Networks, Accounts/Tenants, Network/Firewall Rules, Network Devices, Alerts/Incidents (if Fetch Air Marshal data is selected in Advanced Settings), Network Routes
Before You Begin
Ports
- TCP port 80/443
Authentication Method
- API Key
Creating an API Key
To create an API key:
- Navigate to the Admin panel. After logging into the panel, click the username in the top right of the screen and then on My profile:
- Click My Profile.
- Under the API Access section, click Generate new API key and save it to a secure location (you will need it later when configuring the adapter).
- Refer to Enabling APIs for further information.
Permissions
The value supplied in API Key for a user account that has permissions to fetch assets.
Note
The minimum permission required to fetch assets in Meraki is Organization (Read).
A non-SAML admin with the Organization privilege in Meraki must enable Dashboard API Access under Organization
>Settings>Dashboard API access.If an organization has SAML enabled, admins with SAML access cannot generate an API key (these are accounts with a SAML administrator role in Meraki's nomenclature). The account with the Organization (Read) privilege used for generating the API key must be a non-SAML account.
Connecting the Adapter in Axonius
- From the Adapters page, search for Cisco Meraki and select the adapter.
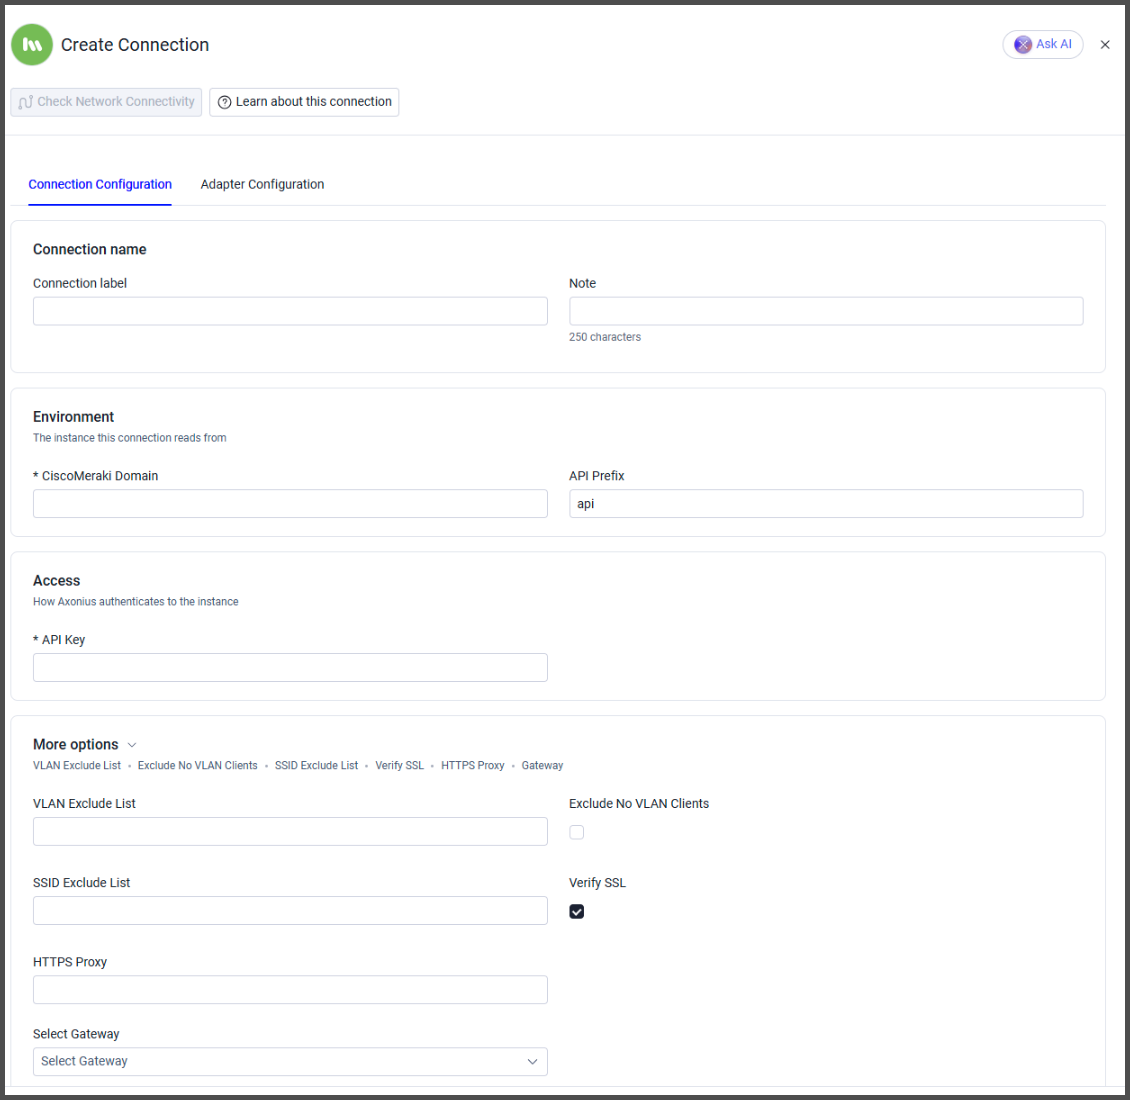
- Click Add Connection. The Create Connection drawer opens on the Connection Configuration tab.
- Fill in the sections below, then save the connection.
To check that Axonius can reach the source before you enter credentials, click Check Network Connectivity. For more details, see Adding a New Adapter Connection.
Environment
The instance this connection reads from.
- CiscoMeraki Domain (required) - The hostname or IP address of the Cisco Meraki server. The domain is: https://api.meraki.com
- API Prefix (default:
api) - An API prefix. Either use the default value displayed or leave empty.
Access
How Axonius authenticates to the instance.
- API Key (required) - An API key for a user account that has the Required Permissions to fetch assets.
More Options
-
VLAN Exclude List - Enter a comma-separated list of VLANs from which devices are not fetched. If there are any surrounding spaces, they are automatically removed.
-
Exclude No VLAN Clients - Select to not fetch devices which are not associated with a VLAN.
-
SSID Exclude List - Enter a comma-separated list of SSIDs from which devices are not fetched. If there are any surrounding spaces, they are automatically removed.
-
Verify SSL (default: enabled) - Select whether to verify the SSL certificate of the server against the CA database inside of Axonius. For more details, see SSL Trust & CA Settings.
-
HTTPS Proxy - Connect the adapter to a proxy instead of directly connecting it to the domain.
-
Select Gateway – Select the Axonius Gateway to use when connecting adapters whose sources are only accessible by an internal network and not from the primary Axonius instance, which may be an Axonius-hosted (SaaS) instance or Customer-hosted (on-premises / private cloud). To use this option, you need to set up an Axonius Gateway.
To learn more about common adapter connection parameters and buttons, see Adding a New Adapter Connection.
Advanced Settings
Note
Advanced settings can either apply to all connections for this adapter, or to a specific connection. Refer to Advanced Configuration for Adapters.
- Fetch clients URLs history - Select this option to fetch clients URLs history.
- Time in seconds to sleep between each request (optional, default: 0) - Specify sleeping time in seconds between each API request Axonius sends to this adapter.
- Fetch MDM devices (required, default: true) - Select this option to fetch MDM devices from Cisco Meraki.
- Fetch additional data for MDM devices - Select this option to fetch the following data for Cisco Meraki MDM devices:
- Device profiles
- Restrictions
- Security centers
- Installed software
- Fetch client policies - Select this option to fetch client policies.
- Fetch firewall rules - Select this option to fetch firewall rules.
- Fetch Air Marshal data - Select this option to fetch data from the 'getNetworkWirelessAirMarshal' endpoint.
- Fetch clients (Default: enabled) - Clear this option to stop fetching client devices. SaaS application data derived from clients is not fetched when this option is disabled.
- Fetch organizations as Accounts (Default: enabled) - Clear this option to stop fetching Cisco Meraki organizations as Accounts.
- Fetch networks and VLANs as Networks (Default: enabled) - Clear this option to stop fetching Cisco Meraki networks and VLANs as Networks.
- Collect device clients in the background (Default: disabled) - Select this option to collect the clients of each network device in a background job instead of during the fetch. The fetch becomes shorter, but client host names and addresses can be up to the background interval old, and a new client appears after the next background run.
- Background device clients interval (hours) (Default: 12) - Enter how often, in hours, the background job collects device clients. Enter a value from
1to168. Keep the value close to the length of your discovery cycle. - Parse hostname - From the dropdown, select the source data for hostname parsing.
Note
A licensed version of Systems Manager is required for this option to work.
'Fetch MDM Devices' requires the Meraki adapter specific field 'Device Type' to be populated with 'MDM Device'. Without the MDM Device value present in this field, the 'Fetch MDM Devices' advanced option will not work.
- Exclude host name from Client device IDs Enable this setting to help reduce duplicate devices in tenants that use MSLA, or where client device host names change frequently.
- Enable Custom Parsing - Enable this option to define how to parse specific fields from the raw data fetched. You can choose to parse the data into an already existing field, or create a new one. See Adapter Custom Parsing for more information.
Note
To learn more about Adapter Configuration tab advanced settings, see Adapter Advanced Settings.
Related Enforcement Actions
Troubleshooting
If your Meraki uses IP restrictions, then make sure you add the IP address of the Axonius instance to the Permissions list.
Updated 3 days ago