
Creating a New Case
You can create a new Case to track, monitor, and remediate similar assets using one of the following methods:
- Manual (from the Case Management page) - Create a single Case based on a specific query. The system automatically creates a Case Set to allow you to schedule the Case to run again in the future. This method is described below.
- Manual (from Monitoring) - Create a Case directly from the Findings Center.
- Manual - From an asset page -select specific assets and use the Create new case enforcement action to generate a case
- Automated (from the Enforcement Center) - Use the Create new case enforcement action within an Enforcement Set to automatically generate Cases based on a predefined query (equivalent to the Base query in the first method) and schedule (Discovery Cycle or other defined schedule).
Required Permissions
- To create a new Case, users require the View user accounts and roles permission (located under Users Management).
- Users are selectable as Assignees of a Case only if they have both of the following permissions:
- View user accounts and roles (under Users Management).
- View Case Management (under Case Management).
Creating a Case from the Case Management Page
Creating a Case from the Case Management page (manual) enables defining and launching a single Case based on a Query. The system automatically creates a corresponding Case Set in the background, which manages the schedule of future runs.
To create a new Case
- On the Case Management page, click Create Case. The Create Case drawer opens.
- Fill in the required Case information in the Case Configuration tab.
- Optional: Configure the automation of Case runs in the Select Schedule tab.
- Optional: Rename the automatically created and named Case Set and add a description in the Case Set Name tab.
- Click Create Case. The new Case is added to the Case Management table, and its corresponding Case Set is added to the Case Sets table.
You can manage the new Case alongside existing Cases from the Case Management page.

Case Creation Behavior
- A Case Set is automatically created for every Case. If you do not define a schedule, the Case runs once (a one-time Case), but the Case Set remains for later scheduling.
- When you save the new Case, a list of assets currently matching the Base Query is saved. From that point on, Case Progress is calculated based on the number of assets that leave the query due to remediation or reconciliation.
- A Case can be closed when all initial assets (excluding assets removed from the system) are remediated.
- You can click Advanced Options at the bottom of the Create Case drawer to navigate directly to the Create a Case Set wizard. Using this option adds a Case Set to the Case Sets table, but it does not add a Case to the Cases table
Case Configuration Drawer
The Create Case drawer provides the following tabs for defining the Case and its automation.
Case Configuration Tab
The Case Configuration tab defines the core details of the Case, including its purpose, the query for the assets it will track, and other settings. Once you fill in the mandatory fields in this tab, you can create a one-time Case.
To define the core Case details
-
In the Case title (required), enter a unique name for the Case.
-
In the Description field (optional), enter a short description of the issue.
-
Select the base query to be monitored by the Case: Under Query type - Simple Query, in the Base query (Required) section, from the Module dropdown, select an asset type, and from the Select Query dropdown, select an existing query for the selected asset type, or click + Add Query to create a new query. To learn more about creating a new query, see Creating a New Query.
- The Query type is set to Simple Query for manual creation from this page, and is not selectable. When you create a Case from Monitoring, Finding is enabled.
- The Base Query must be an asset query; not an internal module query, such as Adapters Fetch History.
- Hover over the selected Query and then click the View or Edit Query icon to verify it, or if necessary,edit the Query.

-
From the Type (required) dropdown list, select the case type that best describes the issue (e.g., Application missing/installation, Data Breach Remediation).
-
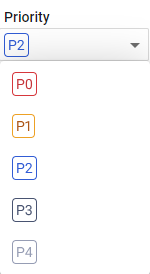
From the Priority dropdown (required, default: P0), select the urgency of the case. P0 (highest) to P4 (lowest).
-
From the Status dropdown (optional, default: To Do), select one of the following statuses: Backlog, To Do (default), In Progress, Done.
-
Set the Case Due date (optional) to one of the following options:
- No due date - No deadline is set for resolving the Case.
- On - Set a specific due date. Click the calendar icon
 to open the calendar, select the due date and time (optional), and then click Ok.
 - After - Set the due date relative to the current date. In the first dropdown, select the number. In the second dropdown, select the unit of time: Hours, Days, Weeks, or Months.
-
From the Assignee (optional) dropdown, select one user to handle the Case. The dropdown list shows users only from your data scope. Clicking the adjacent trashcan icon clears the selected assignee.
- You can postpone assigning a Case to a time after Case creation.
Status and Tracking Options
- Enable Auto-Update status (default: enabled) for the system to dynamically update the Case status as progress is made.
- Progress above 0% moves the status from To Do to In Progress.
-
- Progress = 100% moves the status of To Do and In Progress to Done.
- You can disable Auto-Update status for manual control.
Related Assets and Actions (optional)
To configure additional queries and actions
-
Under Additional Queries (optional), select one or more queries related to the Case. The Case does not track the progress of these additional queries.
- From the Module dropdown, select an asset type, and from the Select Query dropdown, select an existing query for the selected asset type, or click + Add Query to create a new query. To learn more about creating a new query, see Creating a New Query.
- Click the
+button to select an additional query. - Click the adjacent delete icon to delete the added query.
- Hover over the selected Additional Query and then click the View or Edit Query icon to verify or edit the query (similar to Base Query above).
- Click the
- From the Module dropdown, select an asset type, and from the Select Query dropdown, select an existing query for the selected asset type, or click + Add Query to create a new query. To learn more about creating a new query, see Creating a New Query.
-
Under Linked Enforcements (optional), from the Select Enforcement dropdown, select one or more Enforcement Sets to link to the Case for automated remediation.
- Click the
+button to select each additional Enforcement Set to link. - Click the adjacent delete icon to clear the selected Enforcement Set.
- Click the
Email Notification Settings
To configure Email notification settings
- Toggle on Email notification (default: disabled) to inform recipients about the Case opening.
- In Email Recipients, enter one or more email recipients, clicking Add for each additional recipient. It is recommended that at least one of these recipients should be the Assignee.
- In Custom Message, enter text to be added to the body of the email notification. In this method, you can add an enforcement action from the Notify category to send an external notification informing that a Case has been created.
Note
You can set email notifications only if email settings are configured under System Settings.
If you toggled on Set Email Notification (see above), all specified email recipients receive an email in the following format: A new Axonius case has been assigned to you, followed by a link to the new Case and your custom message.
Creating a Schedule
Use the Select Schedule tab to define the schedule for the automatically created Case Set directly from the Create Case drawer. You can set the schedule so that the newly created Case runs automatically at specified times and under certain conditions.
- To set a schedule plan in the Case Set, navigate to the Select Schedule tab, and under Select a Schedule Plan, click On. From the dropdown that opens, select the desired schedule. The scheduling criteria are similar to those for Enforcement Sets. Learn more about configuring each schedule plan.
- If you do not select a schedule, the Case Set defines a one-time Case.
Naming the Case Set
When you begin the process of creating a new Case, a Case Set is automatically created for this new Case. The Case Set is automatically assigned a name by the system. You can change this name and add a Description of what the Case aims to resolve.
To assign a Case Set name and description
- Open the Case Set Name tab.
- In Case Set name, give a unique name to your Case Set for better identification, instead of the default name Case Set_nnn.
- Type a Description for your new Case Set.
Running Cases on Added Assets Only
By default, each Case runs on all assets resulting from the query at the time the Case is run.
As the asset inventory changes over time, with assets being added and removed from the system, it is recommended to run a Case on the added assets only, i.e., the delta of assets matching the query since the previous successful Case run.
To ensure the Case only addresses the newest issues, select the Run on added entities only option under Additional Conditions when:
- Using the Create new case enforcement action (automated method).
- Using the Create A Case Set wizard (manual method).
This avoids processing the same remediated assets multiple times.
Updated 13 days ago