
Software Registry
The Software Registry is a dedicated space for viewing and managing both discovered and managed software, including software approval statuses. Use the Software Registry to manage software enrichments and maintain a list of approved or unapproved software in your organization, whether or not the software is installed on devices. You can use these enrichments as a basis for follow-up actions such as sending notifications when the system discovers unapproved software, or for removing unapproved software.
Required Permissions
- Manage Software - to view the Software Registry page.
- Edit Software - to modify the Approval Status field in the software inventory.
Populating and Managing the Software Registry
To access the Software Registry, select Software Registry on the Software page. The first time you use this feature, the page is empty.
Populate it by:
- Using automated adapter connections.
- Or by Manual upload
Automated Sources (Adapters)
Connect to specific adapters to continuously synchronize software data and approval statuses from external CMDBs or file repositories even when the software is not currently installed on any devices. Use this to maintain a source of truth list that persists in the Software Registry regardless of device discovery. All enrichment fields also appear in the Software table, so you can manage and track the software inventory in one place.
- CSV Adapter - Use the CSV - Software Inventory adapter to synchronize hosted files containing software inventory and approval statuses.
- ServiceNow - Map ServiceNow CMDB fields directly to the Axonius Software Registry fields. For configuration details, see Enriching Software Assets with ServiceNow CMDB Data.
- Custom Parsing - You can upload a list of fields from adapters and use Adapter Custom Parsing to map them to the Approval Status field, automatically adding them to the Software Registry.
Importing a CSV File
Upload a formatted CSV file to populate the list. This method always overrides existing software names, software vendors, and versions in the Software Registry.
To import a CSV file that contains a list of software:
-
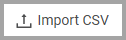
To upload the file, click Import CSV.
A browse dialog opens.
-
Select a CSV file and click Open.
Important:
To import the CSV file, you must use a template. You can't export the CSV, change the data, and then upload. Click software_registry_template.csv to download the template.
You can't enter a version in the CSV without filling in a row representing the software itself (software without a version). The upload fails if the row with the software (without a version) is missing.
CSV Template
- Name (required) - Name of the software.
- Vendor - Name of the software vendor.
- Approval Status - The exact approval status value for the software. (this field must exist in the file)
- Software Category - The exact matching value from the existing software categories, including capitalization. Possible values are listed in the Software Category dropdown in the Add Software form.
- Owner - A valid Email address for the software owner.
- Version - The software version number in free text.
- License Start Date - Date in
YYYY-MM-DDformat. - License End Date - Date in
YYYY-MM-DDformat. - End of Life - Date in
YYYY-MM-DDformat. - End of Support - Date in
YYYY-MM-DDformat. - License Quantity - Integer value.

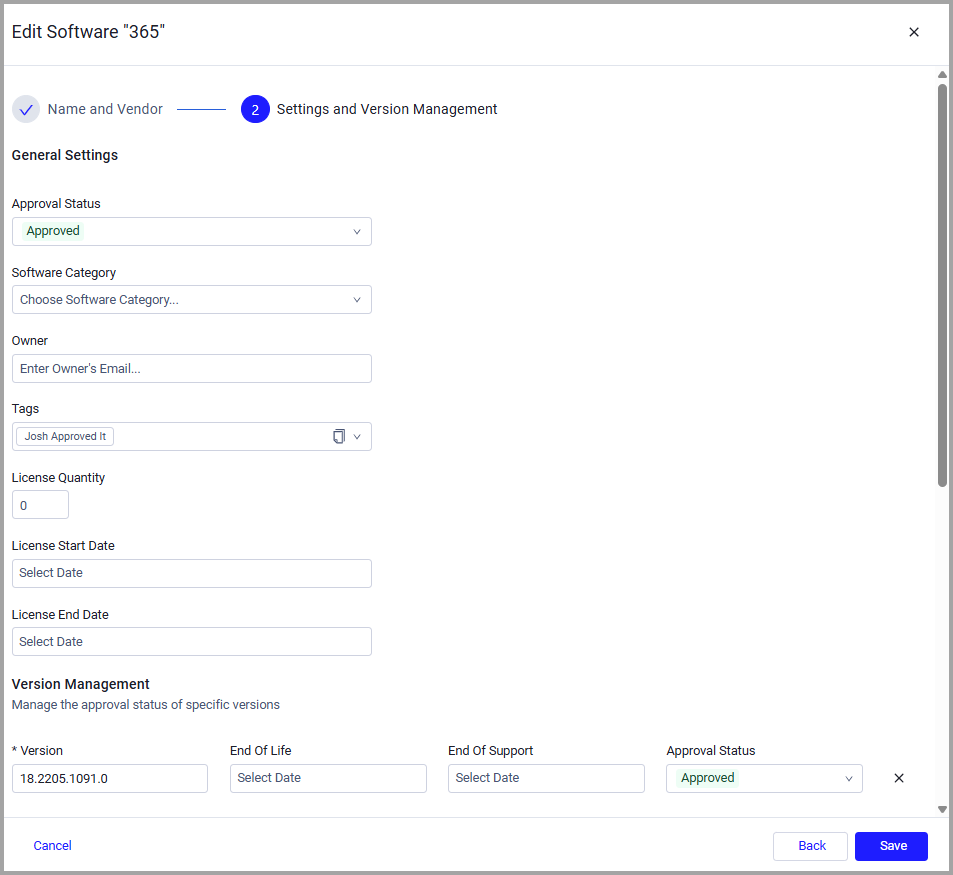
Manually Adding Software
- Make sure you are in 'Live Data' view.
- Click Add Software. The Add Software drawer opens for 1: Name and Vendor.
- Enter the Software Name (required) and the Vendor (optional).
- Click Next. The 2 - Settings and Version Management drawer opens.
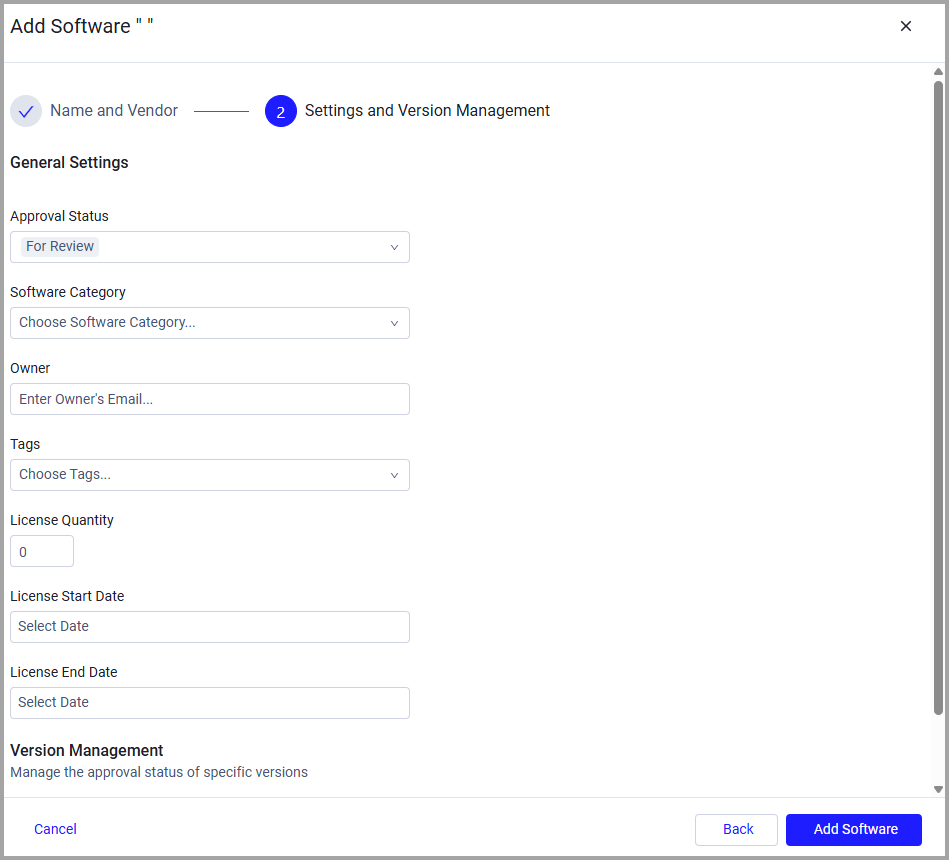
- Under General Settings, select the applicable Approval Status for the added software:
- Select and define any other optional settings.
- Under Version Management, use the plus to add specific versions of the software.
- For each version, enter the version and optionally select End of Life and End of Support.
- Select an Approval Status for each version (required). If software isn't Approved, you can't edit the approval status of a version, and all versions are set to Not Approved. For software that is Approved, you can enter different approval statuses for each version of the software.
Note:
If a Software isn't Approved, you can't edit the approval status of a version, and all versions are set to Not Approved.
- Click Save. The software now appears on the table.
Version Field Requirements
When you add or edit versions in the Software Registry:
- The Version field is mandatory.
- You must also provide at least one of the following: Approval Status, License Quantity, License Start/End date, End-of-Life date, or End-of-Support date.
- An error is displayed if you attempt to save without meeting these requirements.
Software Registry Display Rules
An asset appears in the Software Registry table if it meets either of the following conditions:
- The source is Manual, CSV file, or Adapter Enrichment (any values except Software Page).
- The software has a value assigned in the Approval Status field, regardless of how it was added to the system. For the list of approval statuses, see Approval Status.
These conditions make sure that software imported from external repositories or manually defined by administrators remains visible in the Software Registry, even if it isn't currently detected on any device in your environment.
Approval Status
The Software Registry manages approval statuses at both the software level and the version level. The approval status at the software level controls whether you can edit the approvals for individual versions.
You can select the following approval statuses:
- Approved - The software is authorized for installation and use within the organization.
- Not Approved - The software is prohibited or unauthorized for use within the organization. When you set software to Not Approved, all versions of that software are Not Approved and the version approval status can't be edited.
- For Review - The software has been identified but is waiting for evaluation to determine its compliance or security status. This is the default status for newly discovered software (except for software managed by SSO-based tools).
- Risk Accepted - The software has known risks such as vulnerabilities or policy violations, but the organization has granted an exception to allow its use (for example, for critical legacy business functions).
- Under Investigation - The security team or another authorized team is actively analyzing the software, generally because of suspicious behavior, unknown origins, or potential security concerns.
Understanding Approval Status Hierarchy
The software-level approval status determines how version-level approvals can be managed:
When software is Not Approved:
- All versions are automatically set to Not Approved.
- Version approval statuses are read-only and can't be changed.
When software is Approved:
- All versions are initially set to Approved.
- You can change the approval status of individual versions.
- Use this status to approve the software as a whole while restricting specific versions.
Importing Approval Statuses from External Sources
When you import software using CSV files or ServiceNow, the approval status hierarchy conditions apply:
- Software-level approval only: - Version statuses are automatically set based on the software-level status.
- Version-level approval included: - If at least one version is Approved, the software is automatically set to Approved. Approved and Not Approved versions can coexist only if the software is Approved.
- No approval status specified: - Software and versions automatically receive For Review status.
- Import validation: - The import fails if there are contradictions between software and version approval statuses. If software is Not Approved but versions are Approved, the import fails.
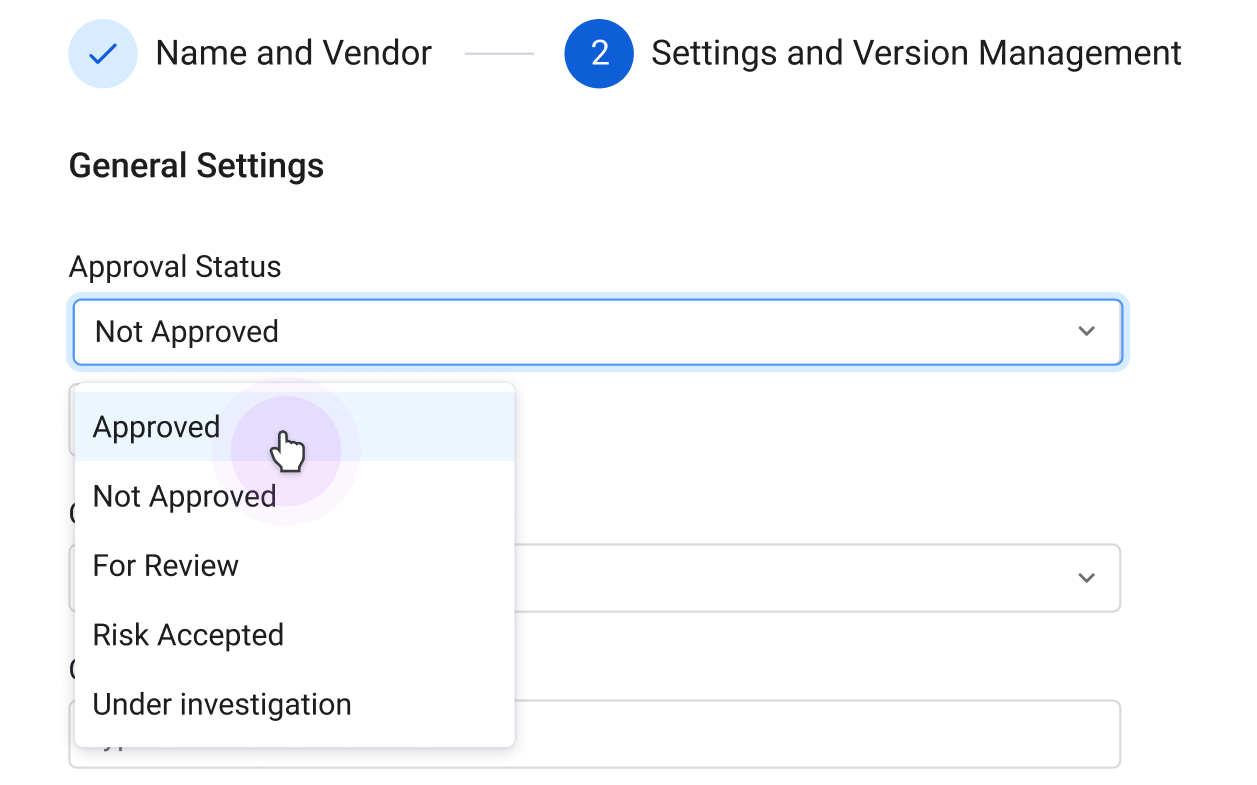
Software Registry Table
Note:
Initially, the Software Registry table isn't populated. To populate the table, see Populating the Software Registry.
The Software Registry table contains the following columns:
- Installed Software: Software Name - The name of the software (as it appears on the Software page).
- Installed Software: Software Vendor - The name of the software vendor.
- Approval Status - The approval status: Approved, Not Approved, For Review, Risk Accepted, or Under Investigation. For more details on these status types, see Approval Status. The status of any software imported without an approval status is set to For Review by default. Approval statuses are displayed in color so you can identify them easily.
- Installed Software: Software Version - The software version.
- Installed Software: Version Approval Status - Shows a summary of the approval statuses for all versions. When some versions are approved while others aren't, the system shows indicates this.
- Detection Status - Displays whether this software appears in your environment and is therefore presented in the Software page.
- Software Registry: Source - Shows how the software was added:
- Software Page - Added by using Edit Approval Status in the Software table.
- Manual - Added by using the Add Software button in the Software Registry.
- Imported - Imported to the Software Registry by using Import CSV file.
- Adapter - Imported into the Software Registry from external products through configured adapters.
- Software Category - Displays one or more software categories that are the most suitable for that software, enriched by Axonius Catalog.
- Owner - The owner of the application in the organization. Usually, this is the administrator with the highest-level administrator privileges.
- License Quantity - The number of purchased units of the software license.
- License Start Date - The start date of the software license.
- License End Date - The end date of the software license.
- Installed Software: End of Life - The date the software reaches end-of-life and is no longer sold by the publisher.
- Installed Software: End of Support - The date this software reaches end-of-support.
- Tags - Displays one or more user-defined labels for the software. See Working with Tags to learn more about adding tags.
- Software Registry: Last Modified - The time and date the software was last modified.
- Software Registry: Last Modified By - The person who last modified the software information.
- Inactive License Count - Displays a calculation of inactive licenses by subtracting the installed device count from the manually entered license quantity. A negative value means installations exceed licenses. The field is empty if no value was entered in the License Quantity field in the Software Registry.
Note:
Each row in the Software Registry table is expanded by individual version (similar to the Versions View of the Software page).
Searching and Filtering
You can filter the software that is displayed.

The following filters are available by default:
- Installed Software: Software Name - Filter by software name.
- Installed Software: Software Vendor - Filter by Software vendor.
- Approval Status - Filter by approval status.
- Installed Software: Software Version - Filter by software version.
- Installed Software: Version Approval Status - Filter by version level approval status.
- Detection Status - Filter by whether the software appears in the Software table (installed on a device).
- Software Registry: Source - Filter by how the software was added.
- Software Registry: Last Modified By - Filter by the person who last modified the software information.
Click + Filter to add or remove filters. Click Reset to clear all the filters and display all software.
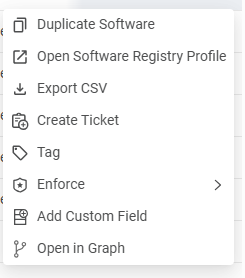
Software Registry Table Actions
Editing the Approval Status
- To edit the Approval Status, click the action button at the right side of the row and choose Edit Approval Status.
- Click Edit Approval Status and then set it to the approval status you want.
- You can also select one or more items and choose Edit Approval Status from the top of the page.
Important:
Changing software to Not Approved automatically sets all versions to Not Approved and makes version approvals read-only.
Editing the Software
To edit the information about the software:
- Click the action button at the right side of the row and choose Edit Software, or select one or more items click the More Actions button at the top of the table and click Edit Software.
- The Edit Software - Settings and Version Management drawer opens.
- Update the following general settings: Approval Status, Software Category, Owner, Tags, License Quantity, and License Start/End Date. You can also manage the approval status of specific versions.
Note:
- You can't edit a software's name or its vendor name.
- You can duplicate the software along with its Software Registry data to another asset.
- When you change a software's approval status from Approved to Not Approved, all version approval statuses automatically change to Not Approved and become read-only.
- Click Save to save your changes.
Duplicating the Software
- To duplicate the software, click the Actions button at the right side of the row.
- Select Duplicate Software. The Add Software drawer opens.
- Enter the new Software Name (required) and Vendor (optional) to avoid duplicates in the system.
- Click Next.
- The Add Software - Settings and Version Management drawer opens.
- Update the settings and then click Save.
Deleting a Row
Click the Actions button at the right side of the row, or select one ore more items and click the More Actions button at the top of the table and click Delete.
The software is removed from the Software Registry, and all its enrichment data is removed from the Software table. The Tags field isn't deleted if Tags existed in the Software Registry before the deletion.
Note:
All version enrichment information is also deleted when a software is deleted from the Software Registry.
All other Software table actions are available in the Software Registry table as well:
Exporting the Software Registry
To export the results to a CSV file, on the Software Registry page, on the right side above the table, click Export CSV. The CSV file is automatically downloaded with the following filename format: axonius-manual_software_.csv
When you set a filter, only the filtered data is exported to the CSV file.
For general information about working with tables, refer to Working with Tables.
Updated 9 days ago