
Creating Workflows
This section explains how to create and configure workflows within Axonius.
The Workflow Interface
The workflow configuration page is divided into two panes:
- Workflow canvas (left pane) - Visually represents the workflow structure.
- Configuration (right pane) - Displays settings for the selected node.
A workflow consists of:
- A trigger node (top) that Initiates the workflow:
- Event - The workflow run is triggered by an external event such as a Slack message is received or a notification from Crowdstrike is received via webhook.
- Scheduled - The workflow runs according to a set schedule.
- Manual - The workflow runs only when manually started.
- Other nodes, such as Action, Condition, Repeat for Each, Exit, and more.
See Viewing and Editing Workflows to learn about editing nodes and adjusting the canvas.
Creating a New Workflow
There are two ways to create a workflow:
- Manually using the procedure here
- Importing and Exporting Workflows
To create a Workflow
-
In the left navigation panel, click the Action Center
 icon, and then click the Workflows tab.
 -
In the All Workflows page that opens, click Create Workflow.
-
A new, activated workflow is created with a default name. The workflow trigger tile is automatically added. Optionally, change the workflow name or deactivate it via the Workflow Settings.
-
Next, select a trigger type.
Selecting a Trigger Type
To select the Workflow trigger type
- In the Trigger Type pane, select one of the following:
- Event (the default) - Workflow starts when a specified event occurs. In the Workflow pane, the top node displays the system-generated UUID (preceded by #) as well as an Event label. When the selected triggering Event occurs, the Workflow begins running.
- Scheduled - Automatically runs a triggering action according to a configured schedule. This starts the Workflow run.
- Manual - Runs a triggering action on demand (by clicking Save and Run). This starts the Workflow run.
- Next, configure the trigger.
Configuring the Trigger
To configure the trigger
- Select and set up the trigger:
- Next, add nodes to the workflow.
Note
When you select Trigger Type
=Scheduled or Manual, the only button available directly below it is Add Action, as in the second node you need to select the triggering action.
Adding Nodes to the Workflow
You build a workflow by adding nodes of different types that will describe the process you want to create.
To add nodes
- Hover over the
+icon to show a list of available nodes. Only nodes that can be added in the current context are shown. - Choose from:
-
Suggested nodes (if available) - Recommended nodes based on the workflow context. Learn how to use Suggested nodes.
-
Add Action
- An Action node is added to the Workflow. Select and configure the Action node. -
Add Event
 - An Event node is added to the Workflow. Select and configure the Event node. An Event node cannot follow an Action node configured to run on all assets.
 -
Add Condition
 - An Event Conditions node (following an Event node) or Action Conditions node (following an Action node) is added to the Workflow. Configure the Event condition or configure the Action condition with After and True branches.
 -
Add Delay
 - A Delay node is added to the Workflow. Configure the Delay duration.
 -
Repeat for Each
 - A Repeat For Each node and a nested loop beginning with an Action are added to the Workflow. Configure the query in the Repeat for Each node and the nested loop.
 -
Add Variables
 - A Write to data repository node is added to the Workflow. Add one or more variables to the Workflow Data repository.
 -
Add Query - A Query node is added to the Workflow. Configure the query in the Query node.
-
- When you have added and configured all the nodes you want in the workflow, click Save to save it. Or continue to save and run it or save and activate it.
Saving and Running/Activating the Workflow
When you have completed building the workflow, save it and run or activate it.
To save and run/activate the workflow
- For an Event triggered workflow - Click Save and Activate.
- For a Scheduled/Manual trigger - Click Save and Run.
The All Workflows folder opens with the newly added Workflow on top of the table. The workflow is saved to the Drafts (if configuration is incomplete) or Shared Workflows (if configuration is complete) folder.
Note
After the trigger is configured, click Save at any time during the configuration to save changes without running/activating.
Conditions and actions must be fully configured to save and activate/run. If not, the Save/Save and Activate/Save and Run buttons are disabled.
It is possible to Save a workflow with a Delay node configured with an invalid Delay time. However, the delay time must be valid to Save and Run or Save and Activate the workflow.
Configuring Workflow Settings
A newly created workflow is assigned a default name and is in Activate mode. This section describes how to assign the workflow another unique name or deactivate it. When you deactivate the workflow, its configuration remains in the system, but it doesn't run even when its triggering criteria are met.
To configure the workflow Settings (optional)
-
In the left canvas pane of the New Workflow screen that opens, click the Workflow Settings icon
 .
.

-
In the right pane of the Workflow Settings drawer that opens:
- In Workflow name, change the workflow name. The new name appears in the workflow canvas pane.
- Deactivate the workflow by toggling off Activate.
Using Suggested Nodes
The Axonius Workflows Recommendation engine can suggest the next node to add to your workflow, making it easier to build complex and dynamic workflows.
- The Recommendation Engine suggests up to three relevant nodes based on the previous node in your workflow. For example, after a Slack message action, it might suggest a response event or an action condition.
- Suggestions are currently provided only for the node following the bottommost node in the workflow.
- The Axonius Workflow Node Recommendation engine currently supports specific interactive actions and their response events. It is continuously being improved and will support more nodes in the future.
Benefits of using suggested nodes include:
- Simplifies workflow building - You can quickly add relevant nodes.
- Improves workflow logic - Ensures a clear and logical workflow structure.
- Enhances workflow dynamics - Builds more complex Workflows based on user interaction and responses.
To add a suggested node to the workflow
-
Under the bottommost node, hover over the
+icon to view suggestions. -
In the Suggested node, click Add [event type] to add the suggested node to the workflow. You can also choose to add a different node.
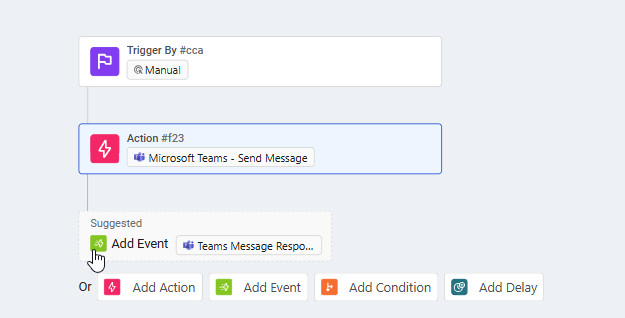
The following screen shows the response event recommended by the system when hovering on the + sign below the Microsoft Teams - Send Message interactive action.
Supported Interactive Actions and Suggested Events
The following table lists the currently supported interactive actions, and their suggested response events.
| Interactive Action | Suggested Event |
|---|---|
| Slack - Send Direct Message to a User | Slack Message Response |
| Slack - Send Message via Webhook | Slack Message Response |
| Microsoft Teams - Send Direct Message to a User | Teams Message Response |
| Microsoft Teams - Send Message | Teams Message Response |
| Microsoft Teams - Send Direct Message to Assets | Teams Message Response |
| Microsoft Teams - Send Direct Message to a Channel | Teams Message Response |
Example - Scheduled Workflow with Slack Interaction
The following example shows a workflow that begins with a scheduled enforcement action that sends a Slack message. Each time a user responds to the Slack message, an event occurs, and based on the response, the workflow continues.
Configure the workflow as follows
- Set the Trigger Type to Scheduled and configure a schedule plan for the triggering action of the Workflow. The Scheduled label appears in the Trigger By node in the Workflow pane.
- Hover over the Trigger By node, click the
+icon, and click Add Action. An Action node opens; the system- generated UUID appears on the node (preceded by #). A UUID also appears on the Trigger By node. - In the Select Action pane, select the Slack - Send Direct Message to Assets Enforcement Action as the triggering action. The action name appears in the Action node.
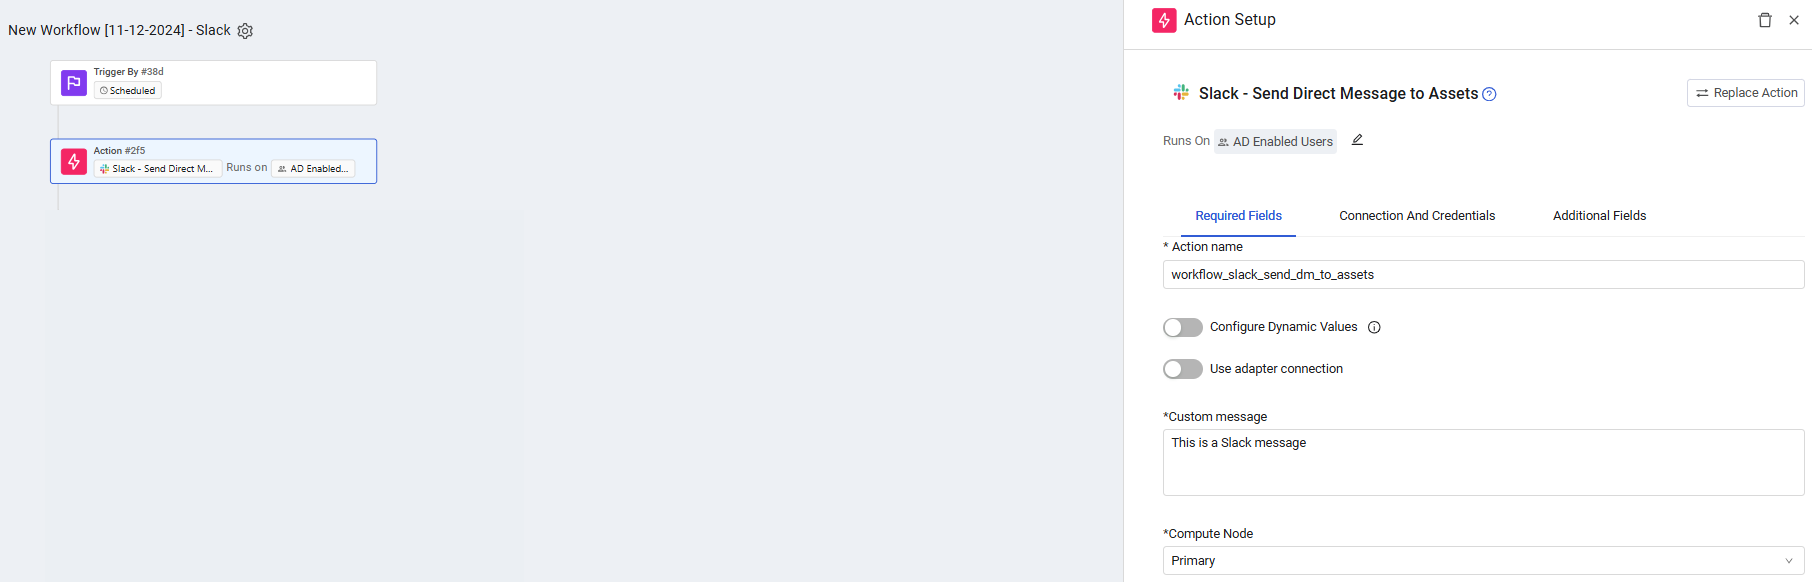
- In the Action Setup pane that opens, do the following:
- Select the Slack - Send Direct Message to Assets Enforcement Action as the triggering action. The action name appears in the Action node.
- Select the Module and Query Name of the query that defines the assets on which to run the Workflow, and click Apply.
- Configure the Required Fields.
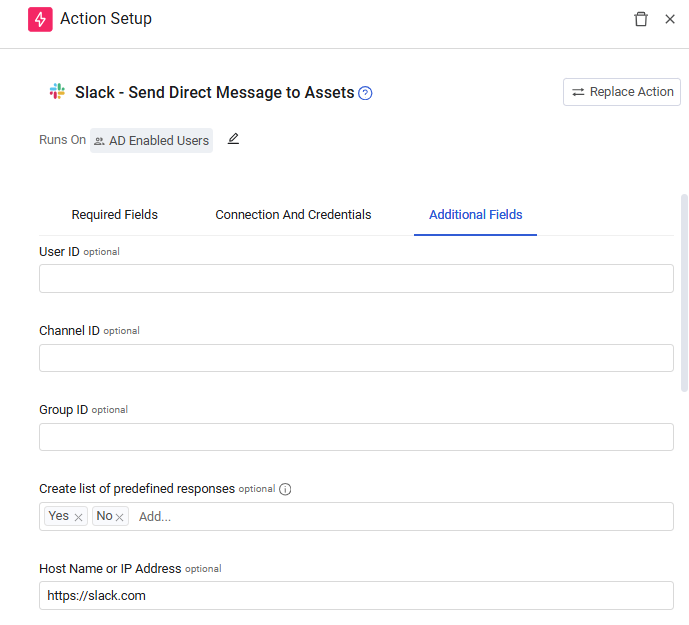
- In Additional Fields, configure the predefined responses (buttons) to be added to the Slack message that is sent to each user resulting from the query.
Note
You can also use the Slack - Send Message to Channel enforcement action, which is configured with predefined responses, in a workflow.
- Hover over the Action node, click the
+icon. The , and click.
Note
This interactive action is not yet supported to provide a suggested response event.
-
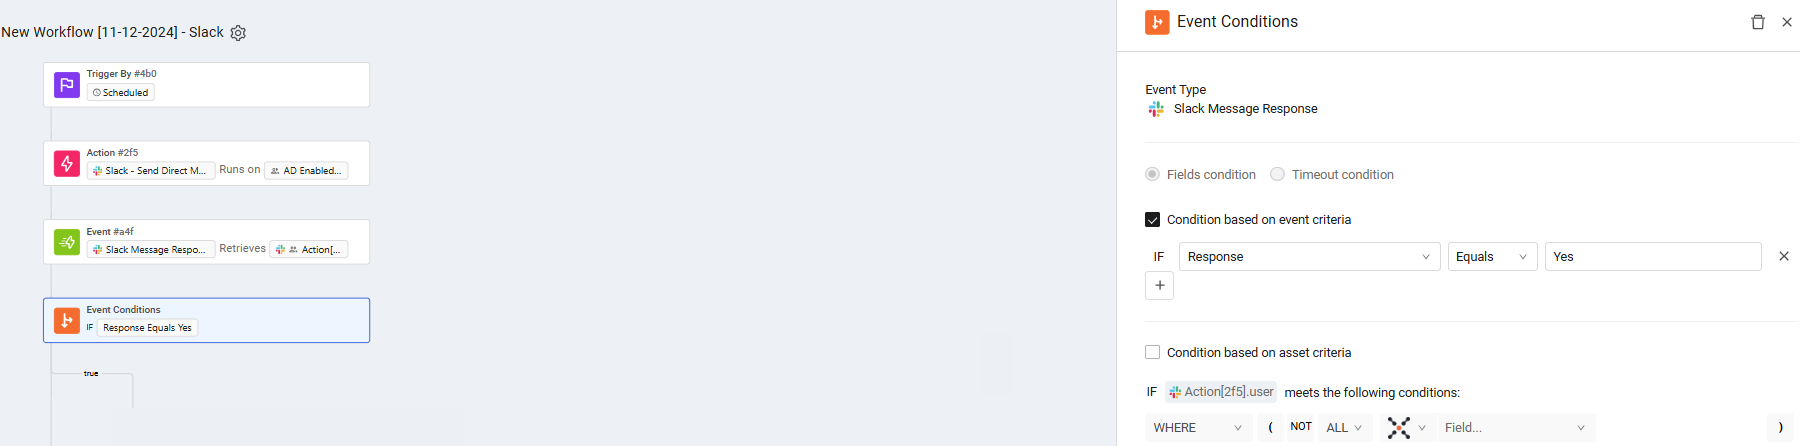
In the Event pane that opens, select the Slack Message Response event. The Event pane shows the Retrieved Asset from the previous node. It also shows the Retrieves information in the Event node. This event is sent each time a user responds to the Slack interactive message using the Response buttons.

-
Hover over the Event node, click the
+icon, and click. -
In the Event Conditions pane that opens, add an Event Condition - If Response Equals Yes. This enables performing one action if the response to the Slack message is Yes (True branch), and another action if the response is other than Yes (After branch).
-
Hover over the True branch (user Response Equals Yes), click the
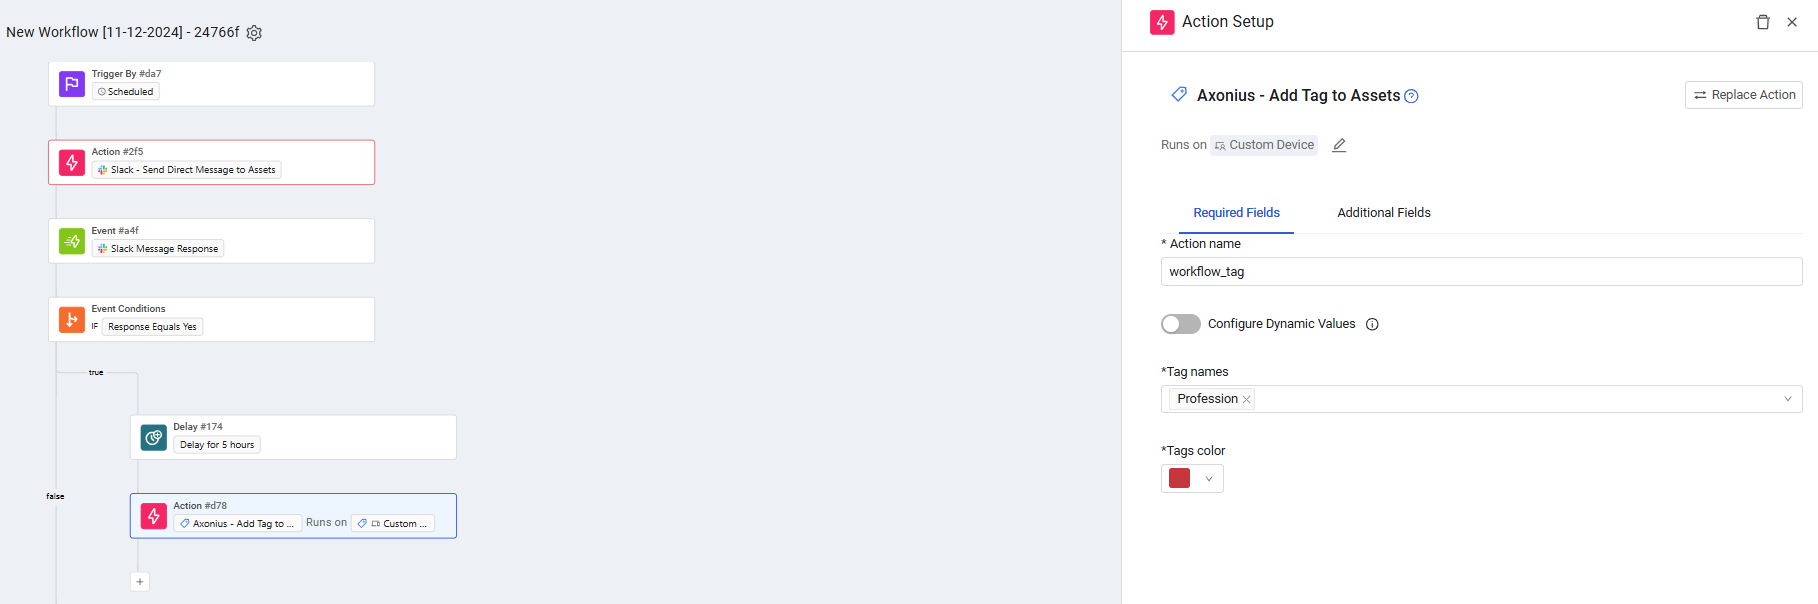
+icon, and then click to add a Delay node to the True branch. In the Delay pane, configure a delay of 5 hours. -
Hover over the Delay node, click the
+icon, and then click. -
In the Action Setup pane that opens, add an Axonius - Add Tag to Assets Enforcement Action to the True branch and configure it, including selecting related assets.
-
Click Save to save the Workflow.
Updated 5 months ago