
AppNeta
AppNeta provides monitoring of network paths, flows, packets, and web applications.
Types of Assets Fetched
This adapter fetches the following types of assets:
- Devices
Parameters
-
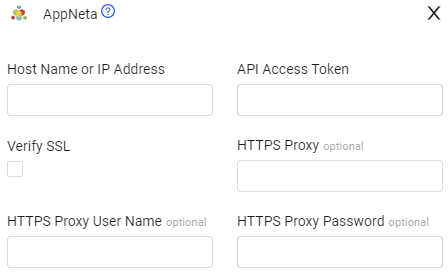
Host Name or IP Address (required) - The hostname or IP address of the AppNeta server that Axonius can communicate with via the Required Ports.
-
API Access Token (required) - An API Key associated with a user account that has permissions to fetch assets.
To create an access token, see Create an Access Token. -
Verify SSL - Select whether to verify the SSL certificate of the server against the CA database inside of Axonius. For more details, see SSL Trust & CA Settings.
-
HTTPS Proxy (optional) - Connect the adapter to a proxy instead of directly connecting it to the domain.
-
HTTPS Proxy User Name (optional) - The user name to use when connecting to the value supplied in Host Name or IP Address via the value supplied in HTTPS Proxy.
-
HTTPS Proxy Password (optional) - The password to use when connecting to the server using the HTTPS Proxy.
-
To learn more about common adapter connection parameters and buttons, see Adding a New Adapter Connection.
APIs
Axonius uses the AppNeta API.
Required Ports
Axonius must be able to communicate with the value supplied in Host Name or IP Address via the following ports:
- TCP port 80
- TCP port 443
Required Permissions
The value supplied in API Access Token must be associated with credentials that have permissions to fetch assets.
Version Matrix
This adapter was only tested with the versions marked as supported, but may work with other versions. Contact Axonius Support if you have a version that is not listed, which is not functioning as expected.
| Version | Supported | Notes |
|---|---|---|
| v3 | Yes | -- |
Supported From Version
Supported from Axonius version 4.6
Create an Access Token
To create an access token
- Navigate to

>Manage Access Tokens. - Click Create Token.
- Enter a token name. The name can be descriptive and include spaces.
- Specify an expiration date or select Never. The token is automatically revoked when reaching the expiration date.
- In the Roles section, specify the permissions for the token (less than or equal to the user's permissions).
- In the Organization Membership section, select Use dynamic membership if you want the token to access any organizations that you have now and in the future (as new organizations are added or removed).
- In the Select Organizations section, select the organizations you want the token to have access to.
Note
The selection of organizations is static. New organizations available to you won't be accessible by the token.
- Click Create Token.
- Copy the token and save it to a secure location, as the token won't appear again.
- Click Finished.
Updated 10 months ago