
Adding Follow-Up Actions and Workflows
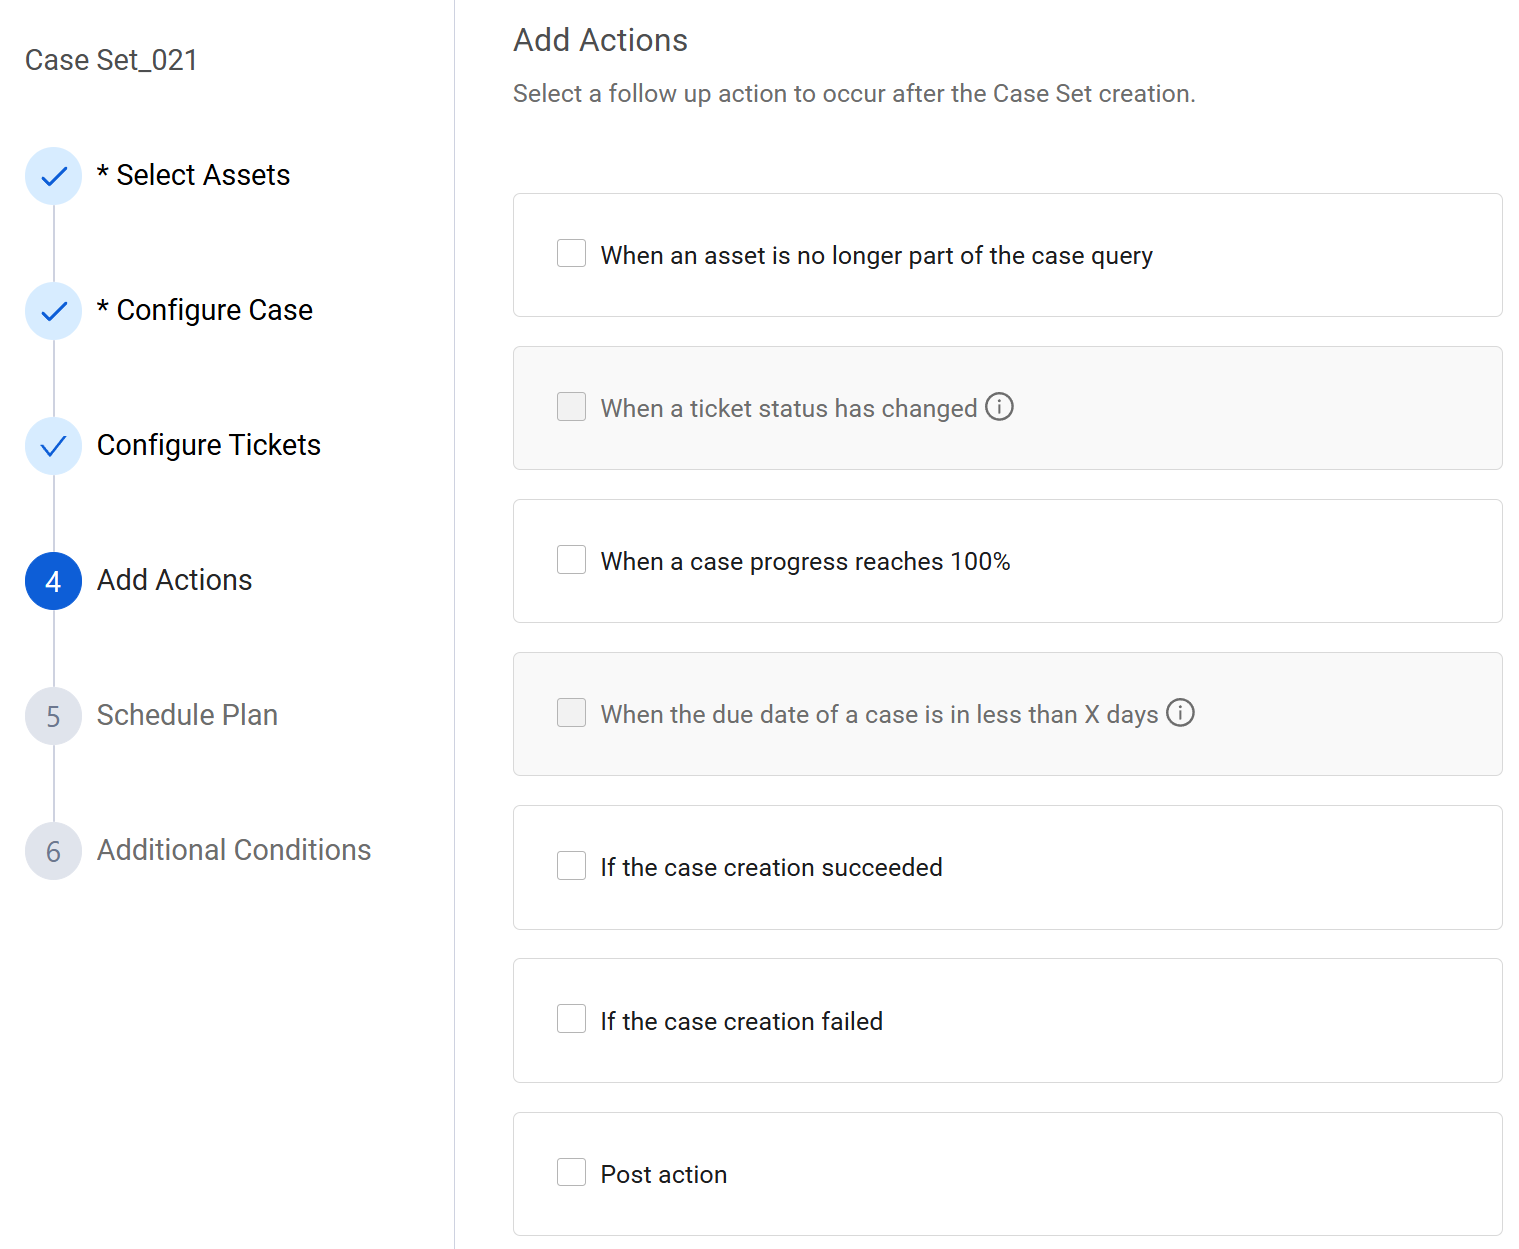
In Step 4: Add Actions of the Create a Case Set wizard, use follow-up actions to automate responses to events that occur after a Case or ticket is created.
Note
The triggers displayed in the UI are dynamic. Depending on whether your Case Set is configured for internal Axonius Cases or external tickets, some success or failure scenarios may be hidden or replaced with relevant alternatives.
Scenarios for Follow-Up Actions and Workflows
Follow-up actions and workflows are automated responses triggered by specific scenarios in your Case Set. These scenarios depend on whether you've configured your Case Set with an external ticketing system.
For each scenario you enable, you can add one or more actions or workflows to automate tasks, such as sending notifications, updating tickets, or modifying the Case itself.
Event-Based Scenarios
Event-based scenarios are triggered by specific events related to the assets or the status of a Case or ticket.
-
When an asset is no longer part of the case query - You can select Actions and Workflows to run when an asset that initially matched the Case query (at the time the Case is created) no longer meets the criteria. This typically happens during the next Discovery Cycle after the asset has been remediated.
-
When a ticket status has changed - This scenario is only selectable if your Case Set is configured with an external ticket. You can select Actions and Workflows to run for any status change or for specific predefined statuses such as 'Closed' or 'Resolved'. See how to specify the ticket statuses to monitor. For example, you can update the Case status to match the ticket status (e.g., set the Case status to 'Closed" when the ticket status becomes 'Resolved'.
-
When a case progress reaches 100% - You can select Actions and Workflows to run when all assets that initially matched the Case criteria (at the time the Case was created) have been resolved and no longer meet the query.
-
When the due date of a case is in less than X days - When you select this option, a dropdown opens for selecting the number of days until the due date. You can select Actions and Workflows to run when the due date of the Case is within the number of selected days. You can configure different Actions and Workflows for different timeframes. Fr example, within five days of the due date, you can send a reminder notification to the assignee. And within one day, you can escalate the Case to a manager.
Creation-Based Scenarios
Creation-based scenarios are triggered by the success or failure of a Case or ticket creation.
- If the case creation succeeded - This scenario is only available for internal Axonius Cases without an external ticket. Select Actions to run if the Case is created successfully.
- If the case and ticket creation succeeded - This scenario is only available if your Case Set is configured with an external ticket. Select Actions to run if both the Case and the external ticket are created successfully.
- If case creation Failed - This scenario is only available for internal Axonius Cases without an external ticket. Select Actions to run if the Case creation fails.
- If the case and ticket creation failed - This scenario is only available if your Case Set is configured with an external ticket. Select Actions to run if the creation of the Case and/or the external ticket fails.
- Post action - Select Actions to automatically run after every Case Set run, regardless of whether a Case or ticket was created.
Selecting Ticket Status to Monitor
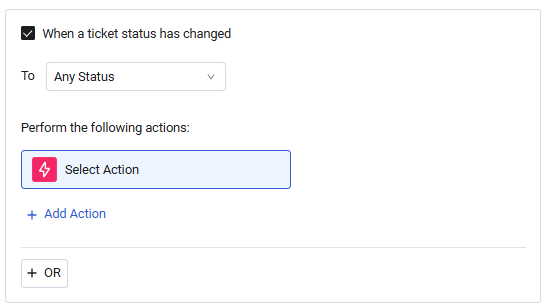
For the When a Ticket Status has Changed scenario, you can configure actions and workflows to run for any status change or for specific status changes.
To select the ticket status to monitor
-
From the To dropdown, select:
-
Any Status (default) - Actions and workflows run for any change in the ticket's status.
-
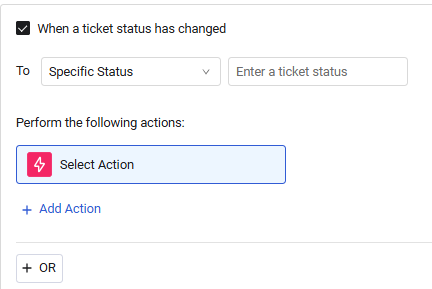
Specific Status -Actions and workflows run only for a specific change to the ticket status. In the second box that opens, type the exact ticket status that should trigger the actions and workflows (e.g., "Closed", "Resolved").
-
-
To configure different actions and workflows for multiple specific statuses, click + OR and repeat the previous step.
Adding Follow-Up Actions and Workflows
You can add follow-up Actions for any of the scenarios listed above, but Workflows can only be added for event-based scenarios (When an asset is no longer part of the case query, When a ticket status has changed, When a case progress reaches 100%, or When the due date of a case is in less than X days).
To add follow-up actions and workflows
- In the Step 4: Add Actions section, select the checkbox next to the scenario you want to enable.
- Add and configure Actions or add and configure Workflows.
Adding Follow-Up Actions
Follow these steps to add and configure follow-up actions for any of your chosen scenarios. You can add multiple actions to a single scenario.
To add follow-up actions
- For an event-based scenario: Under the Perform the following actions: section, click + Add Action.
Note
This step is not relevant for non-event-based scenarios, as adding an action is their only option, and the Select Action node and pane for configuring the first follow-up action is already open.
-
In the Select Action pane, choose an Action from the list. The selected action appears in the Select Action node.
-
In the Action Setup pane for the selected Action, from the Run On dropdown, select the entity that the action should apply to. The selected Runs On asset type is displayed on the right of the Action node.
- Asset - Refers to the entity that triggered the Case, enabling actions such as modifying an asset field (e.g., device) or sending asset details via email.
- Case - Refers to the Case information itself. Only available for the event-based scenarios. This allows for actions such as sending the Case ID or URL to a ticket or email, or incorporating the Case creation date or due date in custom data or tags.
- Ticket - Refers to the external ticket linked to the Case. Only available for event-based scenarios and if an external ticket is linked to the Case Set.
-
Fill in all Required Fields and any additional (optional) fields, as needed.
Note
For more information on a specific action, click the ? next to its name to view its detailed documentation.
- To add an action, click + Add Action and proceed from step 2.
Note
To remove an action, hover over it and click the trashcan icon.
Adding Follow-Up Workflows
Follow these steps to add and configure follow-up workflows for event-based scenarios: When an asset is no longer part of the case query and When a ticket status has changed. You can add multiple workflows to a single scenario.
To add Workflows
-
Under the Perform the following actions: section, click + Add Workflow. A new Workflow Configuration screen opens. The workflow automatically starts with a triggering event that reflects your selected scenario. This event is fixed and cannot be changed.
- When an asset is no longer part of the case query: The Workflow trigger is When an asset is no longer part of a Case.
- When a ticket status has changed: The Workflow trigger is When a ticket status has changed.
-
Add nodes to the Workflow, as desired.
-
When done, click Add Workflow to Case Set to save it.
-
To add another workflow, return to Step 1.
Note
To remove a workflow, hover over it and click the trashcan icon.
Updated 4 months ago