
Deploying the Google Workspace (G Suite) Adapter
To deploy the Google Workspace (G Suite) adapter, perform the following steps:
1. Create Google Workspace (G Suite) Credentials with the Appropriate Permissions
1.1 Create a Service Account and Enable Domain-Wide Delegation
Step 1: Create a Service Account in Google Cloud Console
-
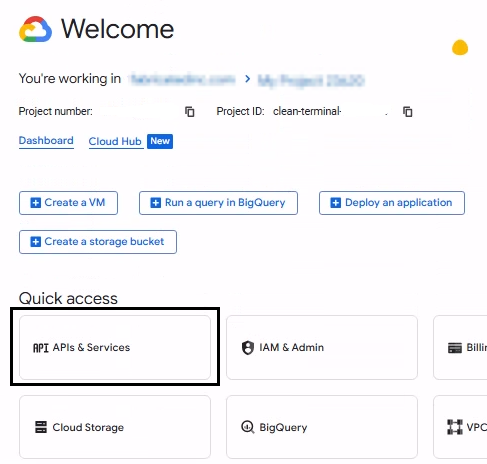
Go to the Google Cloud Console.
-
Select an existing project or create a new one.
-
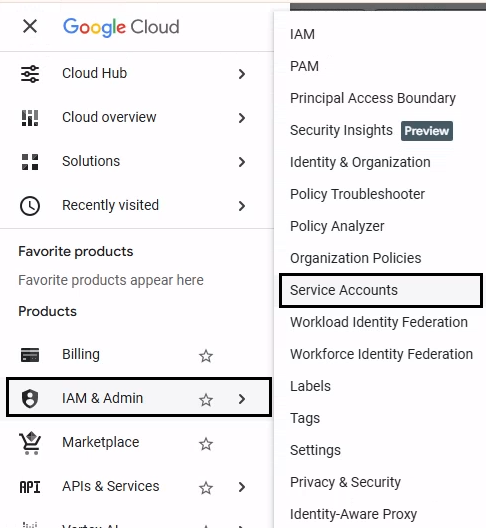
Navigate to IAM & Admin → Service Accounts.
-
Click Create service account.
-
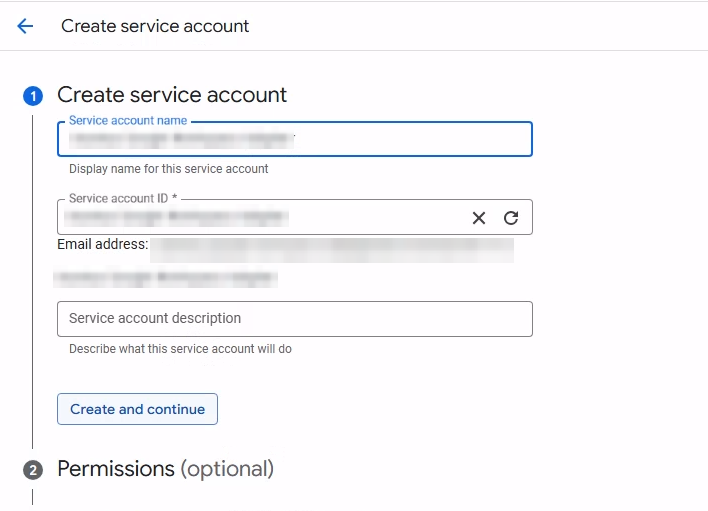
Enter a name (for example, Axonius Google Workspace Adapter).
-
Click Create and continue.
-
Skip granting roles (roles are not required for domain-wide delegation).
-
Click Done.
Step 2: Create and download the Service Account Key
-
Click the newly created service account.
-
Open the Keys tab.
-
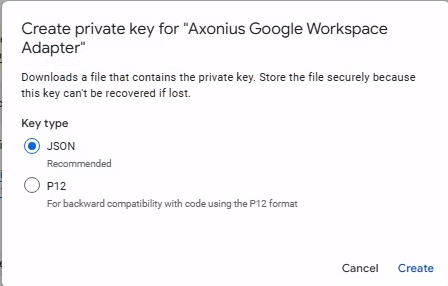
Click Add Key → Create new key.
-
Select JSON as the key type.
-
Click Create.
-
Save the downloaded JSON file securely.
Step 3: Enable Domain-Wide Delegation
-
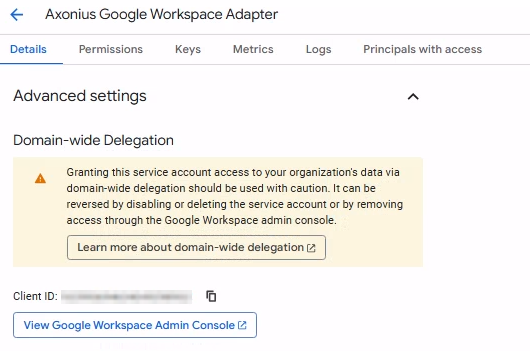
In the service account details page, click the Details tab.
-
Click Advanced settings to expand the section.
-
Copy the Client ID displayed.
-
Keep this ID ready for the next step in the Google Workspace Admin console.
Step 4: Authorize Service Account in Google Workspace Admin Console
-
Go to the Google Workspace Admin Console.
-
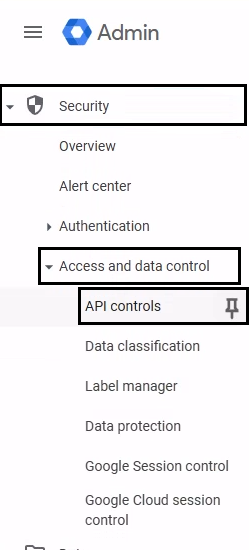
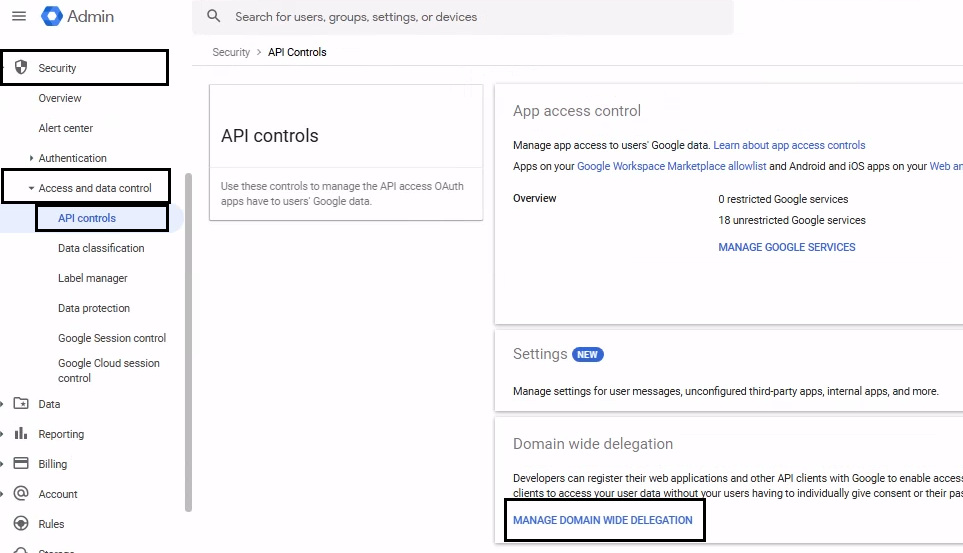
Navigate to Security → Access and data control → API controls.
-
Scroll down to the Domain-wide delegation pane.
-
Click MANAGE DOMAIN WIDE DELEGATION.
-
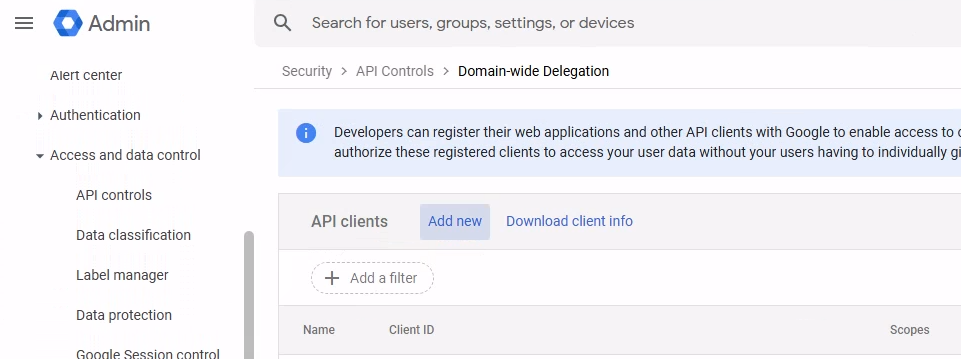
Click Add new.
-
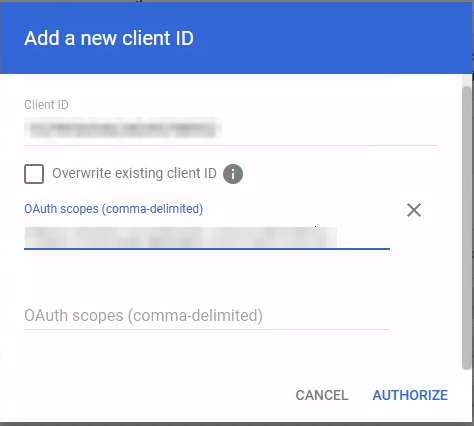
In the Client ID field, paste the unique Client ID you copied before.
-
In the OAuth scopes field, enter the comma-separated list of scopes. See Required Permissions.
-
Click AUTHORIZE.
1.2 Enable Required Google Cloud APIs
Enable Google Cloud APIs
-
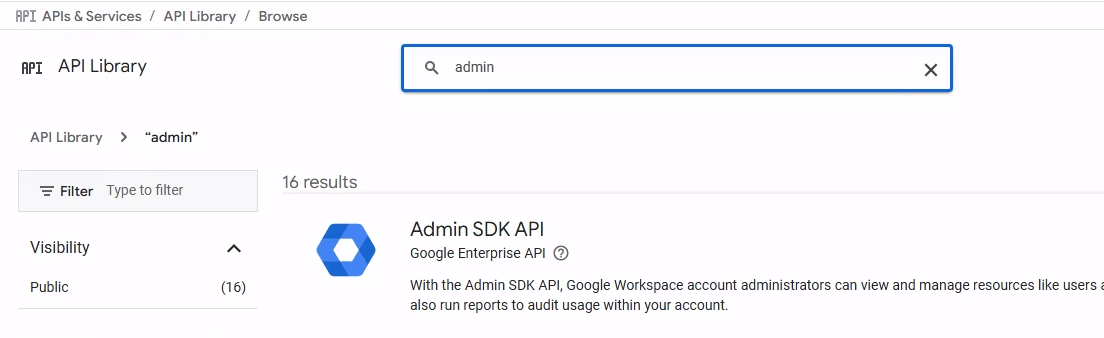
Go to Google Cloud Console → APIs & Services → Library.
-
Select the same project where the service account was created.
-
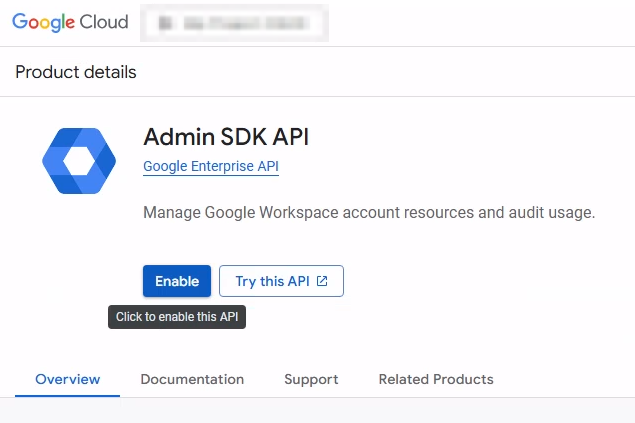
Search for the Admin SDK API in the Library.
-
Click Admin SDK API from the search results.
-
Click Enable.
-
Repeat as needed for other APIs.
For additional APIs required for features like Cloud Identity devices, Groups, Calendars, and Chrome Management, refer to Advanced Permissions.
1.3 Create and Configure a User Account
Step 1: Create a Dedicated User
-
Go to Google Workspace Admin Console → Directory → Users.
-
Click ADD NEW USER and enter the user details (for example,
[email protected]).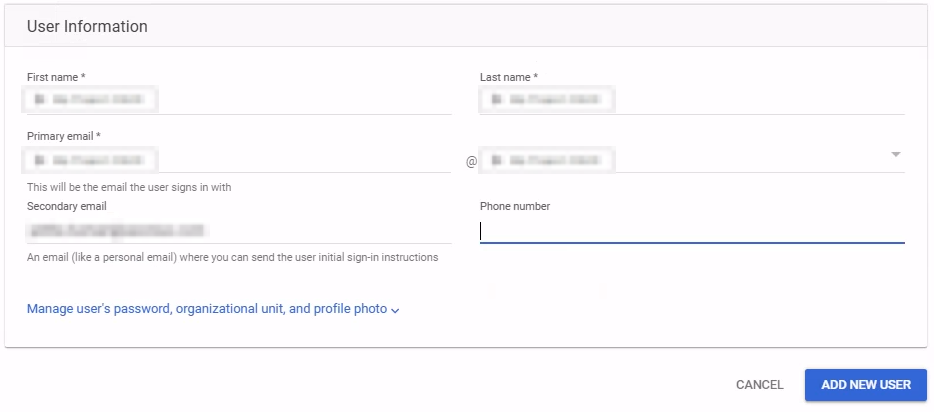
-
Open the newly created user account and navigate to the Security tab.
-
Important: Disable 2-step verification for this account:
-
Set 2-step verification to OFF.
-
-
Save the changes.
Step 2: Assign Admin Role or create a New Role with the Least-Privilege Permissions
Option A: Use a Pre-built Admin Role (Recommended)
- Navigate to Account → Admin roles.
- Assign the user to a pre-built role (for example, User Management Admin) with read-only access.
Option B: Create a Custom Role (With Least-Privilege Permissions)
- Navigate to Account → Admin roles → Create new role.
- Enter a role name (for example,
Axonius Read-Only). - Under Privileges, select the specific read-only permissions listed in the Required Permissions.
- Click Continue and then Create Role.
- Click Assign users and select the user you created.
1.4 SaaS Applications (Optional)
This unique authorization is required only for specific asset types and must be configured only if you want to fetch Licenses and Application Settings.
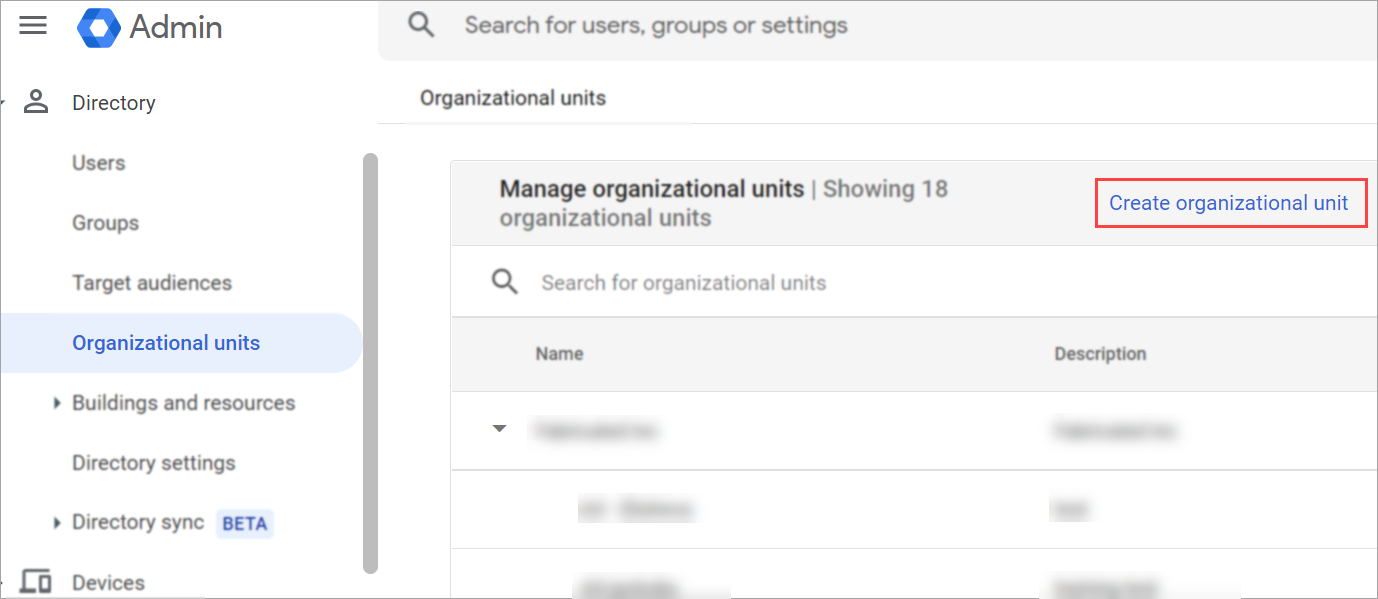
Create an SSO-Excluded Organizational Unit
-
In the Google Workspace Admin Console, from the navigation menu, navigate to Directory
>Organizational Unit. -
Click Create new organizational unit.
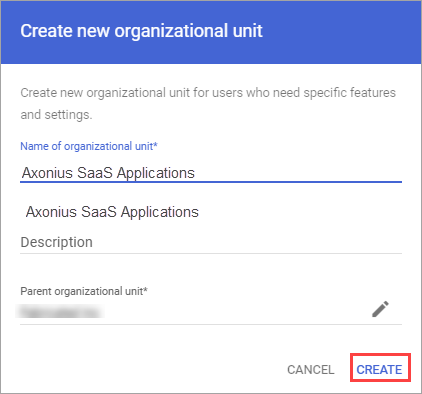
-
Enter a Name for the Organizational Unit (for example, Axonius SaaS Applications).
-
Click Create.
-
From the left navigation menu, navigate to Security
>Authentication>SSO with third party IdP. -
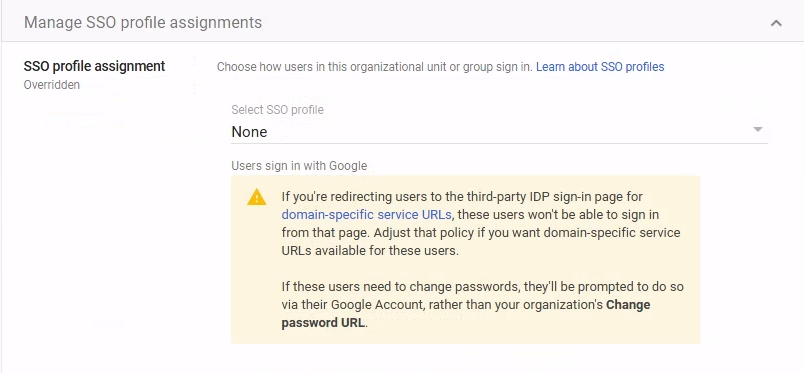
In the Manage SSO profile assignments section, click Get Started or Manage.

-
In the Manage SSO profile assignments page, on the left pane, expand the Organizational units section and select the organizational unit you just created.
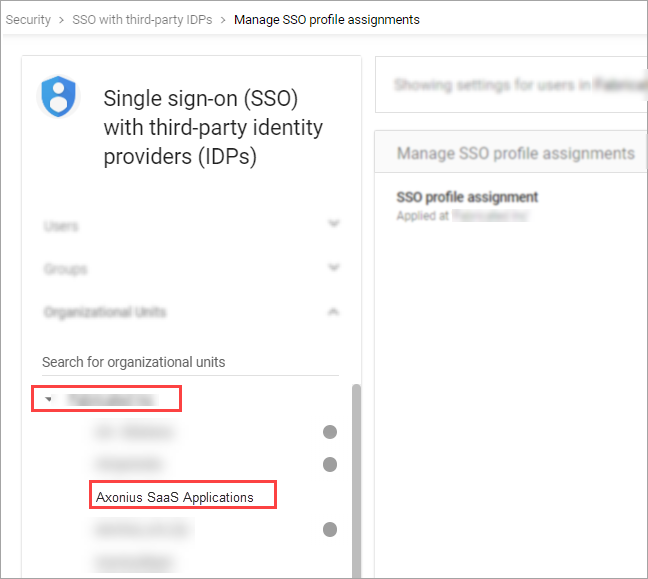
-
Under SSO profile assignment, select None.
-
Click Save.
Username / Password
- Use the user you created before.
- Licenses: Ensure the Enterprise License Manager API is enabled and the scope
https://www.googleapis.com/auth/apps.licensingis authorized. - Application Settings: Ensure the Group Settings API is enabled and the scope
https://www.googleapis.com/auth/apps.groups.settingsis authorized. - Record the Username and Password for later use.
Create a Custom Role in Google Cloud Console
-
Log into Google Cloud Console as an administrator.
-
Navigate to IAM & Admin → Roles.
-
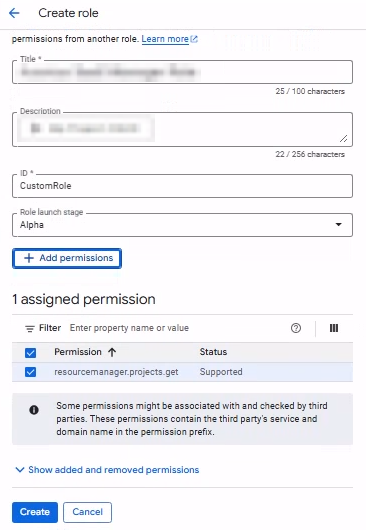
Click Create role.
-
Enter a Title (for example,
srv-axonius-sm-role). -
Click Add permissions.
-
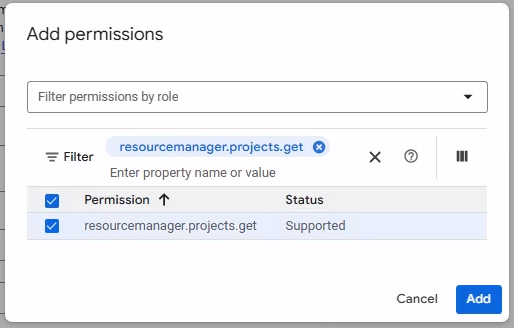
Search for required permissions(for example,
resourcemanager.projects.get).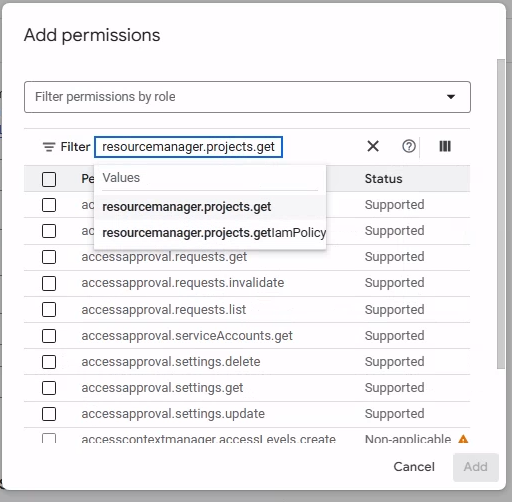
-
Select the permission and click Add.
-
Click Create.
Assign the Role to the User
- Navigate to IAM & Admin → IAM.
- Locate the principal associated with the account.
- Click the Edit icon next to the principal.
- Click Add Another Role.
- Locate and select the custom role you created.
- Click Save.
- If prompted, click Continue.
Enable Admin SDK API for the Project
- Open the following URL, replacing
<project_id>with your project ID from the JSON key file:
https://console.developers.google.com/apis/api/admin.googleapis.com/overview?project=<project_id> - Click Enable to activate the Admin SDK API.
1.4.1 Configure Authentication for SaaS Application Settings (Optional)
Depending on your organization’s security policies, you can either enable 2-step verification (MFA) for the user you just created or exclude the user from the 2-step verification policy.
You only need to complete one of the following sections:
- Enable Multi-Factor Authentication (recommended)
- Optional: How to Exclude the User From MFA
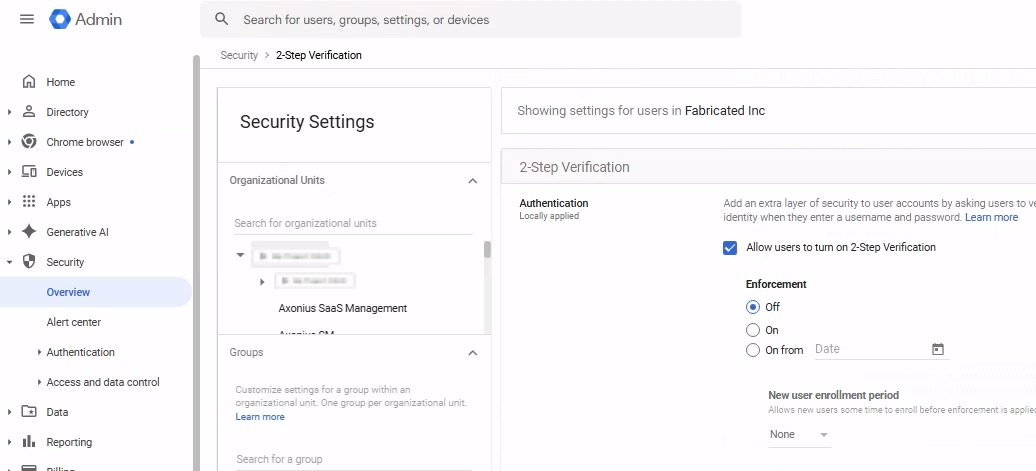
Enable Multi-Factor Authentication (Admin Console)
Prerequisite: These steps must be performed by a Super Admin.
-
Sign in to the Google Workspace Admin Console.
-
Navigate to Menu → Security → Authentication → 2-Step Verification.
-
Select the Organizational Unit (OU) or Group where the user resides.
-
Enable Allow users to turn on 2-Step Verification.
-
Under Enforcement, select Off (allows manual enrollment).
-
Click Save.
Setting Up Multi-Factor Authentication
Axonius enables you to use Multi-Factor Authentication in several ways. You can use your organization’s SSO according to its policy, Google Authenticator, or the Axonius built-in Multi-Factor Authentication.
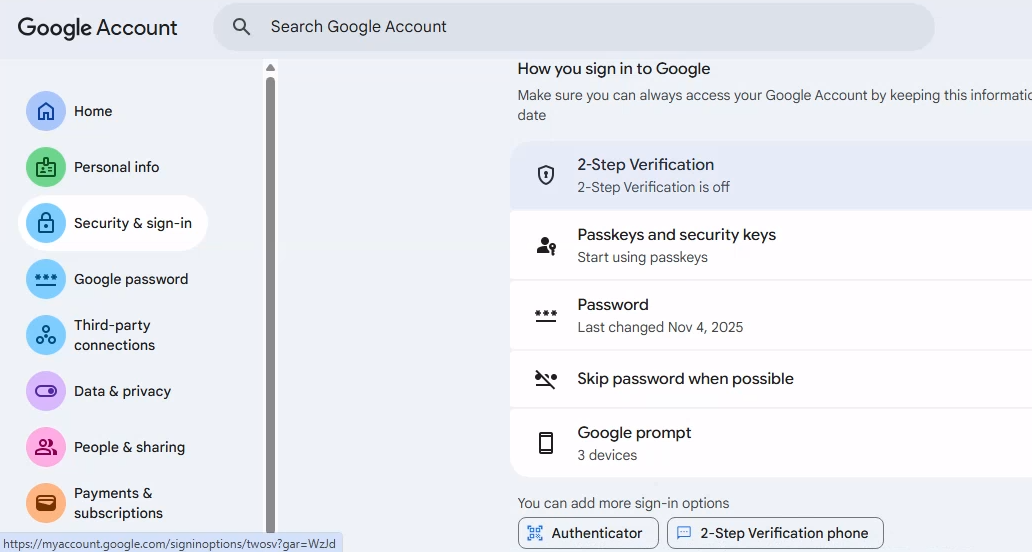
Set Up Google 2-Step Verification
- Sign in to Google My Account.
- Navigate to Security & sign-in.
- Under How you sign in to Google, click 2-Step Verification.
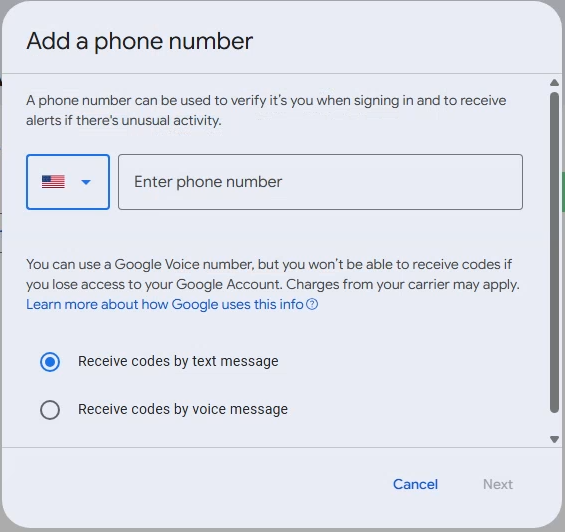
-
Complete the initial setup (for example, phone number, SMS, or Google prompt).
-
Enter the code you received from Google and click Next.
-
Click Turn on to enable 2-Step Verification.
-
In the 2-Step Verification page, scroll to the Add more second steps to verify it’s you section.
-
Click Authenticator app.
-
Use the Axonius Built-In Multi-Factor Authenticator, install Google Authenticator on your phone, or add a Chrome extension.
-
Scroll to Authenticator app and click Set up authenticator.
-
Click Can’t scan it? to reveal the Secret Key.

- Copy the Secret Key.
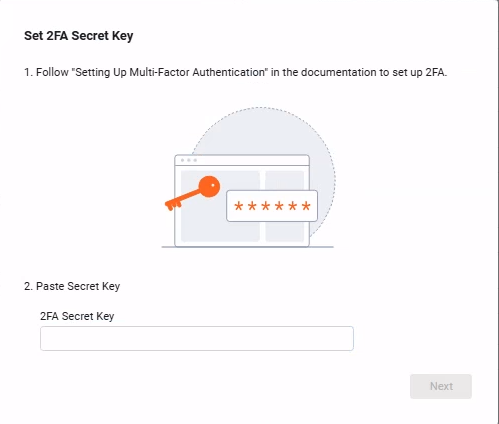
Set Up Axonius Built-In Multi-Factor Authentication
- On the adapter Add Connection screen in Axonius, click the Generate Secret Key icon.
- The Set 2FA Secret Key screen opens.
- Paste the Secret Key copied from Google into the 2FA Secret Key field and click Next.
- Axonius generates a 6-digit verification code.
- Copy the 6-digit code.
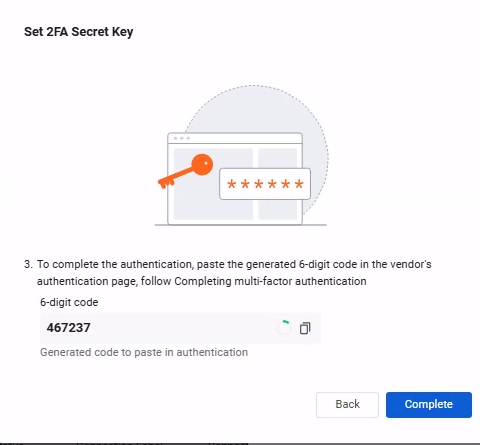
- Return to the Google Set up authenticator screen, click Next, and paste the code to complete verification.
- Click Verify.
- Back in Axonius click Complete on the Set 2FA Secret Field dialog.
- Click Save.
Optional: How to Exclude the User from MFA
If your organization enforces 2-Step Verification globally, follow the steps below to exclude the service user.
Exclude the user using an Organizational Unit (OU)
- In the Admin Console, navigate to Directory → Users.
- Select the user and move them to an OU where 2-Step Verification enforcement is set to Off.
Exclude the user using Group or OU enforcement settings
- Navigate to Security → Authentication → 2-Step Verification.
- Select the OU or Group containing the user.
- Set Enforcement to Off and click Save.

2. Set up the Google Workspace (G Suite) Adapter in Axonius
Create the Adapter connection in Axonius. Based on the authentication method, fill out the specific fields, and configure optional settings.
Add a New Connection
- Navigate to the Adapters page, search for
Google Workspace (G Suite), and click on the adapter tile. - On the top right side, click Add Connection.
- The Add Connection drawer opens.
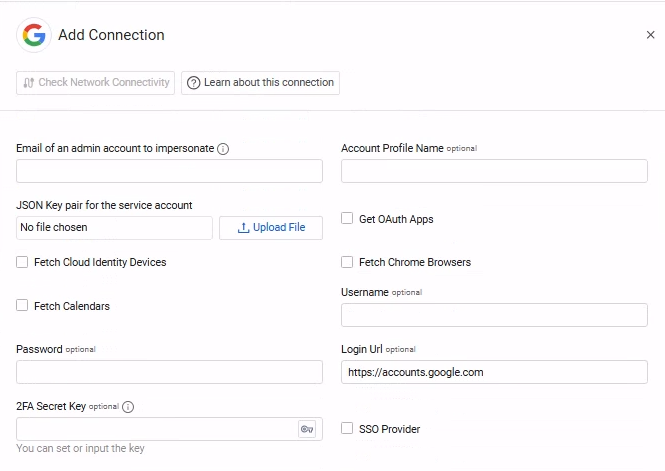
Required Fields
- Email of an admin account to impersonate - Enter the email of your Google Workspace (G Suite) admin.
- JSON Key pair for the service account - Upload the private key JSON file you created for your service account as described in Step 2: Create and download the Service Account Key
- Connection Label - Enter the name to identify this adapter connection.
Required Fields for SaaS Applications
This authorization is required only if you want to fetch Licenses and Application Settings.
-
Username – The value you enter in the User Name field in Google for the user you created.
-
Password – The password you set for the user in Google.
-
Login Url – The hostname or IP address of the Google server.
-
2FA Secret Key (optional) - The secret generated in Google Workspace for setting up 2-factor authentication for the Google user created. If you bypassed 2FA, then this field is not required.
Optional Fields
Expand/Collapse
-
Account Profile Name - Google user name This field is used to link assets to the profile, such as linking the Applications and App Settings to the Account asset.
-
Get OAuth Apps - Select to fetch the OAuth applications used by each user. Note This data requires an additional scope to your Google Workspace (G Suite) admin account. For more information, see Advanced Permissions.
-
Fetch Cloud Identity Devices - Select whether to fetch Cloud Identity devices. Note Fetching Cloud Identity devices requires: Adding the following scope to your Google Workspace (G Suite) admin account. It also requires enabling the Cloud Identity API. For more information, see Advanced Permissions.
-
Fetch Chrome Browsers – Select this option to fetch Chrome browsers information. Note Fetching Chrome browsers information requires an additional privilege to your Google Workspace (G Suite) admin account. For more information, see Advanced Permissions.
-
Fetch Calendars – Select this option to fetch users' calendars. Note Fetching calendar information requires an additional privilege to your Google Workspace (G Suite) admin account. It also requires enabling the Cloud Identity API. For more information, see Advanced Permissions.
-
SSO Provider - If your organization uses Google for SSO, you can set this select this check box (selected by default). For more information, see Connecting your SSO Solution Provider Adapter.
-
Proxy address - Connect the adapter to a proxy instead of directly connecting it to the domain.
-
Proxy port - The port for the proxy server.
-
Proxy username - The user name to use when connecting to the value supplied in Host Name or IP Address via the value supplied in Proxy address.
-
Proxy password - The password to use when connecting to the server using the Proxy.
-
Notes – Add a note of up to 250 characters for this adapter connection.
-
Select Gateway – Select the Axonius Gateway to use when connecting adapters whose sources are only accessible by an internal network. To use this option, you need to set up an Axonius Gateway.
-
3. (Optional) Configure Advanced Settings
Updated 3 months ago