
MPS Monitor Cloud
MPS Monitor Cloud is a platform that provides remote monitoring and management of print and multifunctional device fleets via a web portal and APIs.
Use Cases the Adapter Solves
- Device Fleet Visibility: Gain comprehensive visibility into your entire print and multifunctional device fleet, including printers, scanners, and copiers across all locations.
- Device Lifecycle Management: Track device status, firmware versions, and last seen timestamps to identify offline devices and ensure your fleet is up-to-date.
Asset Types Fetched
- Devices
Data Retrieved through the Adapter
Devices - Fields such as Device Name, Serial Number, MAC Address
Before You Begin
Required Ports
- TCP port 443 (HTTPS)
Authentication Methods
OAuth 2.0 Password Grant
APIs
Axonius uses the MPS Monitor Cloud API. The following endpoints are called:
POST /token- Authenticates and retrieves an OAuth 2.0 Bearer tokenPOST /Device/List- Retrieves the list of devices with pagination support
Required Permissions
The account used for the adapter must have permissions to access the Device/List API endpoint.
Note: The exact permission names should be confirmed with your MPS Monitor Cloud administrator or MPS Monitor Cloud support, as the API documentation is not publicly available.
Supported From Version
Supported from Axonius version 8.0.22
Connecting the Adapter in Axonius
Navigate to the Adapters page, search for MPS Monitor Cloud, and click on the adapter tile.
Click Add Connection.
To connect the adapter in Axonius, provide the following parameters:
Required Parameters
- Host Name or IP Address - Base domain for the MPS Monitor Cloud API. Example:
https://api.mpsmonitor.com. - Client ID - OAuth 2.0 Client ID from MPS Monitor Cloud application registration.
- Client Secret - OAuth 2.0 Client Secret for authentication.
- Username - The email of the user of MPS Monitor Cloud.
- Password - The password of the user of MPS Monitor Cloud.
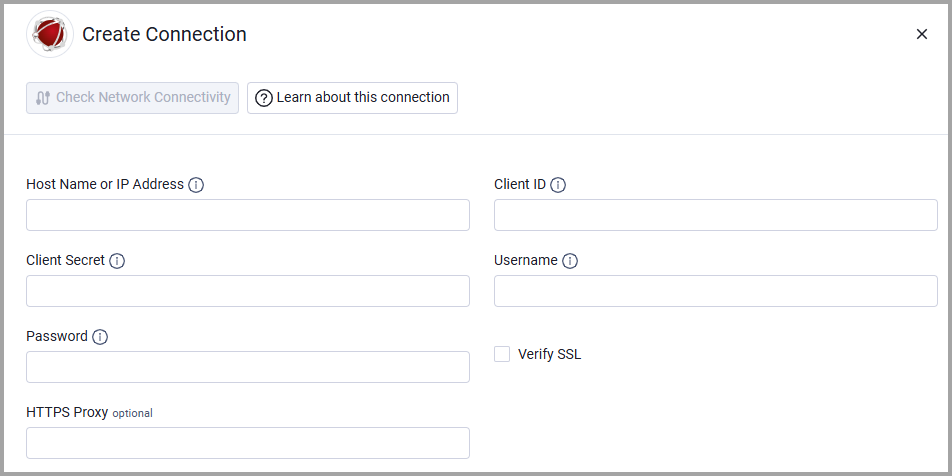
Optional Parameters
- Verify SSL - Select whether to verify the SSL certificate of the server against the CA database inside of Axonius. For more details, see SSL Trust & CA Settings.
- HTTPS Proxy - Connect the adapter to a proxy instead of directly connecting it to the domain.
- HTTPS Proxy User Name - The user name to use when connecting to the value supplied in Host Name or IP Address via the value supplied in HTTPS Proxy.
- HTTPS Proxy Password - The password to use when connecting to the server using the HTTPS Proxy.
To learn more about common adapter connection parameters and buttons, see Adding a New Adapter Connection.
Updated 3 months ago