
Testing a Workflow Node-by-Node
Testing a workflow runs it in a simulated production environment so you can evaluate the results without making any actual changes to assets. There are two ways to create and test a workflow. The first is to create the entire workflow and test it as a single unit. The second way, described here, is to test as you add nodes to the workflow. This allows you to build, simulate, and debug your automation logic incrementally, node-by-node, ensuring each node is correctly configured before running with full production data.
A node-by-node test run includes several key benefits:
- Incremental Validation: Verify each node as you add it to the canvas.
- Production Safety: Simulations run against a single randomized asset, eliminating the risk of accidental mass-actions like triggering thousands of tickets or emails.
- Data Transparency: Open the "black box" of dynamic values to see exactly how variables and functions resolve in real-time.
- Logic Verification: Visually track how assets move through conditional branches and loops.
- The "Test Asset" - Test Run randomly selects one asset returned by the query as the test asset. The data from this specific asset is carried through the entire workflow to simulate a real-world run.
- No actual changes to the asset are made during a test - While testing requires that an asset be resolved from a query, no changes are actually made to the asset during a test.
- Contextual Memory - The test environment maintains a "bank" of data from previous nodes. Because of this, testing must be linear; you cannot test a downstream node (Node 5) unless the preceding nodes (Nodes 1-4) have been successfully tested in that session.
- Error Handling: The system is designed to provide specific feedback on mismatch errors (e.g., trying to use a string function on a number), helping you refine your Dynamic Values before they ever hit production.
- Node Mocking - Time-intensive nodes, such as Delays, are automatically "skipped" during testing. The system acknowledges the logic but moves immediately to the next node so you can verify the end-to-end flow without waiting for the full delay time.
The Test Panel
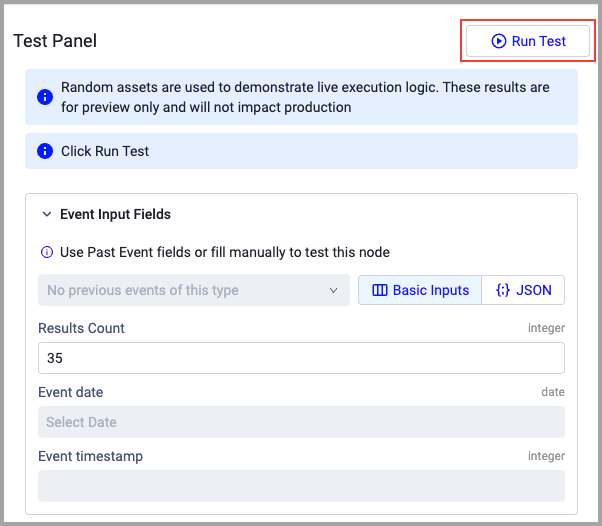
The Test Panel can be opened for every testable node. After adding the node to the canvas, and configuring the required fields, including resolving an asset, click View Test Panel. The test panel opens. For most nodes, the panel is empty until the first test is run. When filling in values in the Test Panel for those nodes that require this, you can use Basic Inputs mode to use the form or JSON mode to enter values formatted in JSON. Click Test Run to run a test on the selected node.
Note
There are two buttons for testing a workflow:
- The Test Run button in the header area of the workflow page runs a test on the complete workflow as one single unit.
- The Run Test button in the Test Panel runs a test on the selected node within the workflow.
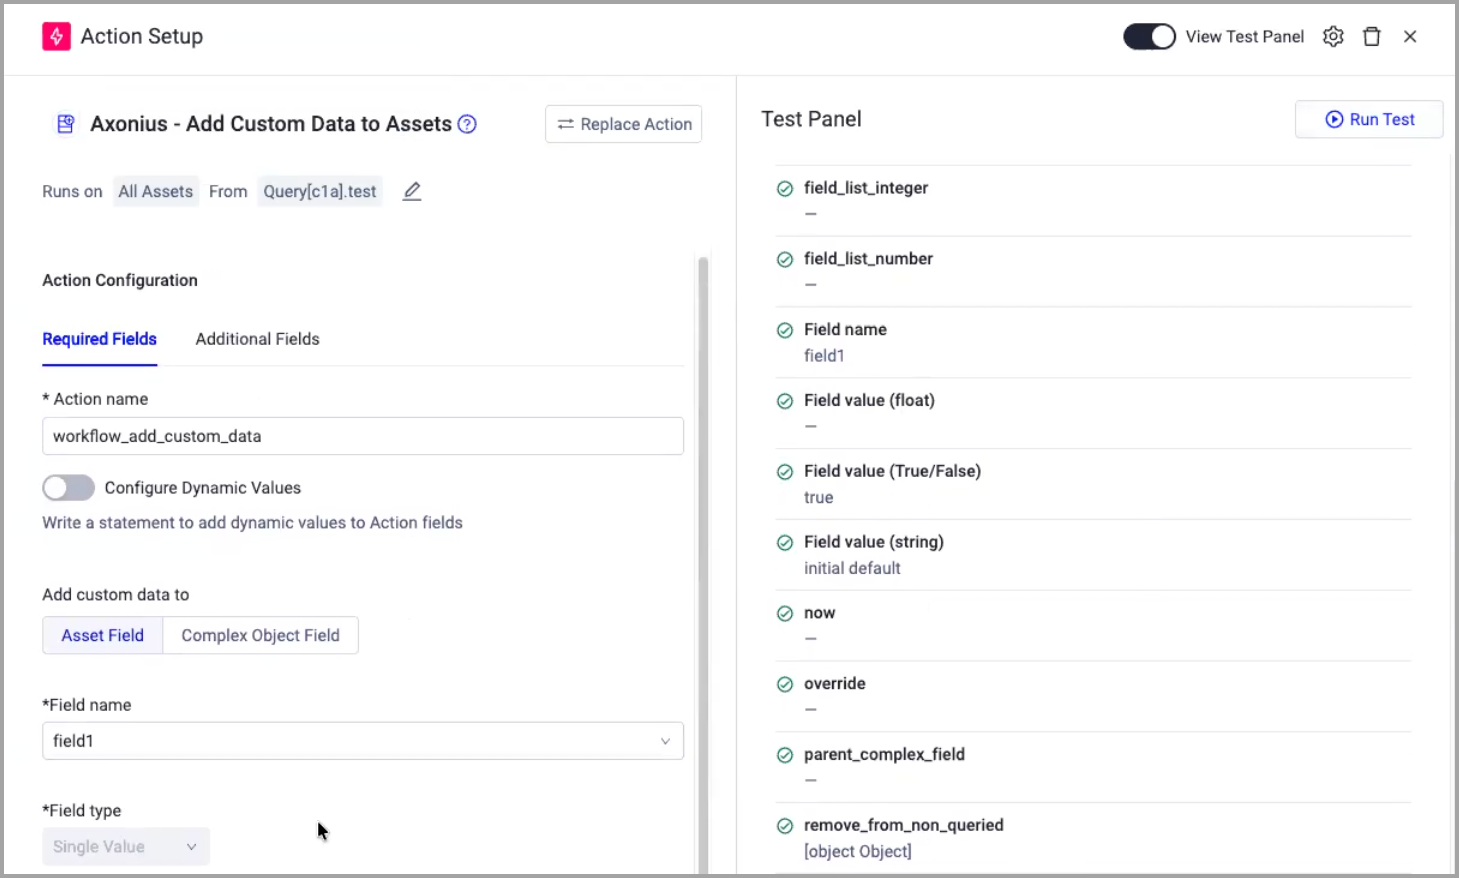
Once a test has run, the results are displayed in the Test Panel. The results are the values that were applied to the test asset.
Test Indicators on Workflow Nodes
When a node can be tested, a colorless circle icon appears in the upper-right corner of the node. No icon appears on Trigger nodes for Scheduled or Manual triggers. Before a node is tested, the icon is colorless. After the first test is run, the icon reflects the status of the run. A green icon for a successful test and a red icon for a failed test. When a test result on a node later changes, the icon changes to reflect the outcome of the most recent test.

Testing Dynamic Value Statements
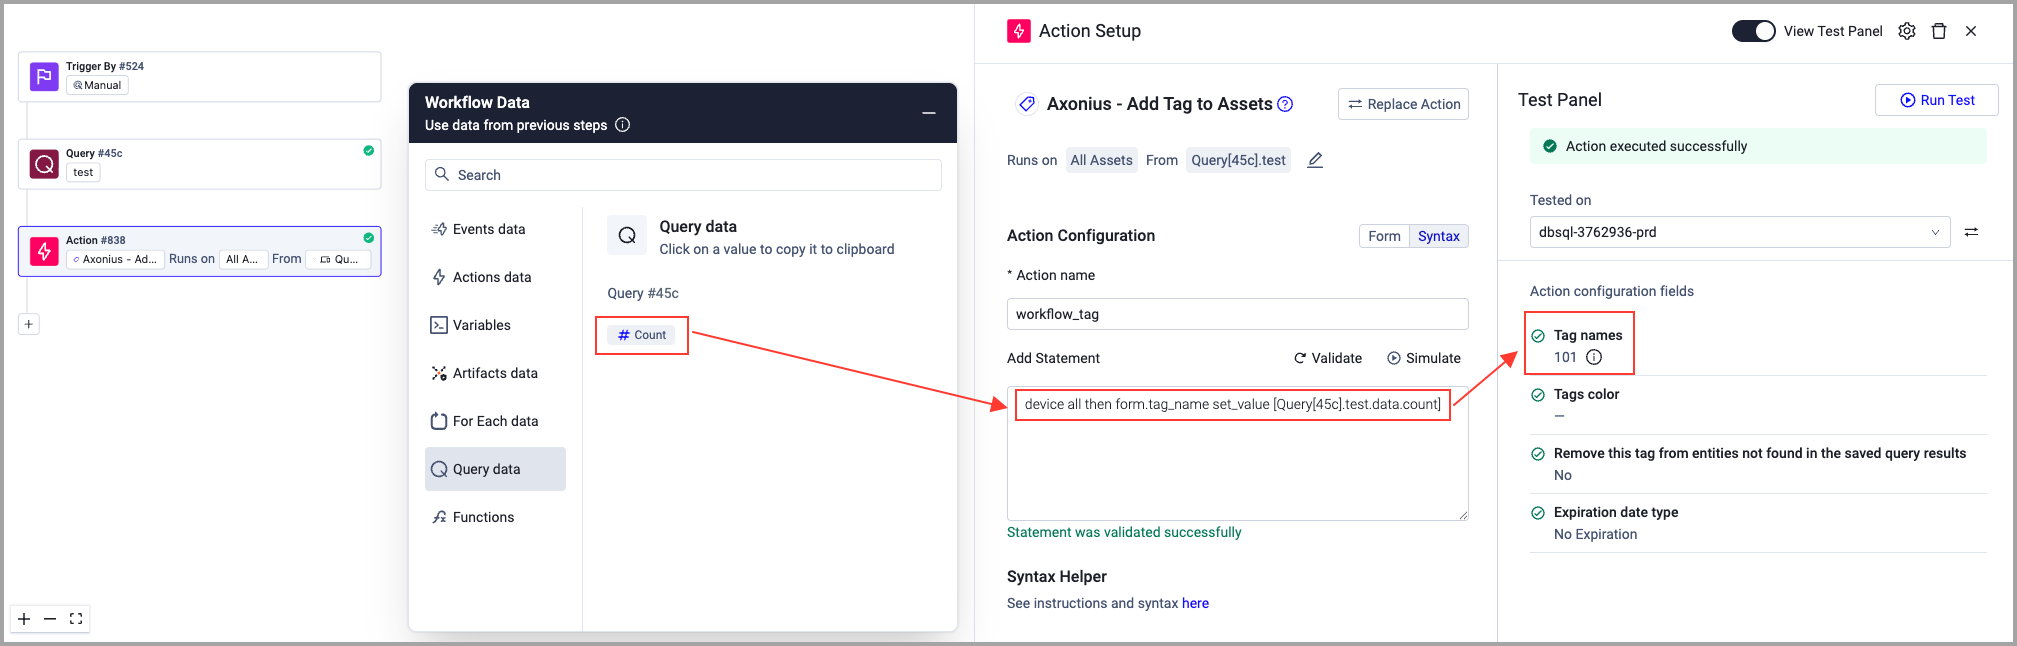
When you test an action or other node that uses dynamic value statements, the value of the statement is shown in the Test Panel with the results of the test.
Testing a Workflow Event Trigger
Only Event triggers need to be tested. Scheduled and Manual triggers are passed over since there is nothing to test.
-
Configure an event trigger as described in Configuring Workflow Triggers.
-
When the required fields for the selected trigger are configured, click View Test Panel. Under Event Input Fields, do one of the following to populate the fields with event data needed.
-
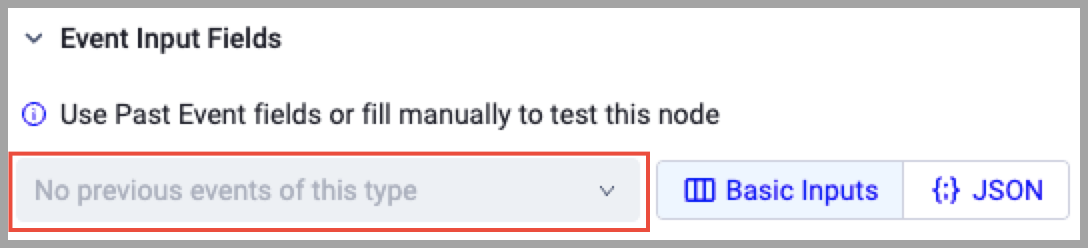
Use information from a previously run event by selecting an event from the event list. This is available only when a previous event of the selected type has already run.
-
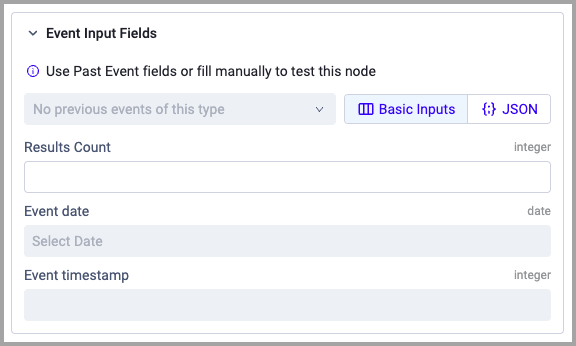
Use the Basic Inputs tab to manually enter values into the form fields.
-
-
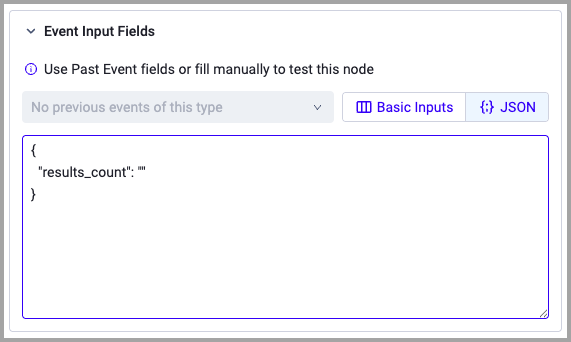
Use the JSON tab to use data from a previous event.
-
Click Run Test.
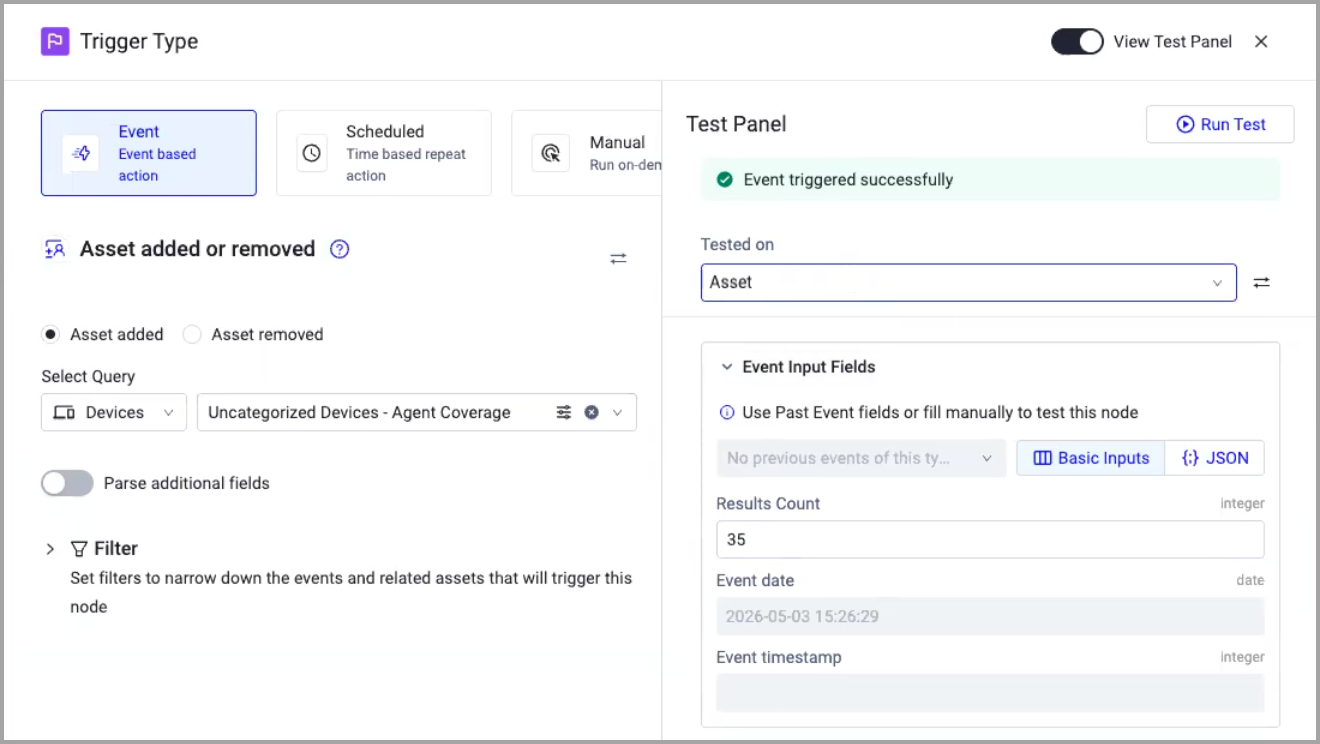
The test is run, and the results are posted to the Test Panel. The asset selected for the test is identified in the Tested on field.
If a test runs successfully, a green success message is displayed. Check the values in the fields to validate that they are correct. To run the test on a different asset, click  (Switch Asset).
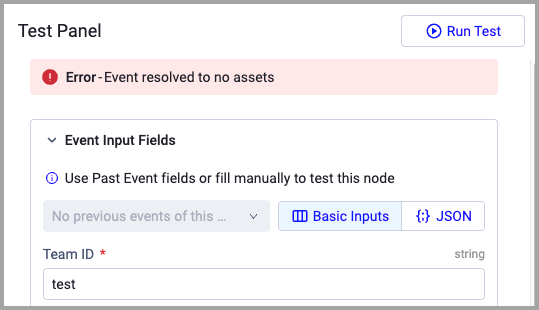
If the test failed, an error message is displayed.
Adding and Testing More Nodes
Once the trigger is set, you can add other nodes to the canvas. The testing process remains consistent regardless of the node's function:
- Configure each node and test it as you build the workflow.
- For each node, click Run Test in the Test Panel.
- Review the Test Panel to see the actual data or error message generated by that node and make any necessary changes to the node configuration. Then, test the node again until the test runs successfully.
Testing the Different Node Types
The different node types behave differently during testing:
-
Action Nodes (e.g., Add Tag, Create Ticket): The Test Panel shows the specific value created or the API response from the vendor.
-
Condition Nodes (e.g., If/Else, Basic Filter): The canvas highlights the path taken by your test asset in green.
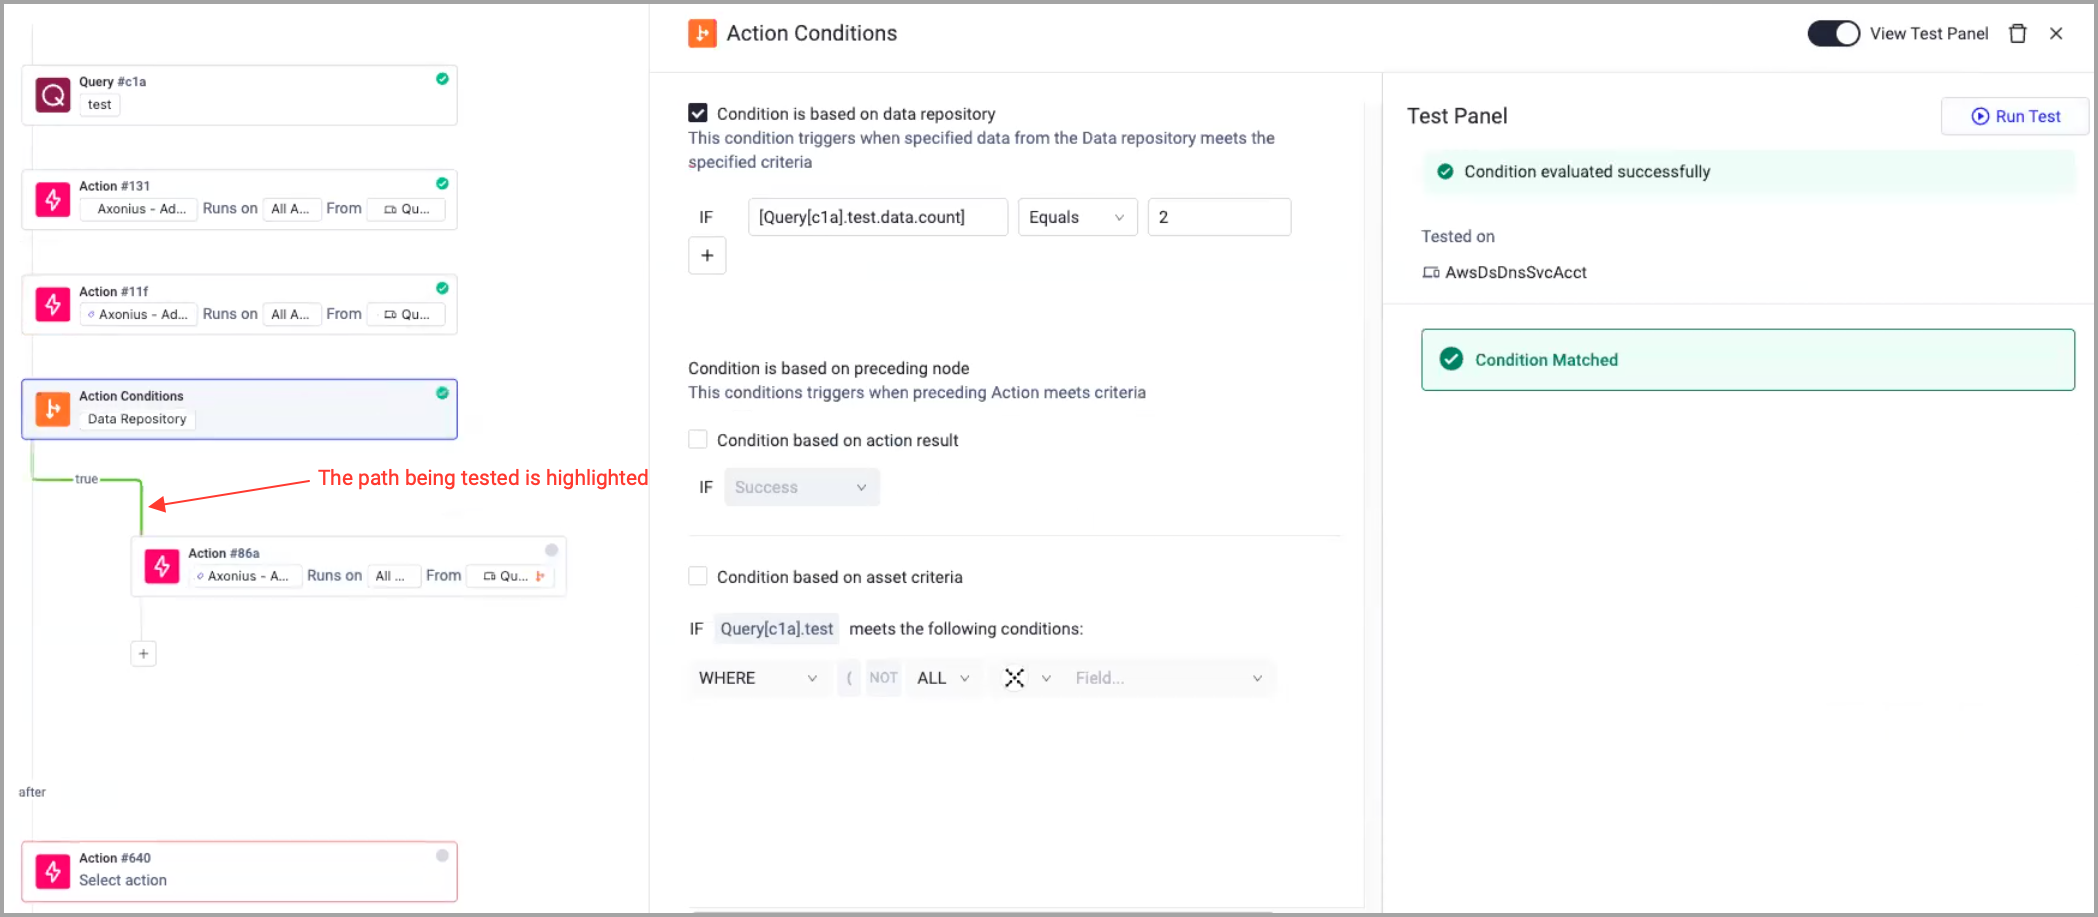
- To test the alternate path: Go to the Test Panel, click Change Asset, and select an asset that meets the opposite criteria.
-
Delay Nodes: The system acknowledges the node but skips the wait time, allowing you to test the rest of the flow with no delay.
-
Variable Nodes: The Test Panel displays the current value assigned to the variable for that specific run.
-
Query Nodes: The test shows the results of the query.
See detailed guides for each node:
- Configuring an Action Node
- Configuring a Variable Node
- Configuring a Query Node
- Configuring a Repeat For Each Node
- Configuring Action Conditions
- Configuring Event Conditions
3. Final End-to-End Validation
Once every node on your canvas displays a green checkmark, perform a final pass to ensure the "data chain" is unbroken.
- Navigate back to the Trigger node.
- In the Test Panel, click Test Run.
- The system selects a random asset and executes the entire workflow. A different random asset is selected each time the test is run.
- When the test is complete, click View Runs to review the full results and confirm all nodes work together. See Viewing Workflows Run History.
- Select Test Run in the Run Type filter to list only workflow test runs.
Troubleshooting & Error Messages
Testing is the best time to catch Dynamic Value mismatches. Common errors include:
- Syntax vs. Logic: A node may pass validation (correct syntax) but fail a Test Run if the data type is incompatible (e.g., applying a "Lowercase" function to a number).
- Empty Fields: If your test asset has an empty value for a required field, the node will fail. Use the Change Asset feature to find an asset with the necessary data to complete your test.
- Vendor Errors: For third-party actions (e.g., Jira or CrowdStrike), vendor errors are displayed when available.
Pro Tip: If a Test Run fails with a generic error, check your Dynamic Values first. Ensure that the functions used (like
To Lower) are receiving the correct data type (Strings).
Updated 2 days ago