
Configuring Jira Settings
Note
This configuration is only required if you have Cloud Asset Compliance and want to use the Create Jira Issue Enforcement Action that is part of Cloud Asset Compliance.
To configure Jira settings:
- From the top right corner of any page, click
.png) . The System Settings page opens.
. The System Settings page opens. - In the Categories/Subcategories pane of the System Settings page, expand External Integrations, and select Jira.
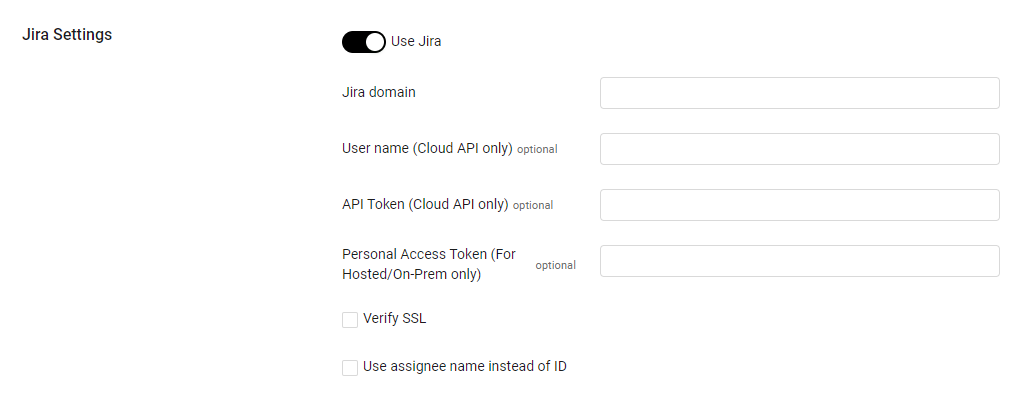
- Toggle on Use Jira. This is a prerequisite if you have Cloud Asset Compliance and want to use the Create Jira Issue Enforcement Action that is part of that module.
- Do one of the following
-
For Jira Cloud Users
- Log in to Jira and use the following URL to generate an API token: https://id.atlassian.com/manage/api-tokens#
.png)
- Specify the Jira domain, User name, and API Token.
- Select Verify SSL to verify the SSL certificate of the server.
- Select Use assignee name instead of ID to use the assignee ID instead of the assignee name in Assignee fields.
-
For Jira On-prem/Jira hosted users
- Obtain the Personal Access Token from the account. Refer to Using Personal Access Tokens for information about obtaining the Personal Access Token.
- Specify the Jira domain and Personal Access Token.
- Select Verify SSL to verify the SSL certificate of the server.
- Select Use assignee name instead of ID to use the assignee ID instead of the assignee name in Assignee fields.
-
Updated 9 months ago
Did this page help you?