IBM Guardium Data Protection
IBM Guardium Data Protection prevents leaks from databases, data warehouses, and Big Data environments. It ensures the integrity of information and automates compliance controls across heterogeneous environments.
Note
Axonius uses the Guardium REST API which supports several Guardium products including information collected by S-TAPs.)
Asset Types Fetched
This adapter fetches the following types of assets:
- Devices, Databases
Before You Begin
Ports
- TCP port 443
Authentication Method
- User Name/Password
- Client ID/Client Secret
Generating the Client ID and Client Secret
In order for the IBM Guardium Data Protection adapter to work, you must perform the following steps:
-
Generate Client Secret in IBM Guardium - You must have PowerShell and administrative privileges to execute the commands on your server. Use the IBM command below to generate the Client Secret. Insert your Client ID into
{CLIENT_ID_NAME}.grdapi register_oauth_client client_id={CLIENT_ID_NAME} grant_types="password" scope="read,write"This command generates a JSON containing
client_secretthat will be used in the adapter configuration.{"client_id":"{CLIENT_ID_NAME}", "client_secret":"{CLIENT_SECRET}", "grant_types":"password", "scope":"read,write", "redirect_uri":"https://someApp"}Insert the values from
{CLIENT_ID_NAME}and{CLIENT_SECRET}into the Client ID and Client Secret fields in the adapter configuration pane. -
Create Active Directory user - Create a specific AD user for IBM Guardium Data Protection. This account will have read access to the API. Insert the user name and password you created for the Active Directory user into the User Name and Password fields in the adapter configuration pane.
-
Give Asset Read permission for the Active Directory user - Create a user in IBM Guardium Data Protection using the same credentials for the user you created in AD. When you create this user, the User Browser table will display an option called “Roles” under the Action column. In “Roles”, give the new user API access to read the assets.
Note
For information about the process of generating a client secret, see Calling REST APIs example.
For the specific command reference, see register_oauth_client.
Connecting the Adapter in Axonius
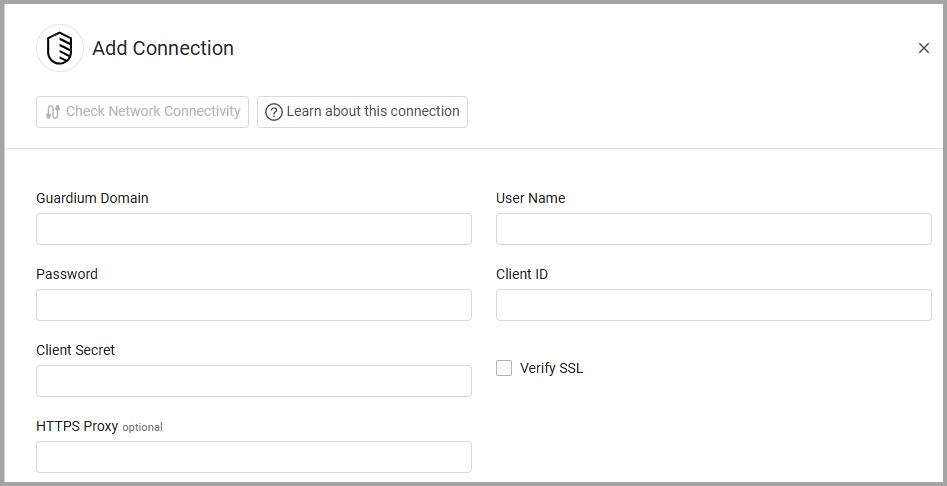
To connect the adapter in Axonius, provide the following parameters:
Required Parameters
- Guardium Domain - The hostname of the Guardium server.
- User Name and Password - The user name and password for an account that has read access to the API.
- Client ID and Client Secret - The Client ID and Client Secret as shown in the Guardium API. For more details, see Generating the Client ID and Client Secret.
- The client ID must be registered in Guardium and the associated client secret retrieved.

Optional Parameters
-
Verify SSL - Select whether to verify the SSL certificate of the server against the CA database inside of Axonius. For more details, see SSL Trust & CA Settings.
-
HTTPS Proxy - Connect the adapter to a proxy instead of directly connecting it to the domain.
To learn more about common adapter connection parameters and buttons, see Adding a New Adapter Connection.
Advanced Settings
Note
Advanced settings can either apply to all connections for this adapter, or to a specific connection. Refer to Advanced Configuration for Adapters.
- Fetch data sources - Select this option to fetch data sources.
- Fetch STAP configuration - Select this option to fetch STAP configuration.
- Fetch Devices from the online report endpoint - Enable this option to create ad hoc online reports in JSON format. If enabled, the following settings may be configured:
- Online Report Names - Enter a comma-separated list of online reports to fetch from Guardium.
- Fetch last X days ago (optional, default: 1) - Specify how many days back (1-365) to fetch report data.
- Fetch size (optional, default: 1000) - Set the number of records (1-30000) to fetch per API request.
- Show FQDN in the online reports - Select this option to set the default value to 1 for SHOW_ALIASES to show the FQDN in the online reports body parameter request.
Note
To learn more about Adapter Configuration tab advanced settings, see Adapter Advanced Settings.
Updated 4 months ago
