
Microsoft Teams - Send Direct Message to a User
Microsoft Teams - Send Direct Message to a User sends a direct message in Microsoft Teams to user assets returned by the selected query or assets selected on the relevant asset page.
See Creating Enforcement Sets to learn more about adding Enforcement Actions to Enforcement Sets.
Note
- Not all asset types are supported for all Enforcement Actions.
- See Actions supported for Activity Logs, Adapters Fetch History, and Asset Investigation modules.
- See Actions supported for Aggregated Security Findings.
- See Actions supported for Software.
This Enforcement Action requires initial setup in Microsoft Teams before you can configure and run it. See Set Up the EC Action for the required setup steps.
Required Fields
These fields must be configured to run the Enforcement Set.
- Action name - The name of this Enforcement Action. The system sets a default name. You can change the name.
- Configure Dynamic Values (optional) - Toggle on to enter a Dynamic Value statement. See Creating Enforcement Action Dynamic Value Statements to learn more about Dynamic Value statement syntax.
- Use stored credentials from Microsoft Entra ID (formerly Azure Active Directory) and Microsoft Intune adapter - Select this option to use credentials from the adapter connection. By default, the first connection is selected.
-
When you select this option, the Select Adapter Connection drop-down becomes available. Select the adapter connection to use for this Enforcement Action.
-
NOTE
To use this option, you must successfully configure an Microsoft Entra ID (Azure AD) adapter connection. Each asset is run using the connection that fetched the asset.
- Recipient Entra User ID - The Entra user ID of the user who will receive the message.
- Custom message - The text of the Microsoft Teams direct message.
Additional Fields
These fields are optional.
- Create list of predefined responses - This field is only available in an action that is added to a Workflow. Enter a list of response buttons to be shown in the Microsoft Teams message in the order that they are added into this field. Click Add to add each possible response to the list. When a response button is clicked in a Microsoft Teams message that is sent, the workflow continues based on that button.
- Cloud Environment - Specifies the Azure cloud environment where your Microsoft Teams tenant is hosted. This determines the authentication and Bot Framework endpoints used for the connection.
Connection and CredentialsWhen Use stored credentials from the adapter is toggled off, some of the connection fields below are required to create the connection, while other fields are optional.
Azure Client ID - The Application ID of the Axonius application.
Azure Client Secret - Specify a non-expired key generated from the new client secret.
Azure Tenant ID - Microsoft Entra ID (Azure AD) ID.
API
Axonius uses the Azure AI Bot Service API.
Required Permissions
The following Graph API Application permissions are required for the action to work:
- AppCatalog.Read.All
- TeamsAppInstallation.ReadWriteForUser.All
Required Ports
Axonius must be able to communicate with Microsoft Teams via TCP port 443.
Set Up the EC Action
To set up this EC Action, follow these steps:
Set Up the App with the Developer Portal
-
In Microsoft Teams, from the side panel, click Apps.
-
Using the search bar, search for "developer portal".
-
From Microsoft Corporation, click Developer Portal.
-
Click Add (or Open).
-
In the Developer Portal, click Apps.
-
Click New app.

-
Enter a name for the app and click Add.
-
On the Basic information page, fill the following fields:
- Short description
- Long description
- Developer or company name
- Website
- Privacy policy
- Terms of use
- Application (client) ID (Optional) - You can link this Teams App to an existing App Registration, which will be used to grant Graph API permissions. This step is optional. See more information under Check and Configure the App Registration.
Note
Due to updates to this integration by Microsoft, there is no guarantee that the App Registration link will function as expected.
-
Click Save.
-
Click App features.
-
Click Bot.
-
Select Select an existing bot or create a new one. To create a new bot:
- Click Create a new bot.
- Enter a bot name and click Create Bot.
-
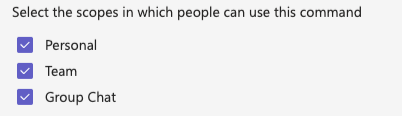
Under "Select the scopes in which people can use this command", select Personal, Team, and Group Chat.
-
Click Save.
-
In the Developer Portal, from the top toolbar, select Tools.
-
Click Bot management.
-
Click the bot you've created.
-
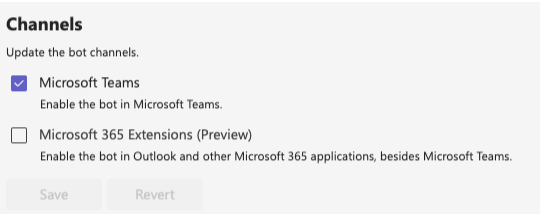
Click Channels.
-
Make sure Microsoft Teams is checked.
-
(Optional) If you want to use Axonius Workflows:
- In Axonius, go to Global settings
>Workflows Events>Microsoft Teams. - Copy the Webhook URL.
- In Axonius, go to Global settings
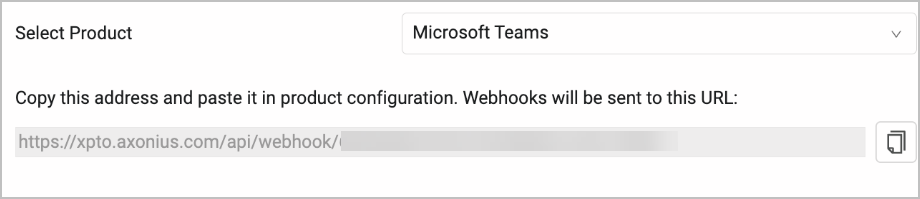
- In the Developer Portal, go to the Configure tab.
- Paste the Webhook URL under Endpoint Address.

- Click Save.
Install the New App in Teams Through the Admin Center
After you set up the app there are two potential ways for installing the app. If this process for installing the app through the Teams portal doesn't work, see the next process for installing the app using a downloaded zip file.
- In Developer Portal, from the top toolbar, click Apps.
- Select the app you created.
- On the top-right of the screen, click Publish.
- Select Publish to your org.
- Click Publish your app
- Navigate to Teams App Management.
- Search for your app and click on it.
- Click Publish.
- When prompted, confirm in the pop up.
Install the New App in Teams Through the Developer Portal
- In Developer Portal, from the top toolbar, click Apps.
- Select the app you created.
- On the top-right of the screen, click Publish.
- Select Download the app package to download a zip file containing the application.
- Navigate to Teams App Management.
- On the top right, click Actions.
- Click Upload new app.
- Click Upload.
- Choose the file you downloaded.
Check and Configure the App Registration
- Navigate to App Registration
>All Applications. - Search for the name you used when you registered your Teams App.
- If a new application appears, it means that Microsoft has created a new App Registration - even if you provided an Application (Client) ID when creating the Teams App. In this case, you must use this newly created application to configure the Graph API permissions.
- If no new application appears, and you provided an Application (Client) ID - you can continue to use the existing App Registration.
- Add the following Graph API Application Permissions:
-
AppCatalog.Read.All
-
TeamsAppInstallation.ReadWriteForUser.All
-
For more details about other enforcement actions available, see Action Library.
Updated about 2 months ago