
ZipHQ
ZipHQ License Management is a comprehensive software solution designed to streamline and automate the management of software licenses across an organization.
The ZipHQ adapter enables Axonius to fetch and catalog requests, vendors, approvals, agreements, and payment methods, ensuring comprehensive visibility into your procurement and contract workflows .
Asset Types Fetched
- Licenses, SaaS Applications, Users, Groups, Roles, Organizational units.
Before You Begin
Required Ports
- TCP port 443
Authentication Methods
- API Key (API Token)
Required Permissions
The API key used for the connection must be associated with a user account that has read permissions for all relevant endpoints to ensure comprehensive data fetching.
APIs
Axonius uses the Ziphq API to retrieve asset data.
Supported From Version
This adapter is supported from Axonius version 6.1.65.
Connection Parameters
To connect the adapter in Axonius, provide the following parameters.
Required Parameters
- Host Name or IP Address - Enter the hostname or IP address of the ZipHQ server.
- API Key - Enter the API Key associated with a user account that has the Required Permissions to fetch assets.
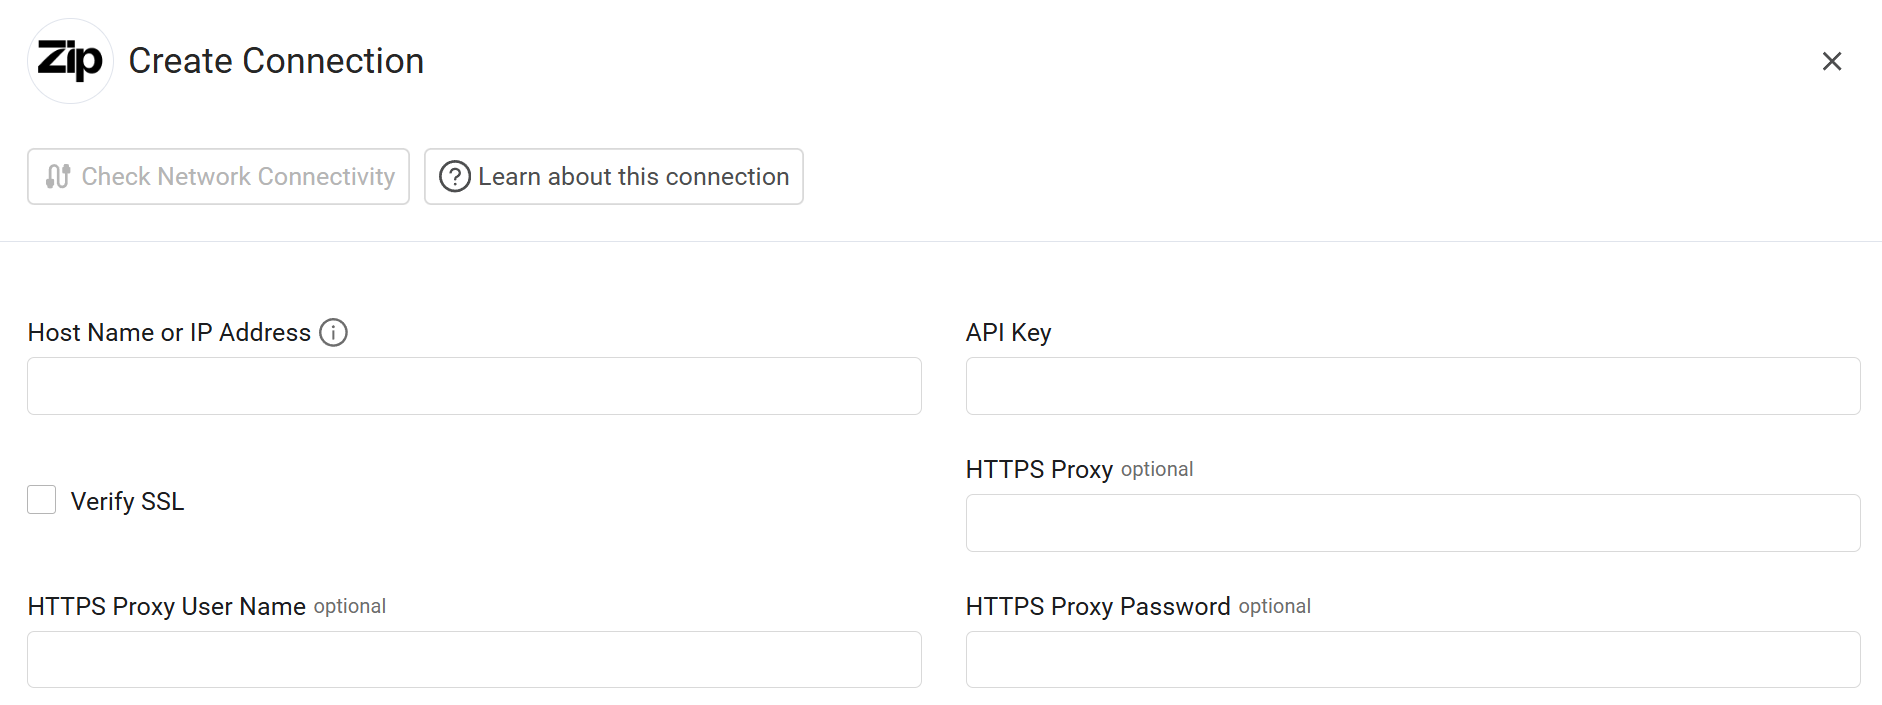
Optional Parameters
-
Verify SSL - Select whether to verify the SSL certificate of the server against the CA database inside of Axonius. For more details, see SSL Trust & CA Settings.
-
HTTPS Proxy - Enter an HTTPS proxy address to connect the adapter to a proxy instead of directly connecting it to the domain.
-
HTTPS Proxy User Name - Enter the user name to use when connecting to the value supplied in Host Name or IP Address via the value supplied in HTTPS Proxy.
-
HTTPS Proxy Password - Enter the password to use when connecting to the server using the HTTPS Proxy.
To learn about additional optional/common adapter connection parameters, see Adding a New Adapter Connection.
Advanced Settings
Note
- Advanced settings can apply to either all connections of this adapter, or to a specific connection. For more detailed information, see Advanced Configuration for Adapters.
- For more general information about advanced settings, see Adapter Advanced Settings.
Expand the Endpoint config option to configure the following settings:
-
Approvals Filtering - Configure the following parameters to filter data retrieved from the
/approvalsendpoint:- Started After / Started Before - Enter a date in the text box to filter by when the approval started.
- Completed After / Completed Before - Enter a date in the text box to filter by when the approval was completed.
- Due After / Due Before - Enter a date in the text box to filter by the approval due date.
- Request Created After / Request Created Before - Enter a date in the text box to filter by when the associated request was created.
- Status - Select one or more status values from the list to filter according to those specific states: Upcoming, Ready to start, Rejected, Approved, Approved automatically, Canceled, Custom node with SLA on, Custom node with SLA off.
-
Status Code List - This section applies context specifically to the Requests endpoint:
- Status Code List - Select one or more status values from the list (such as Awaiting Approval, Rejected, Approved, Canceled, Closed, or Paused) to filter the data fetched from the
/requestsendpoint.
- Status Code List - Select one or more status values from the list (such as Awaiting Approval, Rejected, Approved, Canceled, Closed, or Paused) to filter the data fetched from the
-
Vendors Filtering - Use the following parameters to refine the data retrieved from the
/vendorsendpoint:- Last Updated After / Last Updated Before - Enter an integer in the text box representing the date to filter vendors based on when their records were last modified.
- Status - Click Add to specify one or more vendor status strings to include in the fetch.
-
Enrich Vendors with Payment Methods - Toggle this option on to retrieve payment method data for each vendor via the
/payment_methodsendpoint:- Show Sensitive Data - Select this checkbox to include sensitive payment information in the fetch.
- Include Deleted - Select this checkbox to include payment methods that have been marked as deleted.
-
Agreements Filtering - Use these optional fields to filter data from the
/agreementsendpoint:- Vendor ID / Subsidiary ID / Department ID - Enter the specific identifier in the text box to filter agreements by vendor, subsidiary, or department.
- Sort By - Enter a field name (such as
created_atorupdated_at) in the text box to specify how the results should be ordered.
-
Users Filtering - Configure the following parameters to filter data retrieved from the
/usersendpoint:-
**Email** - Filter users by email address. - Deactivated - Filter by deactivated status.
- Sort By - Sort users by field, options: email, created_at, updated_at.
- Sort Order - Sort by direction.
- Page Size - The number of results to return per page (maximum is 100).
-
-
User Groups Filtering - Configure the following parameters to filter data retrieved from the
/user_groupsendpoint:- Name - Filter user groups by name.
- Sort By - Sort user groups by field options: created_at, updated_at.
- Sort Order - Sort by direction
- Page Size - The number of results to return per page (maximum is 100).
-
Roles Filtering - Configure the following parameters to filter data retrieved from the
/rolesendpoint:- Name - Filter roles by name.
- Sort By - Sort roles by field, options: created_at, updated_at.
- Sort Order - Sort by direction
- Page Size - The number of results to return per page (maximum is 100).
-
Departments Filtering - Configure the following parameters to filter data retrieved from the
/departmentsendpoint:- Name - Department name as configured in Zip.
- Is Active - The active status of the department.
- Hide In Zip - Whether the department is currently hidden in Zip.
- Sort By - Sort departments by field options: created_at, updated_at.
- Sort Order - Sort by direction
- Page Size - The number of results to return per page (maximum is 100).
Updated 27 days ago