
Configuring Reports
Use the Report Editor drawer to configure report content and scheduling.
To open the Report Editor drawer, from the left navigation panel, click  icon. The Reports page opens.
In Axonius New Navigation Experience, access Reports from the Analysis menu.
Do one of the following:
- At the top of the Reports page, click Add Report to add a new report.
- Click a specific report record in the table to view or edit an existing report.
- Select a report and choose Open Report from the Actions menu to open that report in a new tab.
Configuring a Report
Report configuration includes the following sections:
General Information
Use these settings to define the name and access permissions of the report.
-
Name - Provide a unique name for the report. You can change the name later if required, see Changing the Report Name.
-
Set access to Private - Select whether to create a private report. Private reports can only be viewed, edited or deleted by the user that created and owns the report and may include any dashboard with Private access, Private queries,as well as any public queries.
- Public reports are available to any user within the Data Scope and has the proper report permissions. They can view, edit or delete the report. Public reports may include Public dashboards and charts and Public saved queries.
Content
Use these settings to configure the contens of the report.
-
Include dashboards and charts - When selected, a list of available dashboards appears. You can select full dashboards, individual charts, or a combination to include in the report. The folder containing the dashboard is indicated next to the dashboard name.
- From the list, select the items you want in the report. Items are added to the list and published in the report in the order you select them.
- To remove an item, deselect it from the list.
- To remove all items selected from a single dashboard, you can also click the X on the tile of that dashboard.
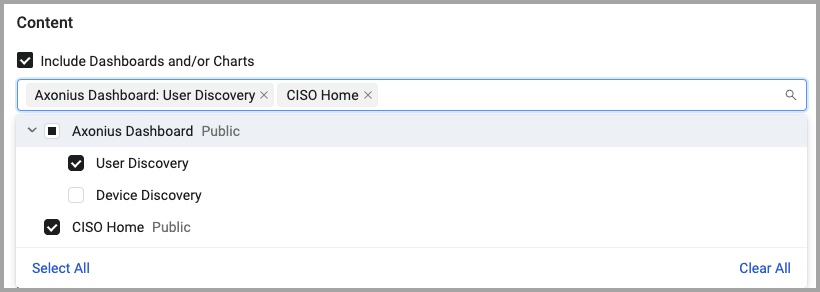
This is useful for when you want specific charts sent to a dedicated team for resolving a specific issue.
-
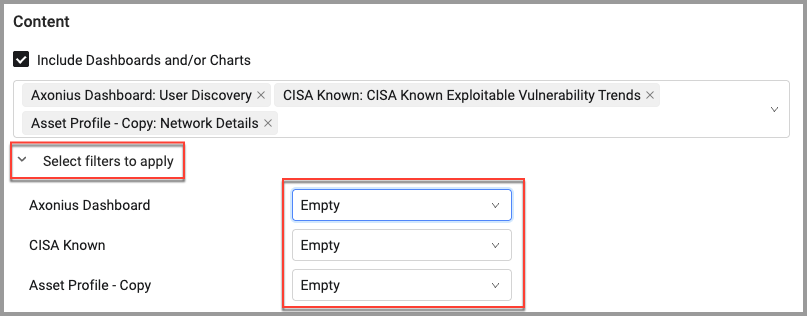
Select filters to apply - This option appears when one or more dashboards are selected. You can select a saved filter to apply to each dashboard. When only some charts from a dashboard are selected, you can select a filter to apply to the dashboard containing the charts. Filter selections made when configuring a report do not change the filter selected on the dashboard itself.
-
Include Data Analytic reports - From the list, select which Data Analytics reports to include. For more information about creating data analytic reports, see Analyzing Query Data - Creating Data Analytics Reports. It is recommended not to choose Data Analytics reports with a large number of columns, as reports generated for Data Analytics may not display all the data. You are able to log into Axonius to view the full report.
-
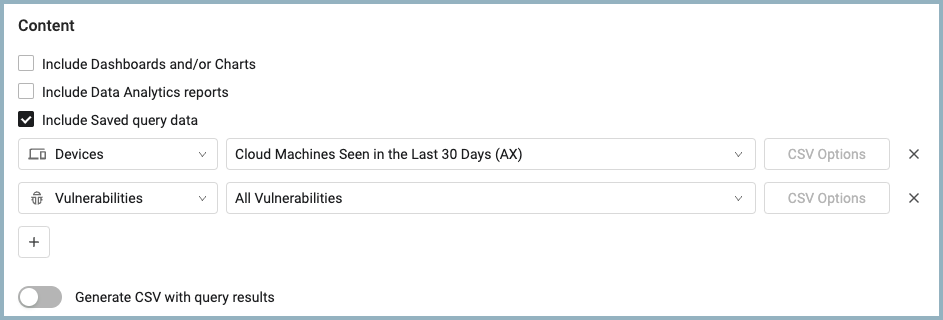
Include Saved query data - Select the queries whose data you want to include in the report.
-
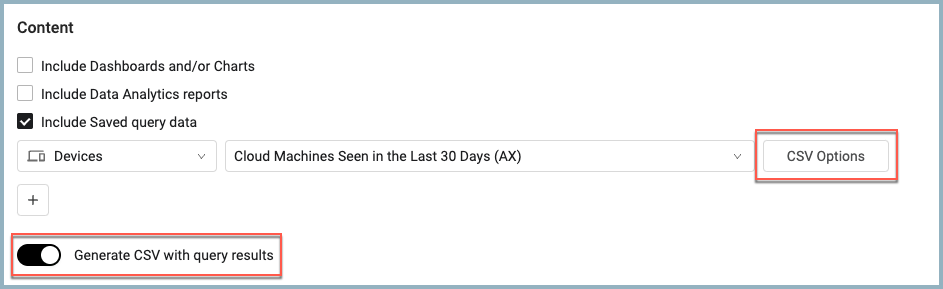
Generate CSV with query results - When Include saved query data is selected, you can enable Generate CSV with query results to create a CSV file with the entire saved query results for each of the listed saved queries. When enabled, click CSV Options to configure the options for each CSV file separately. When you first run a report, it could take a few minutes to generate the CSV file.
Email
You can have generated reports sent as an email attachment to a list of recipients.
- Send report as email - Select to send the generated report via email to a list of recipients.
- Recipients - Enter a list of email addresses. A copy of the report will be sent to each address.
- Recipients CC - Enter a list of email addresses. A copy of the report will be sent to each address.
- Subject - Enter a subject line for the email.
- Custom Message - Enter text for a custom message.
Note
The Custom message field allows unsanitized HTML code.
- Attach query CSV to email - When selected, the query CSV will be attached to the email along with the report. Generate CSV with query results in the Content section must be selected.
Email Schedule
Use a schedule to have a report sent via email at specific dates and times.
-
Set email scheduling type - Enable and set the schedule parameters you want. You can deactivate email scheduling if required.
- You can deactivate email scheduling if required. Toggle off Set email scheduling type to turn off email scheduling of reports. This does not change the configuration that you set. You can turn on email scheduling as required.
-
Repeat schedule run - Select the type of schedule you want. See Repeat Schedule Run Settings for complete description of the available options.
-
Scheduled run time - Click in the field and select a time from the list. The report email will be sent on the days selected above and at the time selected here.
- Reports can be sent more than once a day. See Setting More Than one Time in a Day to Send Email Reports
Save the Changes
Note
If you have configured a scheduled email, the Send Email button is displayed. Click it to send the email with the latest generated report.
You can configure a custom logo to be used in the reports PDF files. For details, see the UI Settings.
- Click Save. The report configuration is saved and the report will be generated according to the configuration parameters. See Downloading and Sending Reports for other options.
Repeat Schedule Run Settings
In the Repeat schedule run, select the frequency to send the reports by email. The following options are available:
-
Every x hours - The System sends the latest report by email every number of hours defined in the Send email every (hours) field. The time the first email is sent time is determined based on the specified value, starting midnight. For example, if the specified value is 6, the times the email is sent are: 12am, 6am, 12pm, 6pm, 12am, etc.
- The start time for the next email to be sent will be the closest interval. For example, If the specified value is 6, and the configuration was saved at 10am, the next email will be sent at 12pm.
- The maximum possible value is 24.
-
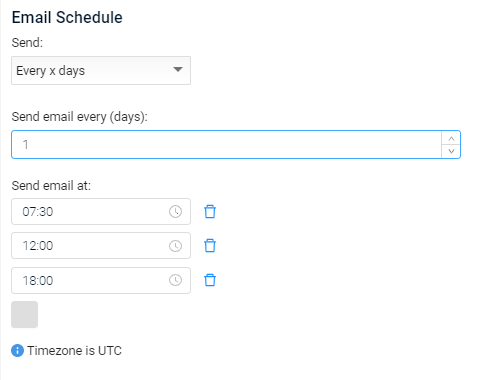
Every x days - The system sends the latest report by email every X days as defined in the Send drop-down box. The start time is determined based on the specified value, starting the 1st of each month. For example, if the specified value is 10, the mail is sent on the 1st, 11th, 21st, 31st (if exists), 1st, 11th, etc. The first email start time is the closest interval. For example, If the specified value is 10, and the configuration was saved on the 12th, the next email will be sent on the 21st. The maximum possible interval is 30.
-
Every x months - The system sends the latest report every X months as specified in the Send email every (months) field and on the days of the month specified in the Send email on field. For example, if the specified value is 3 months, and the the days are the 10th and the 15th, a report will be sent every third month on both the 10th and 15th of that third month. The first email start time is the closest interval. For example, If the specified value is 3, and the configuration was saved on the 12th of the month, the next email will be sent on the 21st. The maximum possible interval is 12.
-
On days of week - The system sends the latest report by email on the days of the week selected at the time specified in Send email at field.
-
On days of month - The system sends the latest report by email on the selected dates of the month at the time specified in the Send email at field.
Setting More Than one Time in a Day to Send Email Reports
When you choose Every x days, Days of week or Days of month you can set a number of times to send reports at set hours on the days that you selected. In this way you can send emails at defined hours and not every X hours, for instance to fit in with specific events during the working day.
To send reports at specific hours of the day
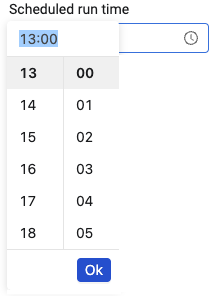
- Under Send email at, click
+to set more than one email send time. A default time is entered into each time field.
- Click inside the field, select a time, and click OK.
- To delete a time, click the trashcan icon.
- Click Save to save the configuration.
Downloading and Sending Reports
For full details of what your generated report contains, see Report Content.
After a report is configured and saved the report runs immediately. It will then be available for download. At the bottom of the Report Editor drawer, do one of the following:
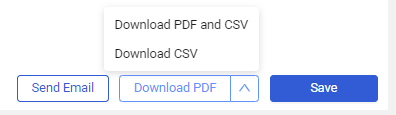
- To download a PDF of the report, click Download PDF.
- To download a CSV generated, from the Download PDF list, click Download CSV. (Generate CSV with query results in the Content section must be selected.)
- To download both the PDF and the CSV, click Download PDF and CSV. The download is a compressed file.
To send the report in an email immediately:
- Click Send Email to send the latest report as an email attachment. The Send Email button is only available if you configured sending email.
Changing the Report Name
Once you have created a report, if necessary you can change the report name.
To change the report name
- From the Reports page, click on the report. The Report Configuration drawer opens.
- In the drawer header, click
 and in the Name field, enter a new name.
 - Click Save.
Reports with this content will now be created with the new name.
- You can deactivate email scheduling if required. Toggle off Activate email scheduling to turn off email scheduling of reports. This does not change the configuration that you set. You can turn on email scheduling as required.
- Attach CSV to email to attach a CSV file with the entire saved query results for each of the listed saved queries. Note that this option is only available if you select Generate CSV with queries results. When you select Compress email attachments under Email, you can send the CSV files as a single compressed file. The compressed file also contains the PDF file of the report. The system will warn you if the compressed file reaches 10 megabytes.
- Specify email subject, optional custom message, list of recipients and recipients CC. You need to press Enter, or type a comma or a semicolon after you add an email address.
Note
The Custom message field allows unsanitized HTML code.
- Select the email scheduling recurrence (every x hours, every x days, on specific days of the week or month) and the time the email will be sent (Time zone is UTC). More than one time can be set.
Updated about 2 months ago