
Zoom
Zoom is a remote conferencing service that provides video conferencing, online meetings, chat, and mobile collaboration.
Asset Types Fetched
- Devices, Users, Licenses, Application Settings, Activities, SaaS Applications, Accounts/Tenants
Before You Begin
APIs
Axonius uses the following APIs:
Note
Zoom has an API limit per day. See Rate limits by account type.
Setting Up Zoom to Work with Axonius
Create a User Account
Note
The following steps are only required to fetch Application Settings and Licenses.
- From Zoom's Admiun menu, navigate to User Management
>Users. - Click Add Users.
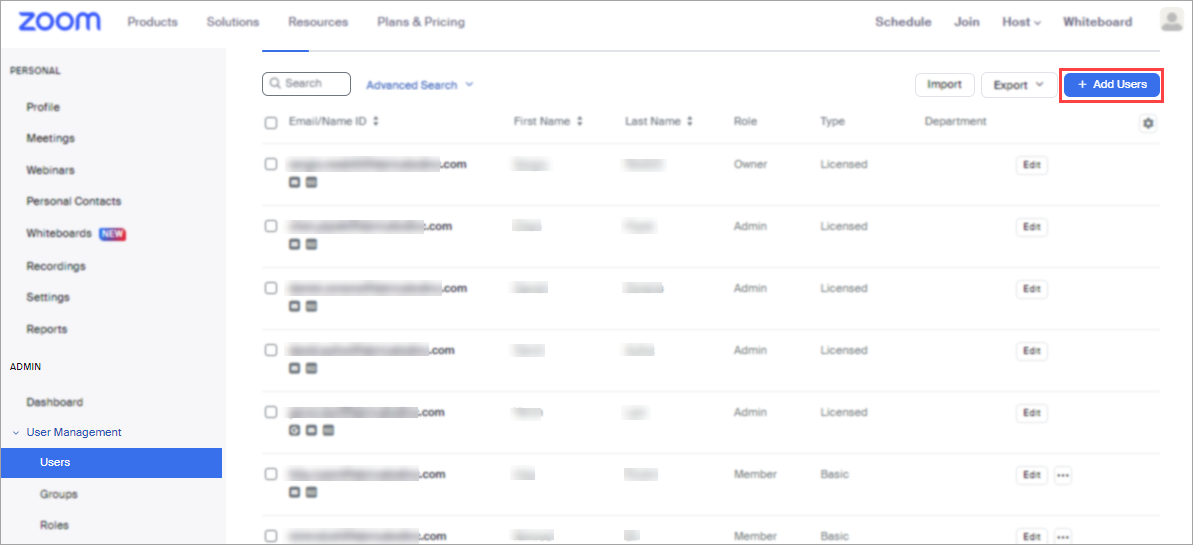
- Enter the email address for the new account and click Add.
.png)
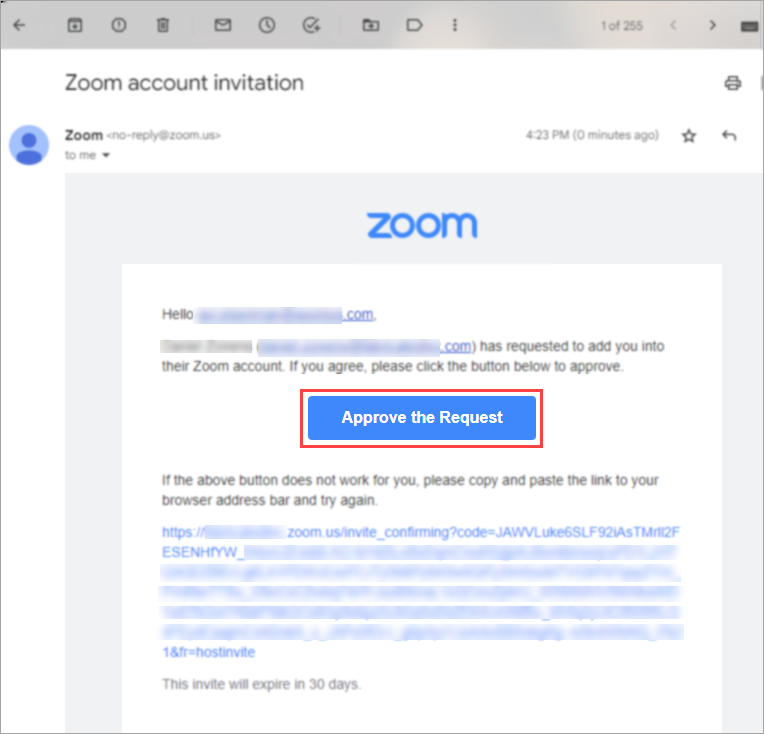
- Access the new email inbox you created and open the verification email from Zoom.
- Click Approve the Request.
- Add a password for the new user. The password must contain at least 32 characters.
- Configure user permissions:
- From the Admin menu, navigate to User Management
>Roles. - Click Add Role.
- Enter a name for the role and click Add.
- From the Admin menu, navigate to User Management

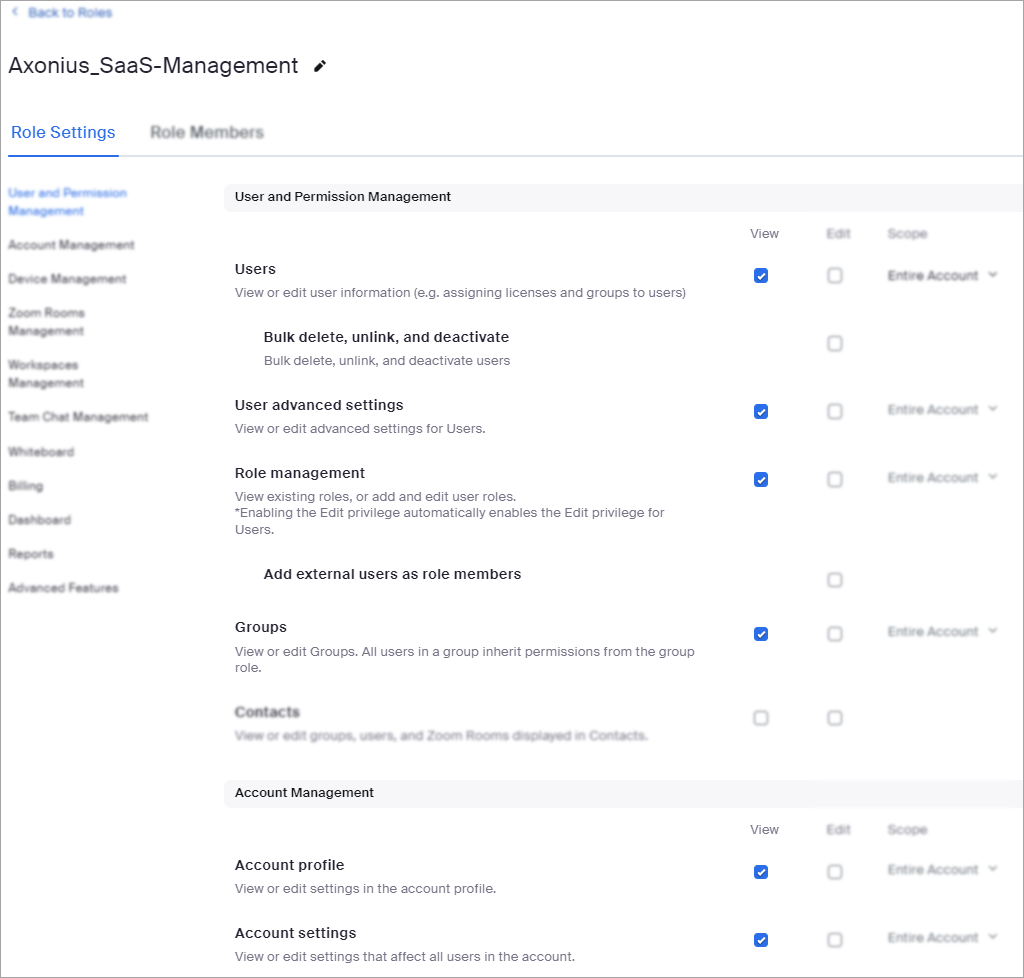
- Under Role Settings
>User and Permission Management, mark the View checkbox for the following permissions:- Users
- User advanced settings
- Role management
- Groups
- Account profile
- Account setting
- Single Sign-On
- Integration
- From the left menu, select Billing and then mark the View checkbox for the following permissions:
-
Subscription
-
Billing information
Note
For the full list of permissions, API endpoints and scopes required for each asset type - see Zoom Permissions.
-
- Click Save Changes.
- Click the Role Members tab.
- Click Add Members.
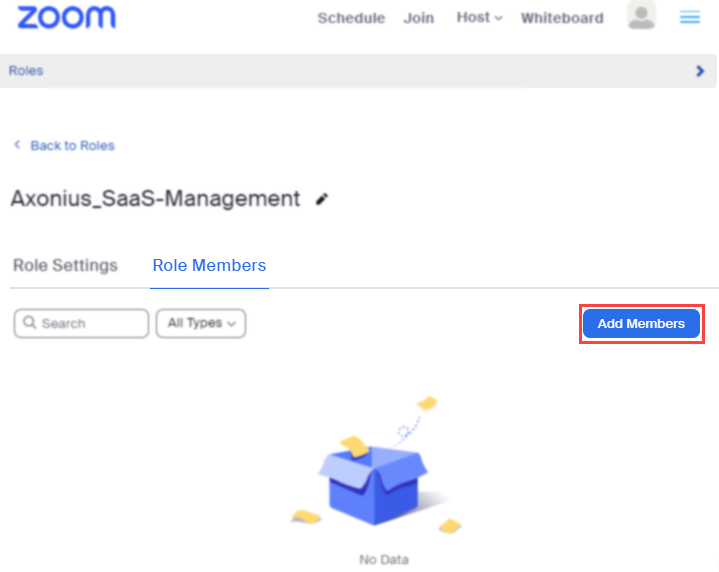
- Enter the email address that you created and click Add.
Enable 2-Factor Authentication (2FA) With Google Authenticator
Note
This part is mandatory if your organization requires 2-Factor Authentication.
- Log into the Zoom web portal as an admin (not the newly created user).
- Enable 2FA (You can skip this step if 2FA is already enabled for the account/group.):
- Navigate to Advanced
>Security. - Enable Sign in with Two-Factor Authentication.
- If a verification dialog appears, click Enable to verify the change.
- Select Enable 2FA for users that are in the specified groups, then click the pencil icon and select the group the newly created user belongs to.
- Click OK.
- Navigate to Advanced
- Set up 2FA for the user account:
- Log into the Zoom web portal with the newly created user account.
- Install Google Authenticator on your phone or add a Chrome extension.
- Select your device type and then click Next. A QR code is displayed.
- Click Can't scan QR Code?
- Copy the Secret key that appears.
- Back in Axonius, paste the copied secret key in the 2FA Secret Key connection field.
- Back in Zoom, in the wizard, click Back.
- Open the Google Authenticator (2FA app) on your mobile device.
- Tap the option to scan a QR code (Look for a camera or QR code icon).
- Scan the QR code on the Zoom web portal. The 2FA app will generate a 6-digit, one-time code.
- Click Next.
Next Steps
- Configure the required permissions to connect the adapter and fetch assets.
- Connect Zoom in Axonius.
- (Optional) Configure Advanced Settings.
Related Enforcement Actions
Updated 10 days ago
Did this page help you?