
Okta Application Category Events
Axonius supports Okta Application Category Events in an Event node of a Workflow.
The following table lists the Okta Application Category Events, i.e., Okta events related to Applications, their descriptions, as well as their event names in Okta. Learn more about these event types.
| Event Type | Description | Event Type Name in Okta |
|---|---|---|
| Consent Granted | User granted consent to app in Okta. This event can be used to identify the org AS consent grant. When fired, the event contains information about the successful consent grant by org AS. | app.oauth2.consent.grant |
| Activate | Application was activated in Okta. | application.lifecycle.activate |
| Create | Application was created in Okta. | application.lifecycle.create |
| Deactivate | Application was deactivated in Okta. | application.lifecycle.deactivate |
| Deleted | Application was deleted from Okta. | application.lifecycle.delete |
| Updated | Application was updated in Okta. | application.lifecycle.update |
| Sync user | User was synced in an external application in Okta. | application.provision.user.sync |
| Assigned user to app | User was added to an application membership in Okta. | application.user_membership.add |
| User app password changed | User's application password changed in Okta. | application.user_membership.change_password |
| Unassigned user from app | User was revoked from an application in Okta (unassigned but not yet deprovisioned). | application.user_membership.revoke |
- In the Okta admin management UI,add the Okta Application event types you want to monitor and use in the Workflow.
- Whenever one of the registered events occurs in the Okta admin UI, a Webhook event is sent to the Axonius URL for Okta events. For example, if a user subscribes to an application using the Okta admin UI, Axonius receives an application.user_membership.add event and any Workflows configured with this event are triggered.
Integrating Okta with Axonius
Before Okta can begin sending Okta Application Category Events, you must configure the following in the Okta admin management UI:
-
Axonius webhook URL that is to receive Okta events.
-
Private Secure Key.
-
The event types from the above table in Okta, which you want to monitor and include in Workflows. For example, application.lifecycle.activate, application.lifecycle.deactivate.
Adding the Okta Application Category Events to the Workflow
You can add Okta Application Category Events in the triggering Event node of a Workflow or in an Event node anywhere else in the Workflow, where relevant. When an event from this category occurs, the Workflow begins or continues running.
To select Okta Application Category Events as the Workflow trigger
- In the Trigger Type pane, under User Onboarded or Offboarded, click the Okta Application Category Events tile.
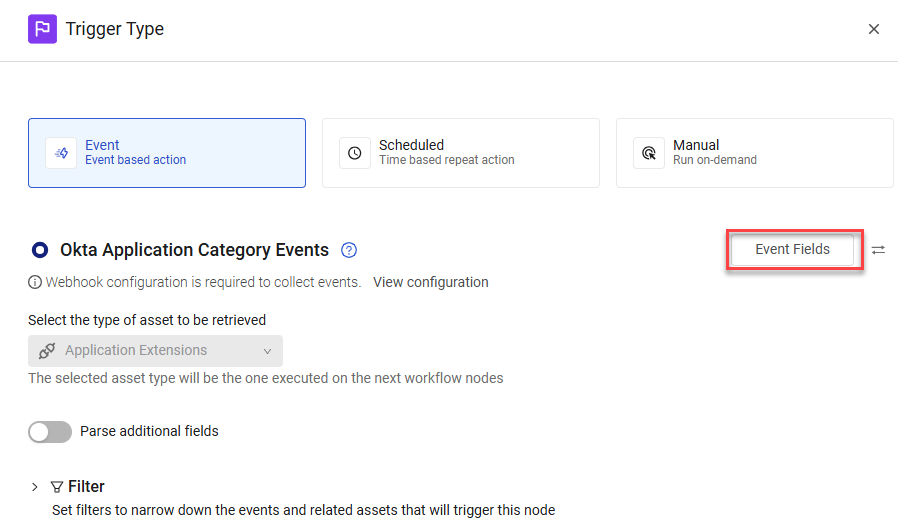
The Workflow is triggered each time an event from this category occurs in Okta. The next node runs on the retrieved application.
To select Okta Application Category Events as a non-triggering event
- In the Event pane, under User Onboarded or Offboarded, click the Okta Application Category Events tile.
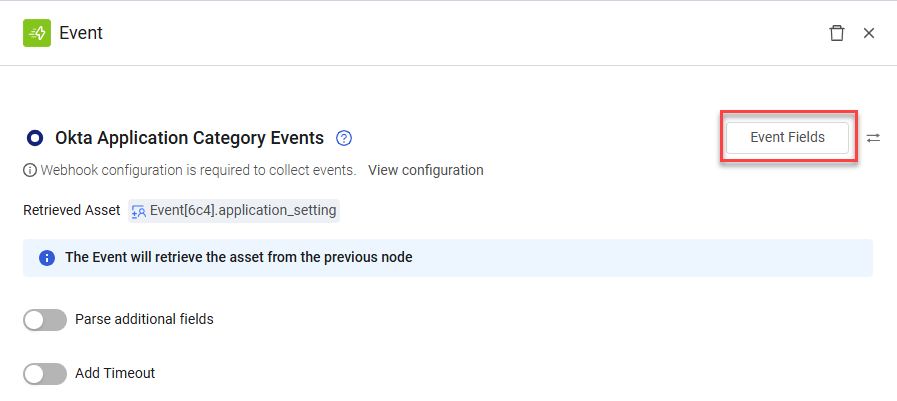
In this case, when an event from the Okta Application category is created in Okta on the asset retrieved from the previous node (in the above example, the event application setting), an event occurs and the Workflow continues running.
Viewing the Event Structure
After you select the event, you can view the structure of the Events that Okta hook delivers to the Axonius Webhook URL. You can then use these Event fields to follow up on Okta Application Category Events in a Workflow, for example in triggering Event filters or in Event Conditions.
To view the Event fields
- In the Trigger Type or Event configuration panes for the Okta Application Category Events (see above screens), click Event Fields. A list opens of all Event field names and their field types.
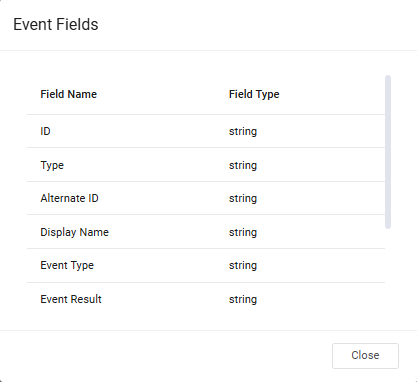
The following describes these Event fields:
- ID - ID of the Okta application.
- Type - Type of Okta application.
- Alternate ID - Alternate ID of the Okta application.
- Display Name - Display name of the Okta application.
- Event Type - Type of event that occurred. For example, application.lifecyce.activate.
- Event Result - Result of the event that was triggered.
- Event Published At - Indicates the precise time (standard timestamp in ISO 8601 format) that Okta recorded and published the event to the System Log in Okta’s internal systems.
- User ID, User Display Name - ID and display name of the Okta user. Relevant for application.provision.user.sync, application.user_membership.add, application.user_membership.revoke, and application.usermembership.changepassword.
- Event date - Date the event occurred.
- Event timestamp - Timestamp when the notification was delivered to Axonius.
Filtering By Event Type
This section describes how to set up your Workflow to be triggered or continued only for a specific event type.
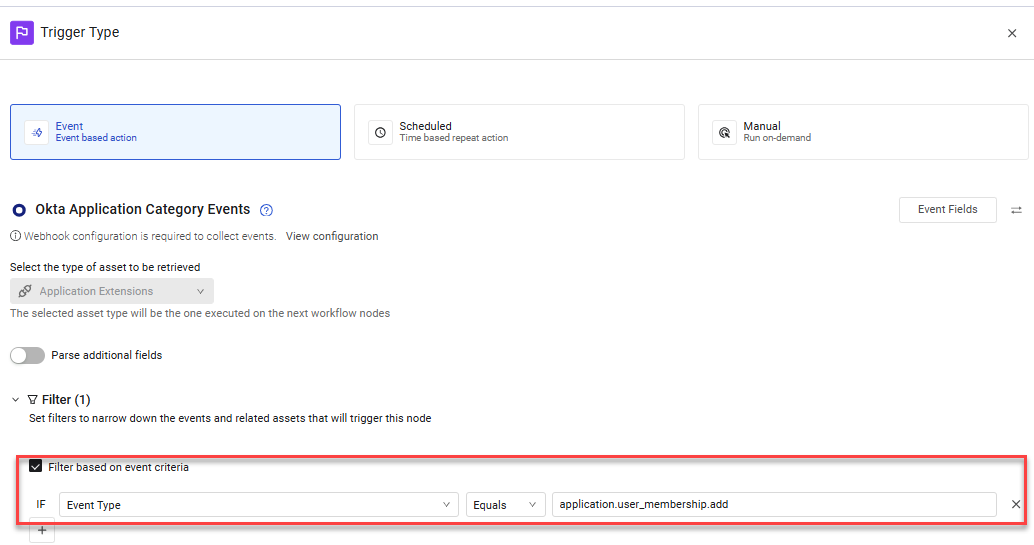
- Filter the Okta Application Category Events triggering event so that only a specific Event Type triggers the Workflow. Learn how to filter a triggering event.
The following example shows a Workflow that is triggered only for Event Type = application.user_membership.add. This means that whenever a user subscribes to an application in Okta, the Workflow begins running.
- Add an Event Condition under any Okta Application Category event to filter it by Event Type. The Workflow will only proceed for matching events.
The following example shows a Workflow that continues on the True branch only for Event Type = application.lifecycle.activate. This means that whenever an application is activated in Okta, the Workflow continues running on the True branch.

Updated 9 months ago