
1E
1E is a remote endpoint management solution built on a single agent for speed, visibility, and control of all endpoints.
Use Cases the Adapter Solves
- Endpoint Visibility Across All Managed Devices: Identify every device managed by 1E — including hardware details, OS version, and agent status — giving security and IT teams a unified view of the endpoint estate.
- Agent Health and Version Monitoring: Track 1E agent versions and connection states across all endpoints to ensure agents are current and communicating, enabling proactive remediation of stale or disconnected devices.
Asset Types Fetched
- Devices
Data Retrieved through the Adapter
Devices - Fields such as Hostname, FQDN, OS Version, OS Architecture, Domain
Before You Begin
Required Ports
- TCP port 80/443
Authentication Methods
Select an authentication method to connect the adapter based on your 1E environment:
| 1E Environment | Authentication Methods |
|---|---|
| Cloud | User Name and Password |
| On-prem | Access Token |
| SaaS | JWT Token, Certificate File, Certificate Passphrase |
| JWT Issuer (Client ID) | |
APIs
Axonius uses the Tachyon SDK. The following endpoints are called:
POST api/Authentication/RequestJwtAuthenticationPOST Tachyon/api/Authentication/RequestJwtAuthenticationGET Consumer/Devices
Consult with your vendor for permissions for reading the objects.
Setting Up 1E to Work with Axonius
Please consult your 1E administrator or 1E support for instructions on generating API credentials. For certificate-based (non-interactive) authentication, refer to the 1E non-interactive authentication documentation.
Connecting the Adapter in Axonius
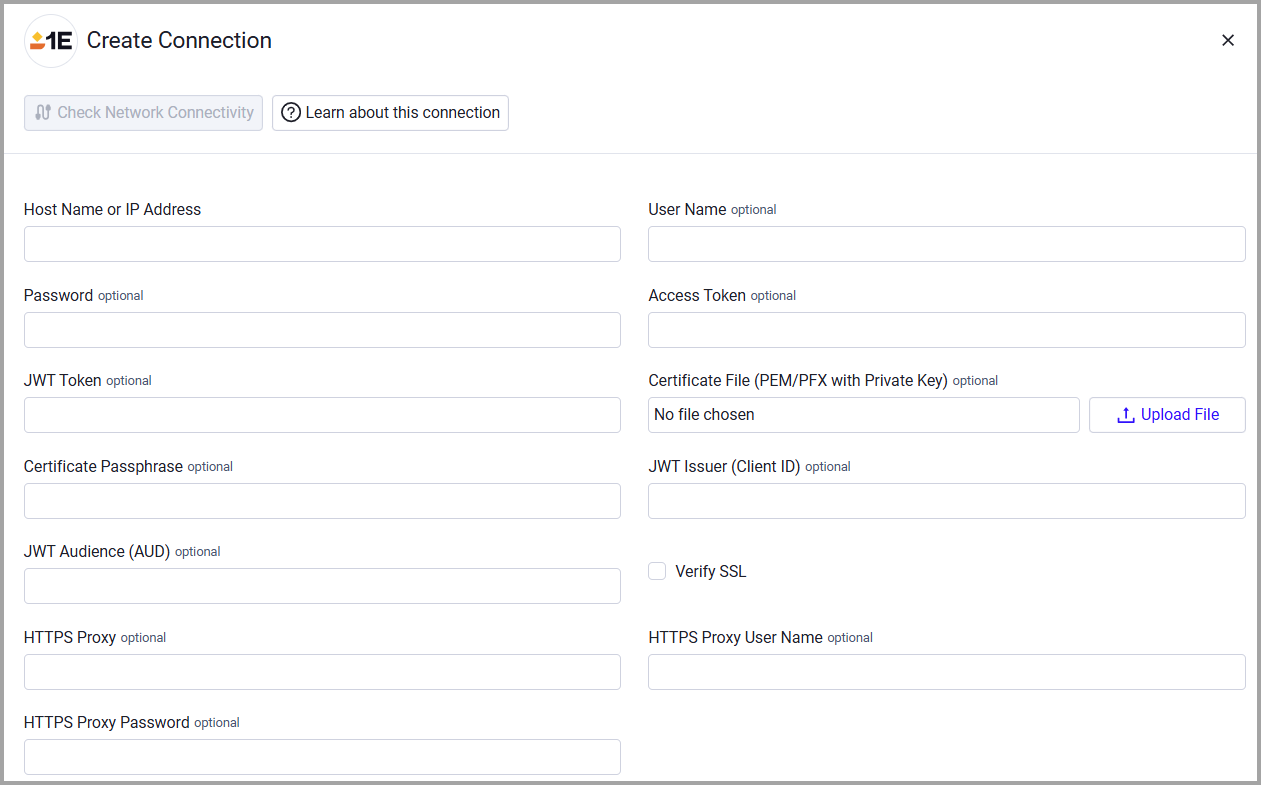
To connect the adapter in Axonius, provide the following parameters:
Required Parameters
- Host Name or IP Address - The hostname or IP address of the 1E server.
- Select one of the following authentication methods based on your 1E environment. See Authentication Methods for details:
- User Name and Password - The credentials for a user account that has the permissions to fetch assets.
- Access Token - An Access Token associated with a user account that has permissions to fetch assets.
- JWT Token - A Token associated with 1E's Non-Interactive Authentication flow. You can obtain a Token using a JWT you already have. To do so, make a POST request to either of the endpoints listed below. Your token needs to be wrapped in double quotes in the payload since the endpoint expects a string. If the JWT is valid, you receive a Token in return. See the 1E documentation for more details.
https://your.tachyon.server/Tachyon/api/Authentication/RequestJwtAuthentication(for versions 9.X and 23.X)https://your.platform.server/api/Authentication/RequestJwtAuthentication(for versions 24.1 and newer)
- Certificate File (PEM/PFX with Private Key) - The certificate file containing the private key used to sign the JWT. Accepted file formats are PEM or PFX/PKCS12.
- Certificate Passphrase - A passphrase to decrypt the private key (relevant only if the certificate is password-protected).
- JWT Issuer (Client ID) - The application or client ID registered in your identity provider.
- JWT Audience (AUD) - The audience claim (aud) for the JWT. Required for non-interactive authentication where the identity provider URL is used instead of the domain. If not provided, the server domain is used as the audience. If you need to authenticate against an identity provider that expects a specific audience value (such as the identity provider's URL), you can specify it in this field.
Optional Parameters
- Verify SSL - Select whether to verify the SSL certificate of the server against the CA database inside of Axonius. For more details, see SSL Trust & CA Settings.
- HTTPS Proxy - Connect the adapter to a proxy instead of directly connecting it to the domain.
- HTTPS Proxy User Name - The user name to use when connecting to the value supplied in Host Name or IP Address via the value supplied in HTTPS Proxy.
- HTTPS Proxy Password - The password to use when connecting to the server using the HTTPS Proxy.
To learn more about common adapter connection parameters and buttons, see Adding a New Adapter Connection.
Updated 1 day ago