
Ninja One (RMM)
Ninja One is an RMM (Remote Monitoring and Management) solution for MSPs and IT organizations, allowing them to automate, manage, and remediate endpoint management tasks.
Use Cases the Adapter Solves
- Endpoint Visibility: Gain a comprehensive view of all devices managed by Ninja One, including detailed software and patch information.
- Security Monitoring: Identify devices with missing patches or unauthorized software to ensure endpoint security compliance.
- Asset Enrichment: Enrich device data with volume information and Windows services to support deep technical auditing and troubleshooting.
Asset Types Fetched
![]() Devices |
Devices | ![]() Users |
Users | ![]() Software |
Software | ![]() SaaS Applications
SaaS Applications
Before You Begin
Ports
- TCP port 80/443
Authentication Method
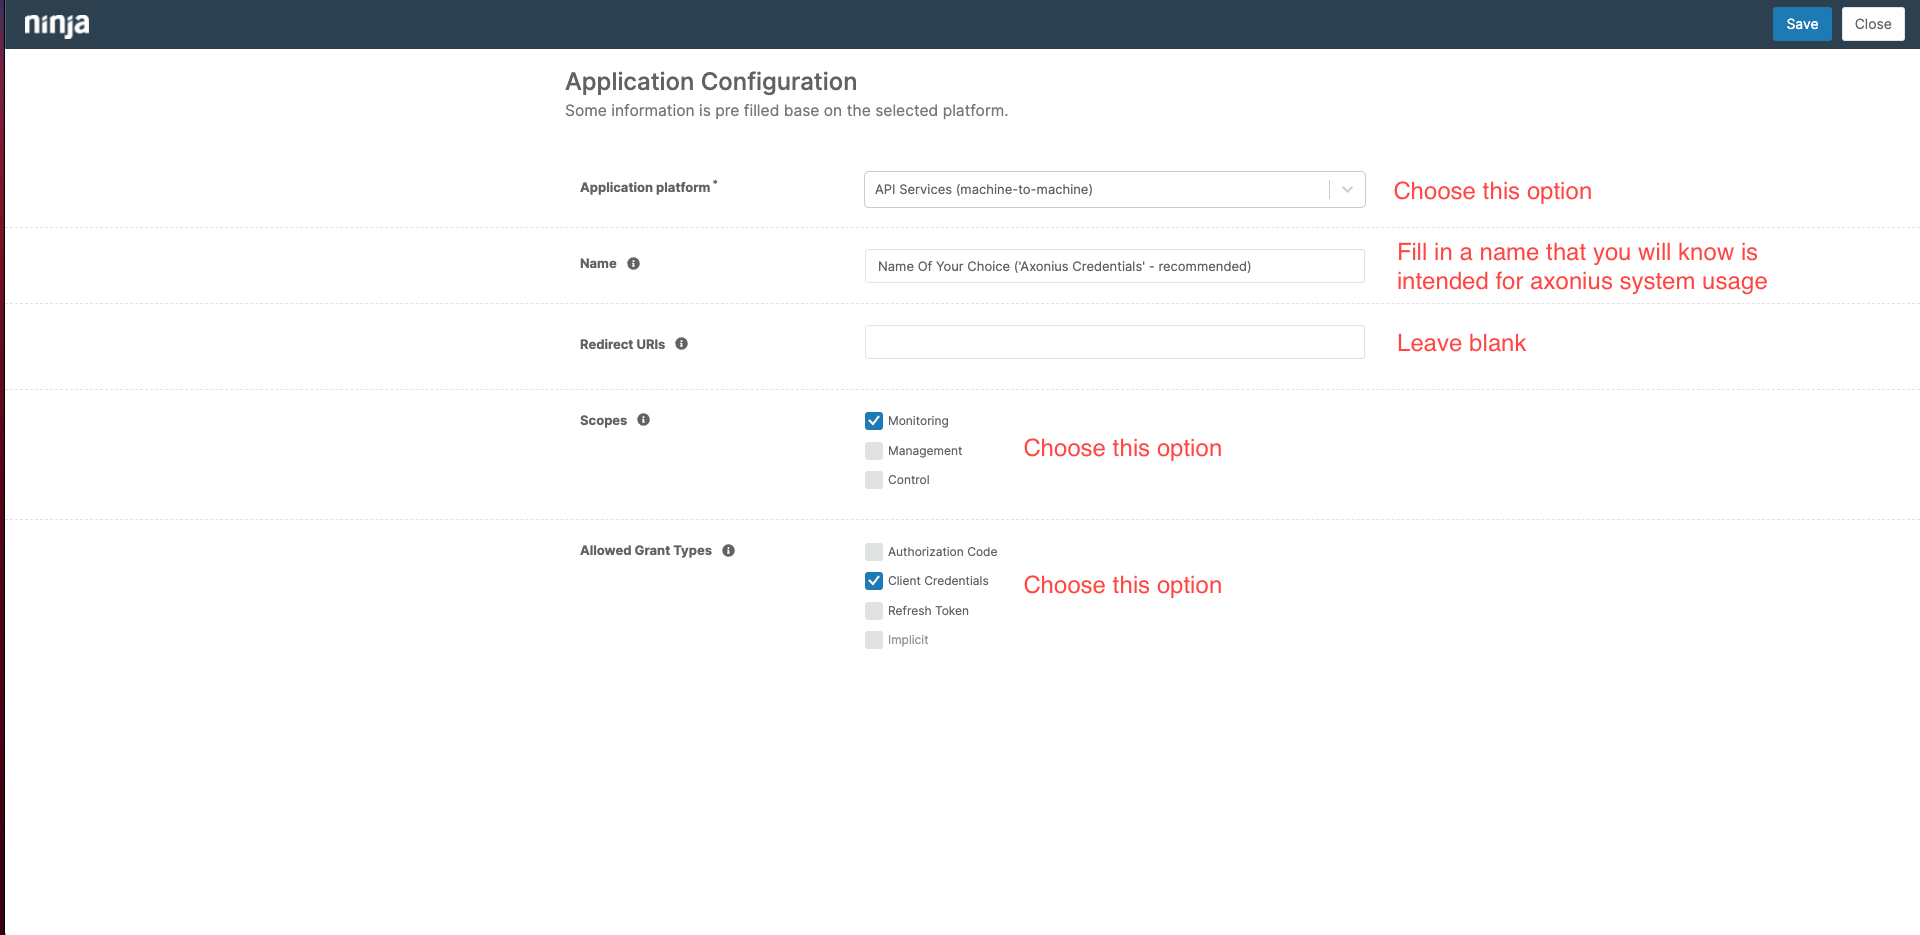
While creating the api client_id and secret, the customer will need to select scope='Monitoring', and Grant_type='Client Credentials'.
APIs
Axonius uses the Ninja RMM Public API 2.0.
/v2/device/{id}/windows-services - to fetch Windows services.
Permissions
The following permissions are required:
- Scope: 'Monitoring' (required for fetching assets).
- Scope: 'Management' (required only to run Enforcement Sets).
- Grant Type: 'Client Credentials' or 'Authorization Code' and 'Refresh Token' depending on the auth method.
Note:
If you do not see these options, the account may have restricted permissions. Please contact your NinjaOne admin.
Supported From Version
Supported from Axonius version 4.6
Setting Up Ninja One to Work with Axonius
Either obtain the API Client ID and Client Secret or the Authorization Code
-
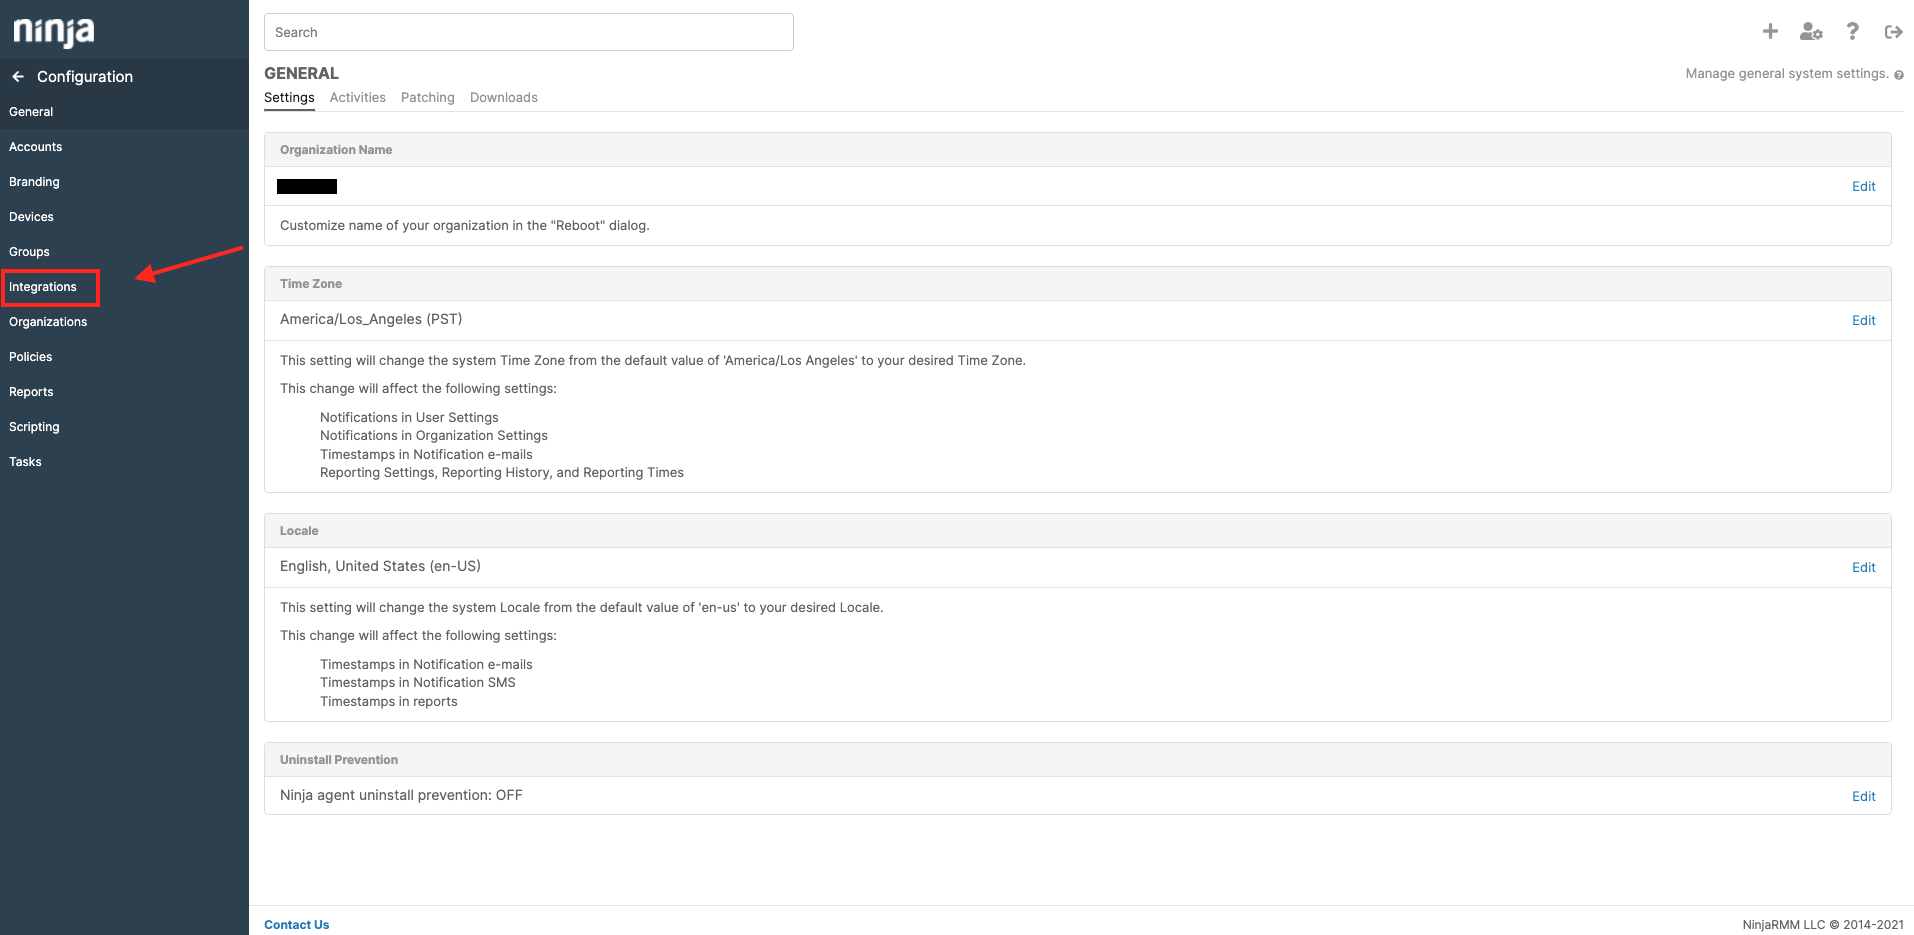
From the Ninja RMM Management portal, open the Integrations page.
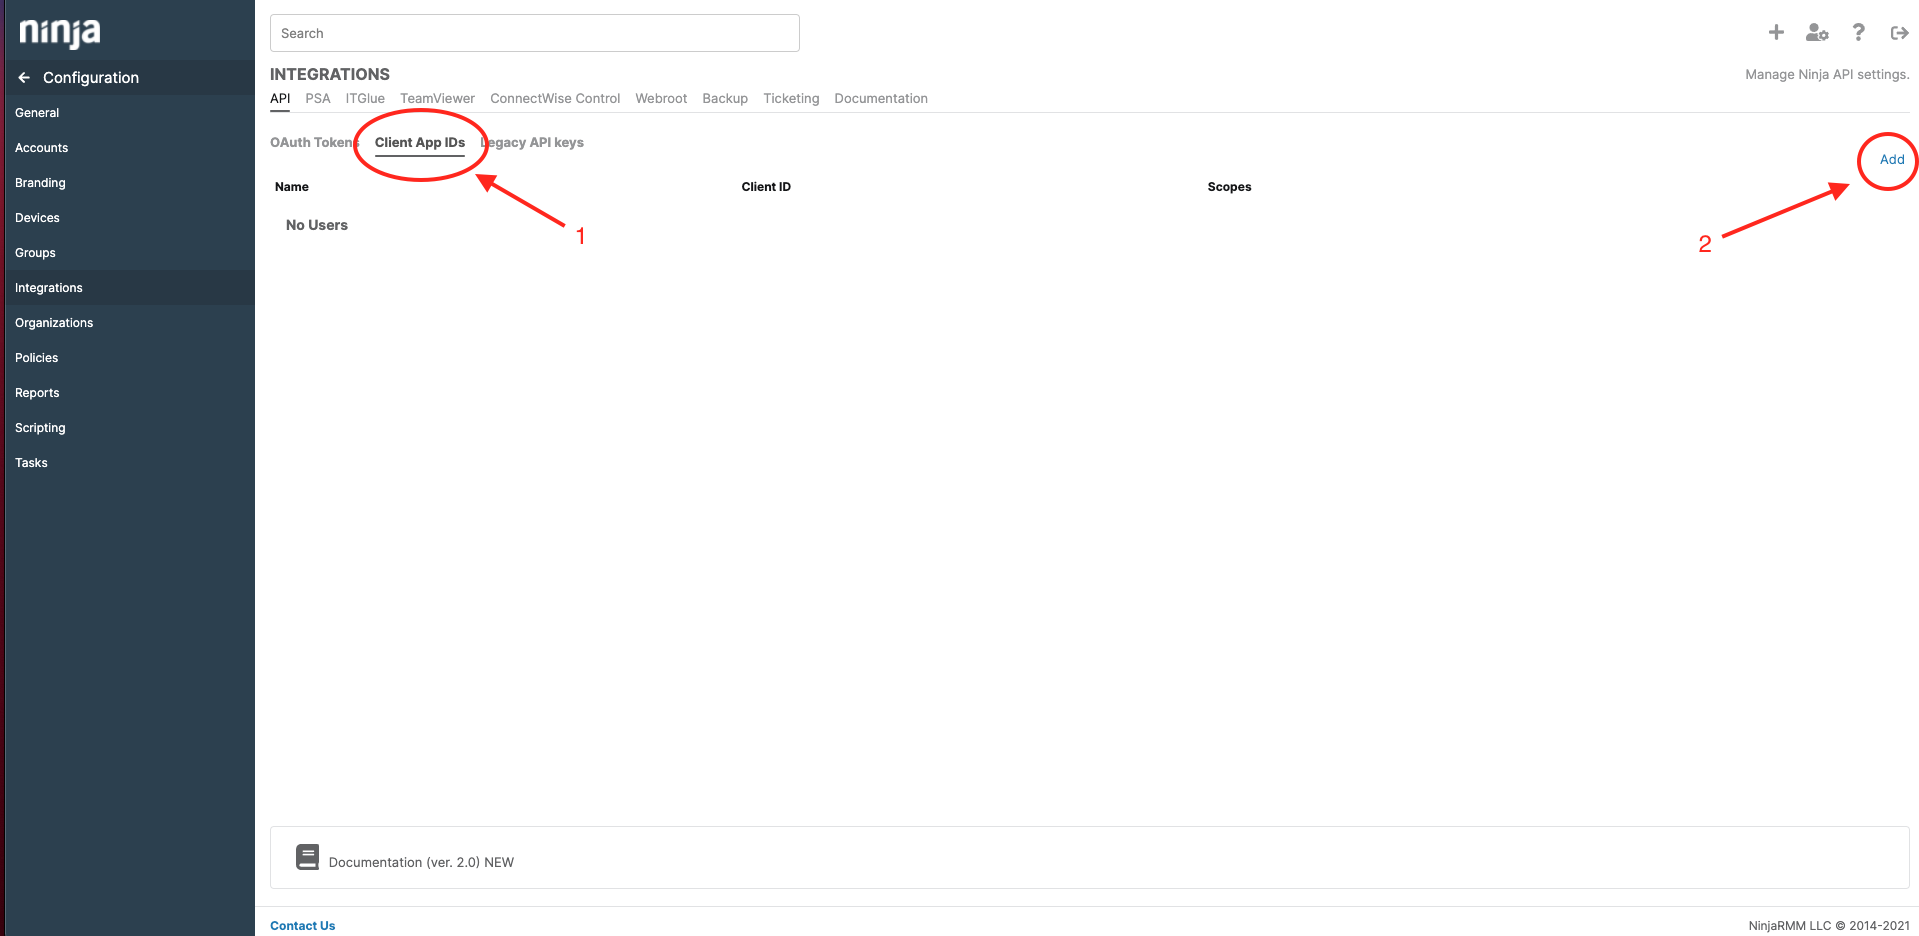
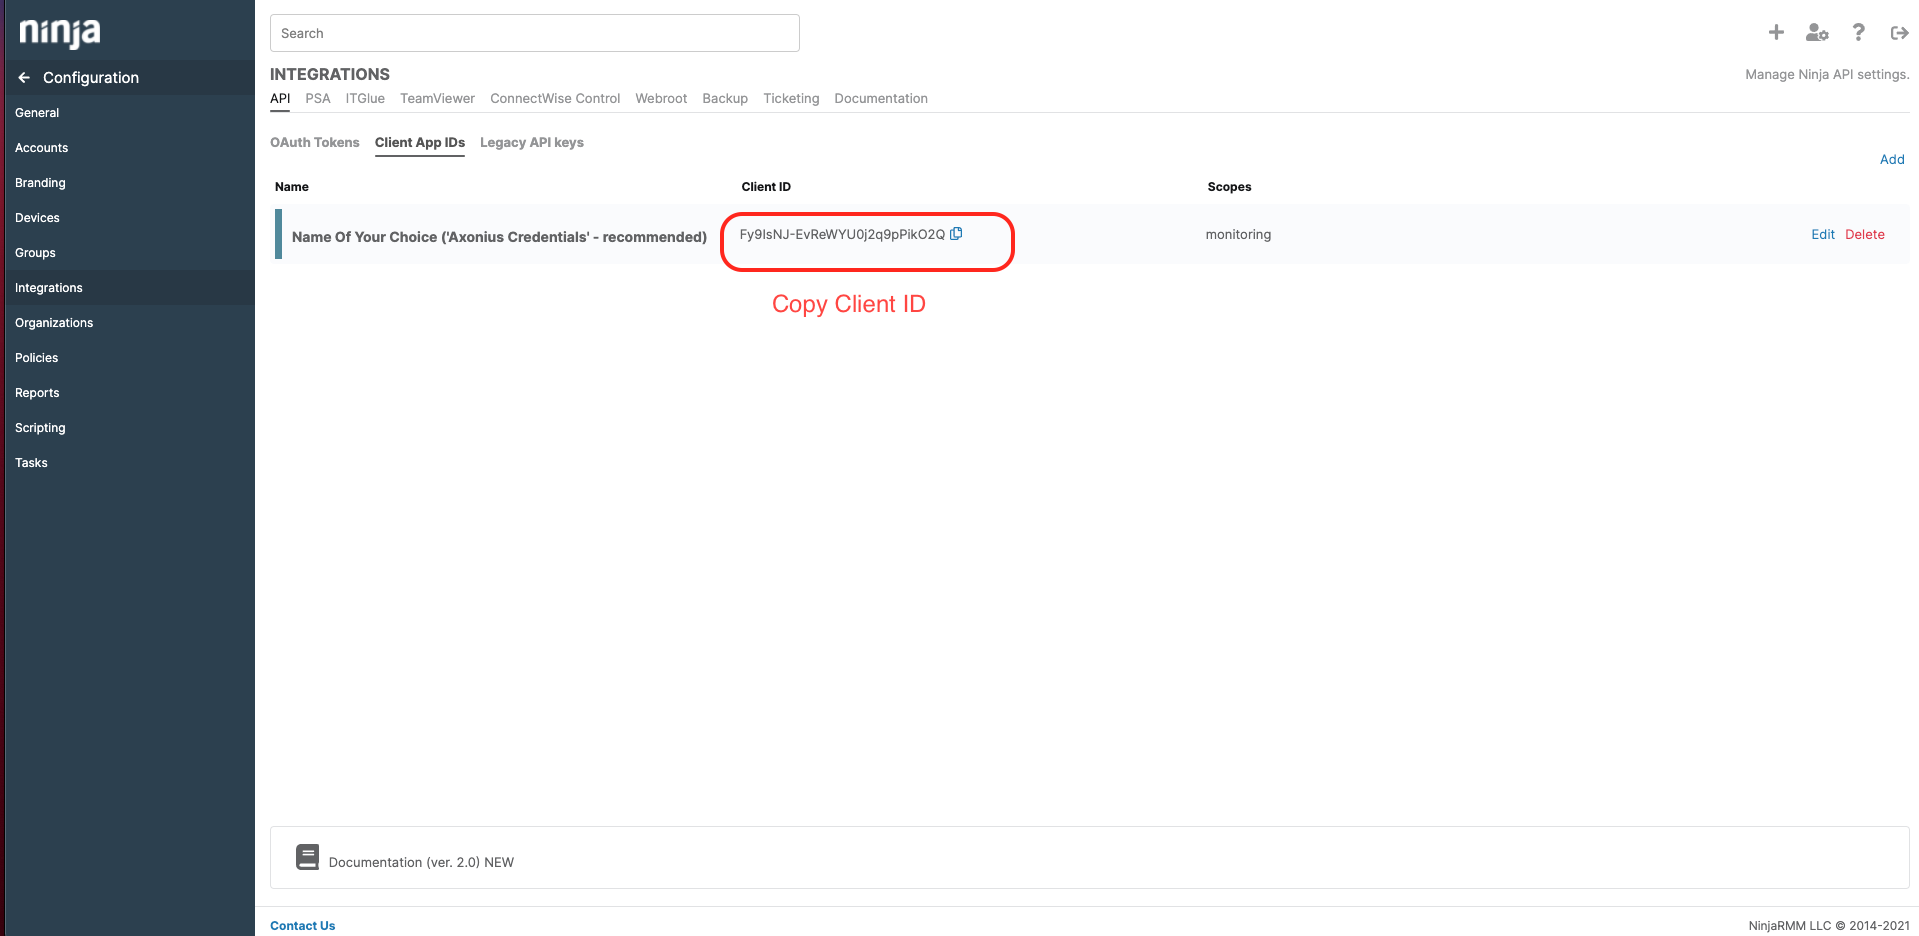
- Under API select Client App IDs and click Add to add an API Key.
- Configure the API as shown below. Set the Name as needed.
- Click Save. The Client Secret key is displayed. It is only shown once. Copy the Client Secret Key and make sure you save it to a safe place. Then click Close.
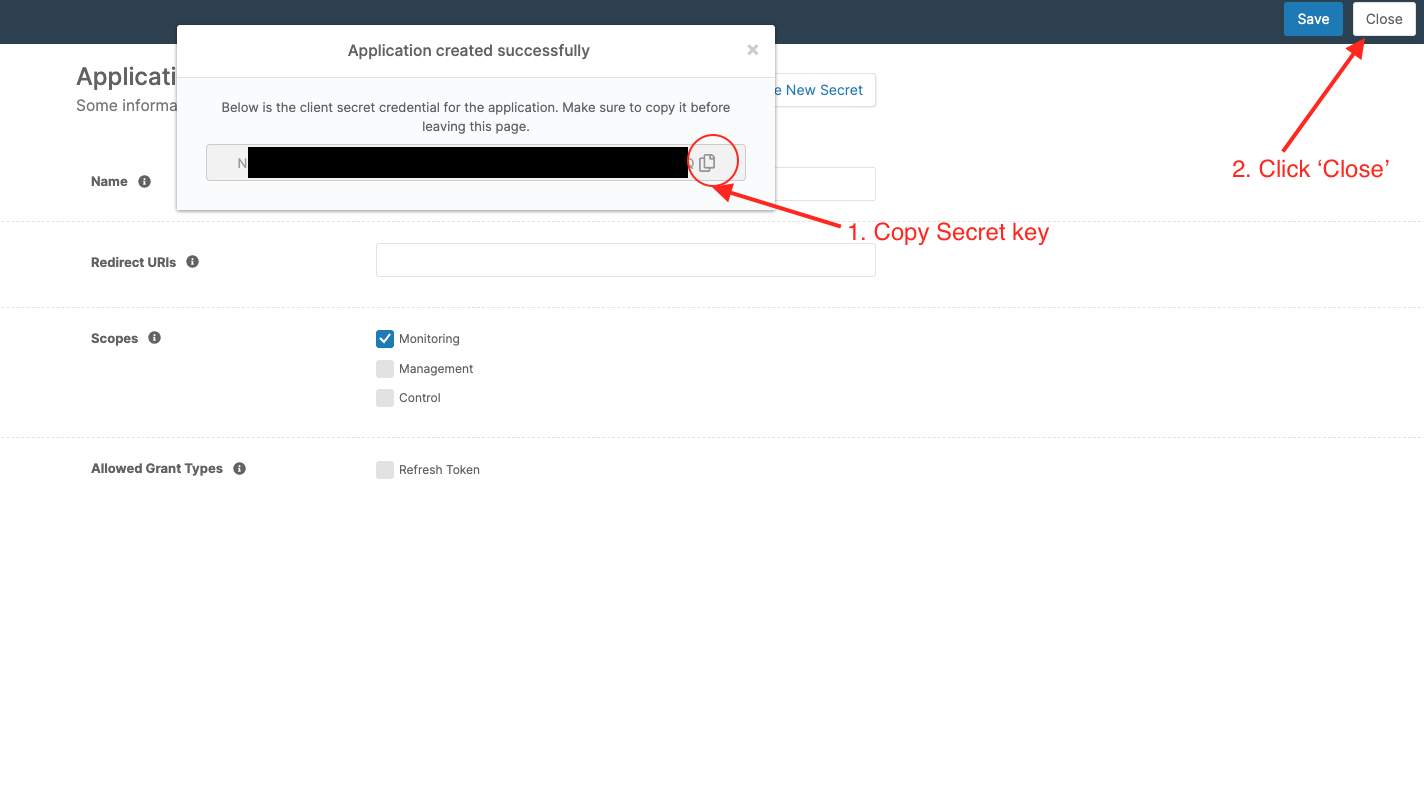
- The Client ID is now displayed on the API page. Copy the Client ID and save it to a safe place.
Connecting the Adapter in Axonius
Navigate to the Adapters page, search for Ninja One, and click on the adapter tile.
Click Add Connection.
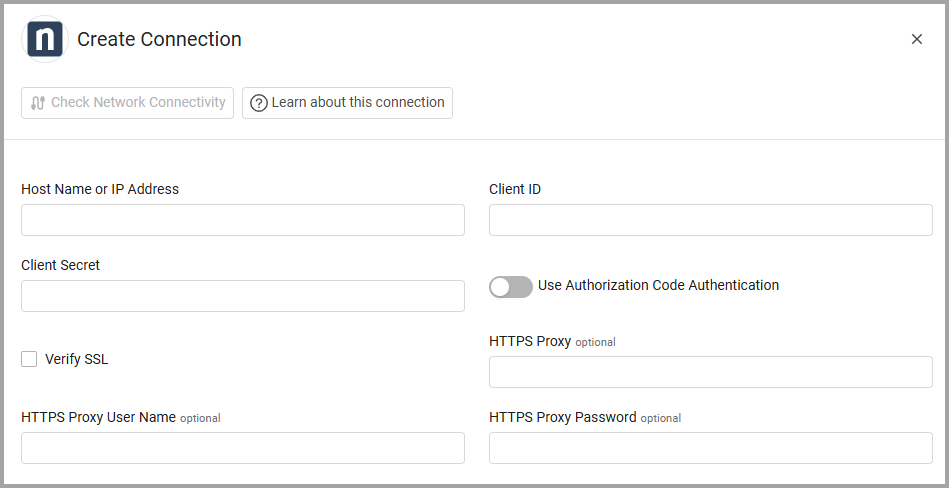
To connect the adapter in Axonius, provide the following parameters:
Required Parameters
- Host Name or IP Address - The hostname or IP address of the Ninja One (RMM) server.
- Client ID - Credentials to connect to the Ninja One (RMM) server.
2. Client Secret - Credentials to connect to the Ninja One (RMM) server.
Connection Label - A label to help you distinguish between multiple connections for the same adapter. See Connection label.
Optional Parameters
- Verify SSL - Select whether to verify the SSL certificate of the server against the CA database inside of Axonius. For more details, see SSL Trust & CA Settings.
- HTTPS Proxy - Connect the adapter to a proxy instead of directly connecting it to the domain.
- HTTPS Proxy User Name - The user name to use when connecting via the HTTPS Proxy.
- HTTPS Proxy Password - The password to use when connecting via the HTTPS Proxy.
-
Select Gateway – Select the Axonius Gateway to use when connecting adapters whose sources are only accessible by an internal network and not from the primary Axonius instance, which may be an Axonius-hosted (SaaS) instance or Customer-hosted (on-premises / private cloud). To use this option, you need to set up an Axonius Gateway.
To learn more about common adapter connection parameters and buttons, see Adding a New Adapter Connection.
Advanced Settings
Note:
Advanced settings can either apply to all connections for this adapter, or to a specific connection. Refer to Advanced Configuration for Adapters.
To learn more about Adapter Configuration tab advanced settings, see Adapter Advanced Settings.
- Fetch Users - (default true) Select this option to fetch users.
- Fetch Device software and patch information - Select to fetch software and patch information for devices.
- Fetch Device volume information - Select to fetch volume information for devices.
- Fetch Windows Services - Select this option to fetch Windows Services.
Related Enforcement Actions
Version Matrix
| Version | Supported | Notes |
|---|---|---|
| Ninja One RMM V2 | Yes |
Verify