
Working with Axonius Compute Nodes
You can create one or more compute nodes that connect to a primary node. There can be only one primary node. Compute nodes allow you to:
- Add load balancing to improve the overall performance of your Axonius deployment.
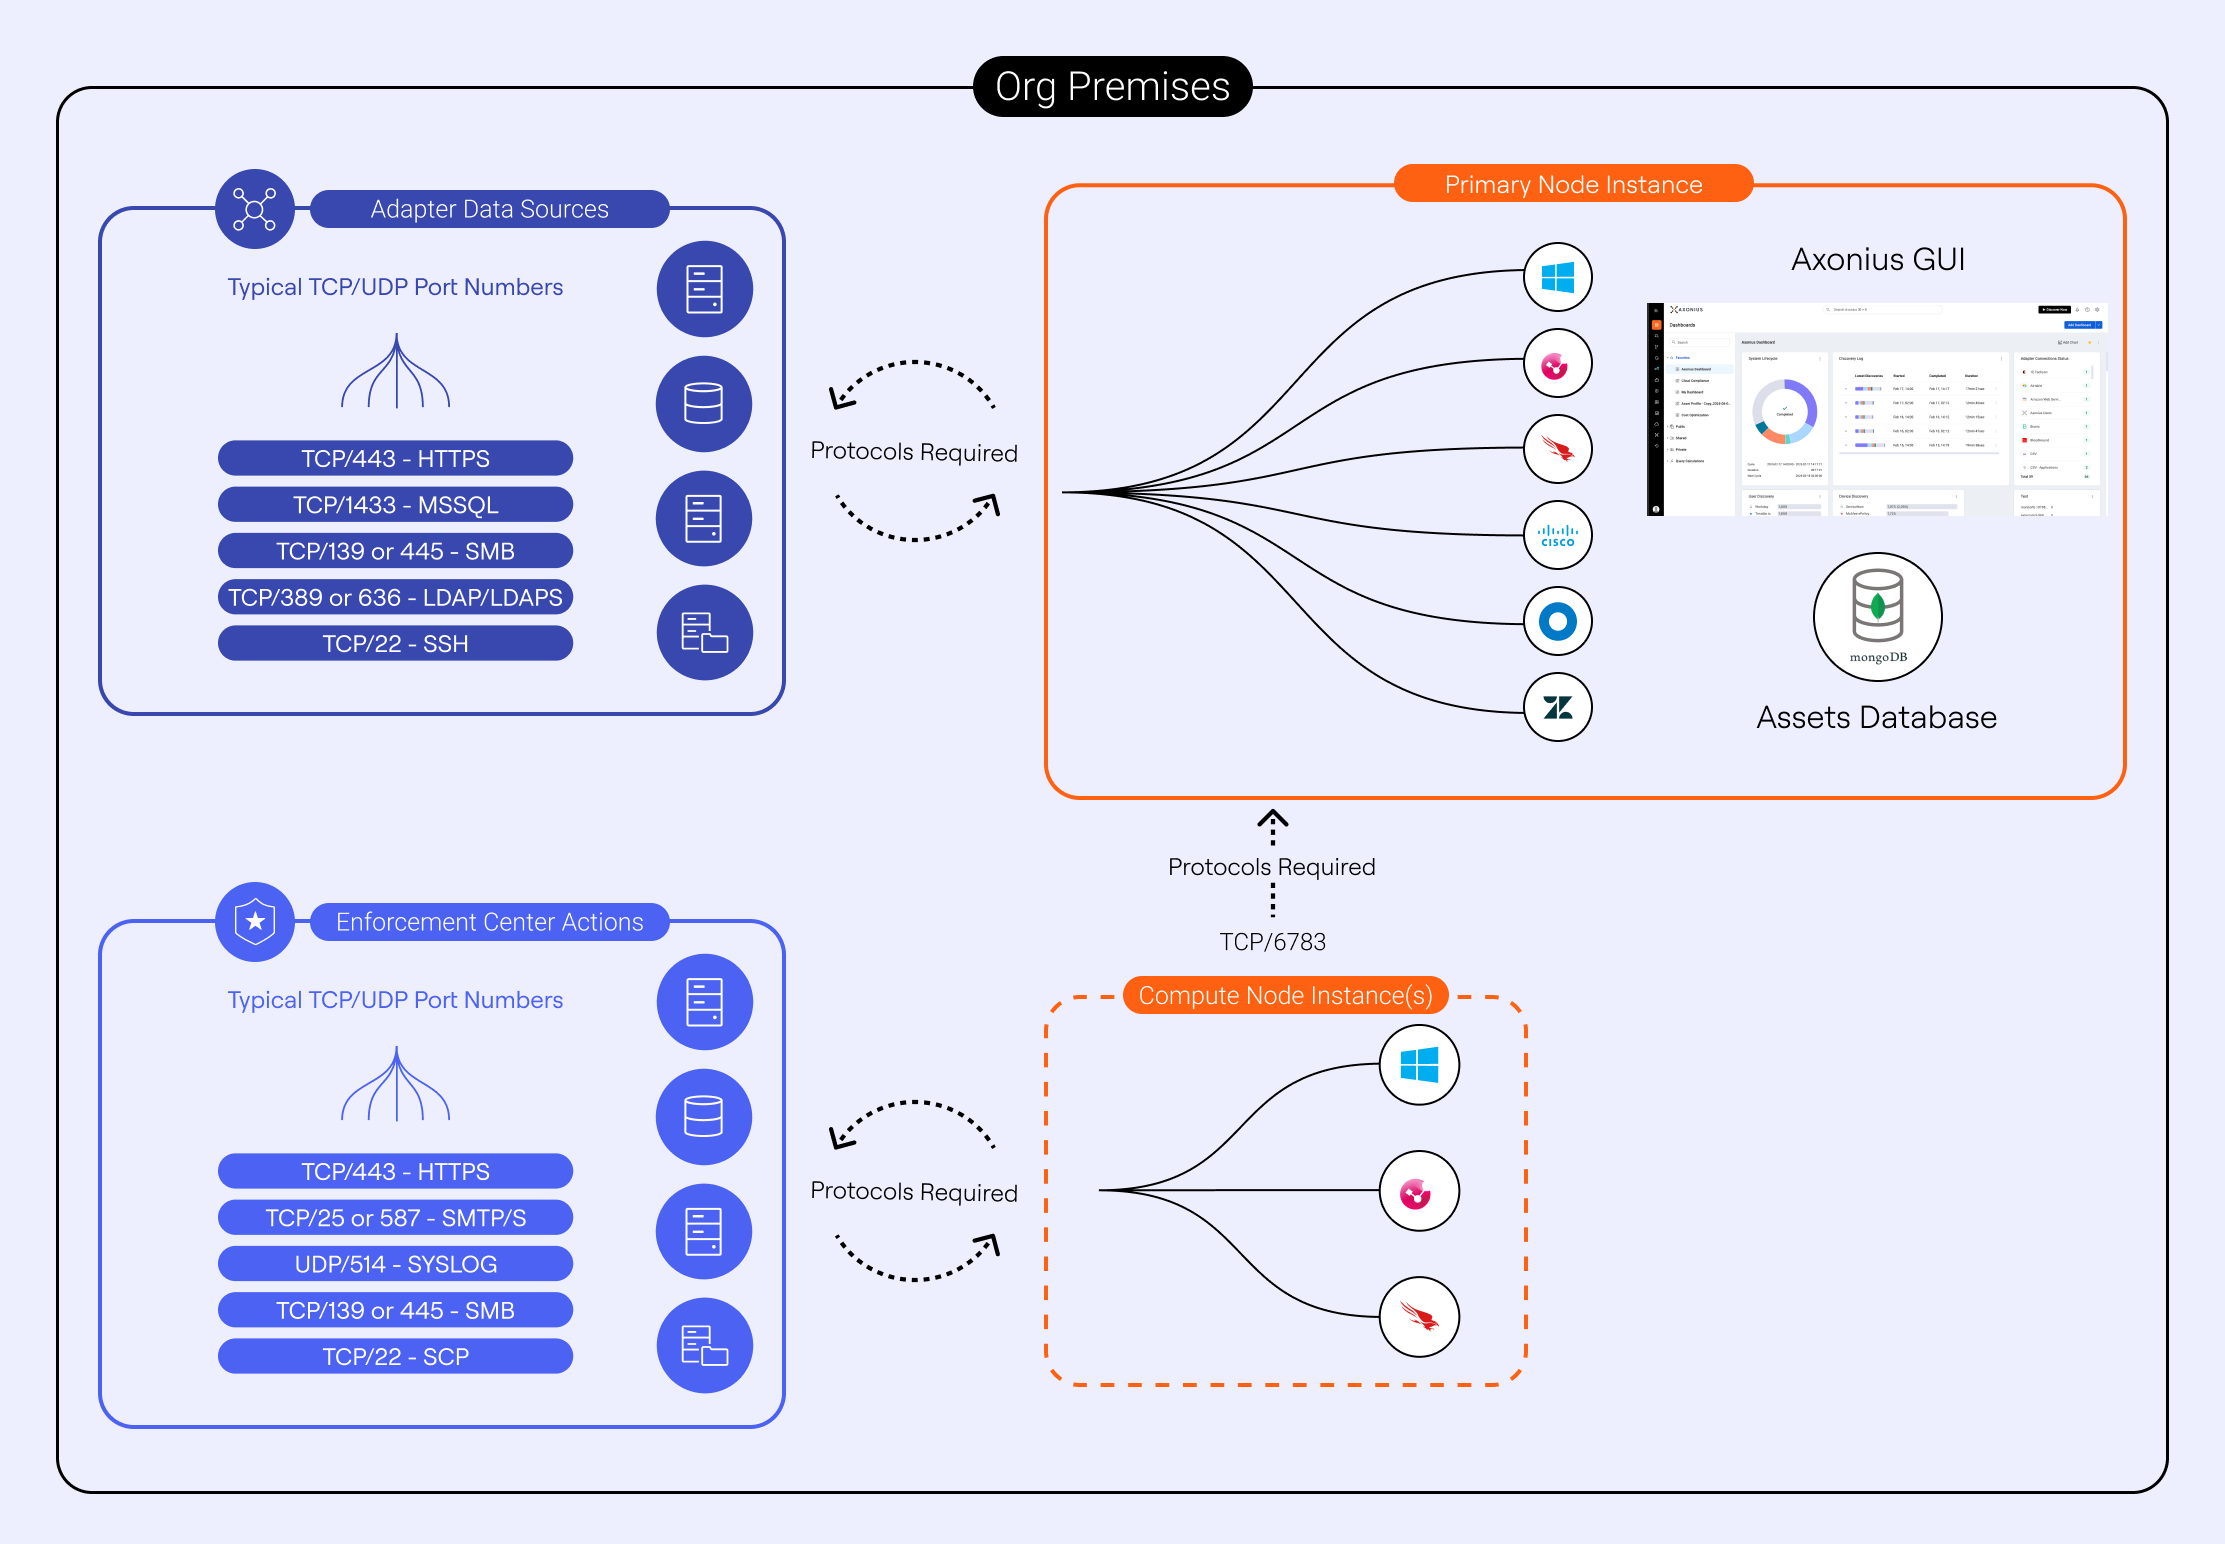
To connect a compute node, the following are required:
- The Axonius compute node must be installed on the partially connected network, with the same Axonius release version as the Axonius primary node.
- The following ports must be open from the Axonius compute node to the Axonius primary node for OpenVPN:
- TCP/6783:
| Source | Destination | Protocol | Port |
|---|---|---|---|
| Compute Node | Primary Node | TCP | 6783 |
Notes
If you are using the PaloAlto firewall you must use 'OpenVPN APP-ID' for destination port 6783 in order to connect the node.
If you are using an IDS or DPI on your system, define the destination port protocol/profile as OpenVPN (and not HTTPS) in order to connect the node.
Node Sizing Recommendations
| Number of Assets sent through Node | RAM | CPU Cores | Disk* |
|---|---|---|---|
| < 30k | 16 GB | 4 virtual cores | 500 GB |
| > 30k | 32 GB | 8 virtual cores | 500 GB |
| > 100k | 64 GB | 8 virtual cores | 500 GB |
- An SSD is not required for storage.
Connecting a Compute Node to a Primary Node
1. Copy the connection string from the primary node
To connect a compute node to a primary node, you need to copy a connection string from the primary node and use it when configuring the compute node.
-
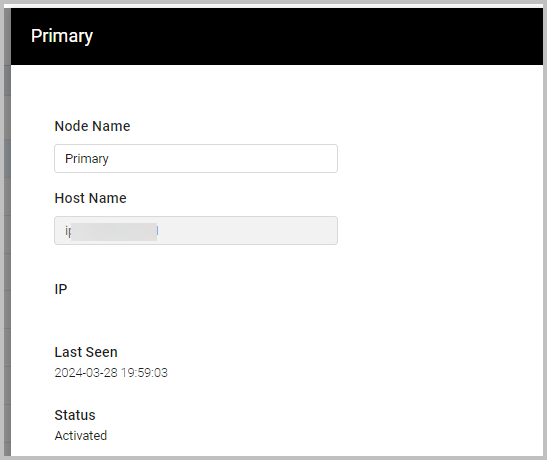
Log into the Axonius primary node, and go to the Manage Nodes page. The Manage Nodes page opens, displaying installed Axonius nodes, including the tagged name, hostname, IP address, last seen, installed version, and the status (activated/deactivated) of each node.
In Axonius New Navigation Experience access Manage Nodes from the System Settings menu at the top of the page.

-
Click Connect Node. From the message box that opens, click Generate and Copy to generate and copy the connection string that contains the node name.
Note
- From version 6.0.12 it is possible to use the same connection string to connect more than one node.
- However, it is also possible to generate a separate different connection string for each node, if you require this.
2. Deploy the compute node and connect to the primary node with the connection string.
- Make sure any prerequisites listed above are met.
- Deploy an Axonius node into the additional network and start the machine.
- Decrypt the system using the steps provided by Axonius.
- Configure the IP address per the "Setting the IP address" section in Configuring the Axonius Platform
- Install the license as described in Logging in and Signing Up. However, do not fill in signup details or configure an Admin user. Once the decryption and installation process is complete, the Axonius Machine opens:
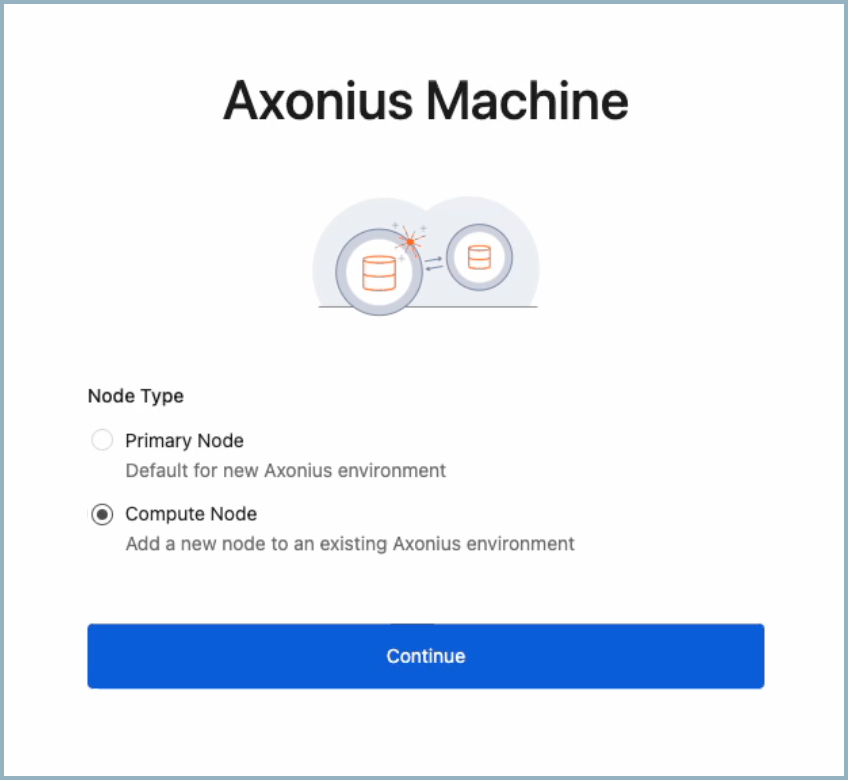
- From the Node Type select Compute Node.
- Paste the connection string copied from the primary node into the Connection string pane.
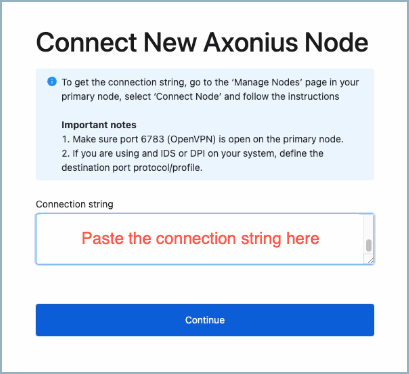
-
To use an HTTP proxy, select Connect through HTTP proxy and fill in the following fields:
- Hostname/IP - Enter the hostname or IP address of the proxy server.
- Port - Enter the port to use.
- Username (optional) - Enter a username.
- Password (optional) - Enter the appropriate password.
-
Click Continue.
-
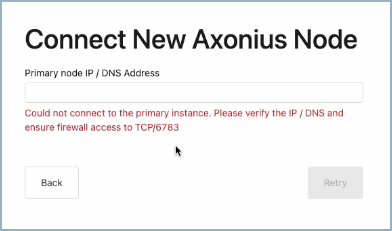
Some systems may have issues with the IP address of the primary node, in which case the following is displayed. Go back to the Manage Nodes page and copy the IP address of the Primary node into the Primary node field and click Retry.
The system begins to install, this might take a few minutes.
You should see a success message. An additional compute node is now added to the Manage Nodes page in the primary node with a status of Activated. The Axonius user interface is available only from a primary node. Once a node is connected to a primary node as a compute node, you will not be able to access the user interface on the compute node machine any more.
You can now configure any adapter to use the newly added Axonius compute node.
Managing Compute Nodes
You can deactivate, reactivate, delete, and rename compute nodes.
Deactivating a Compute Node
You can deactivate a compute node from the system using the Manage Nodes drawer. When you deactivate a compute node, all adapter connections using this compute node are removed from the primary node.
To deactivate a compute node:
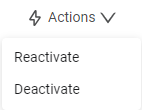
- From the Manage Nodes page, click on an active node. The Manage Nodes drawer opens.
-
Click the Actions button and choose Deactivate. The system asks you to confirm your action.
Once you confirm the action:
- All the adapter connections that use the selected Axonius compute node are removed.
- The status of the compute node is marked as Deactivated.
Reactivating a Compute Node
You can reactivate a node using the Manage Nodes drawer. To reactivate a deactivated node:
- From the Manage Nodes page, click on a node which is not currently active. The Manage Nodes drawer opens.
- Click the Actions button and choose Reactivate. The system asks you to confirm your action. Once confirmed, the status of the selected Axonius Compute node(s) is updated as Activated.
Deleting a Compute Node
You can delete a Compute node from the Manage Nodes page. You can only delete a compute node if it has not been used for two days. Once you delete a compute node it is completely removed from the system and will have to be installed again if you want to use it again. To delete a compute node
- First you have to Deactivate the compute node. It is now possible to delete the compute node.
- From the Manage Nodes page, click on a node (not the primary node). The Manage Nodes drawer opens.
- Click the Actions button and choose Delete. The system informs you that this completely deletes the node, and asks you to confirm the action. Once confirmed, the selected Axonius compute node is deleted from the systems.
Renaming Nodes and Hostnames
To allow you to manage your Nodes better you can rename the Nodes as well as the Hostnames To rename a Node:
- From the Manage Nodes page, click on a Node.
- The Manage Nodes drawer is displayed. You can rename the Node Name or Hostname. The Hostname field should not include spaces or special characters.
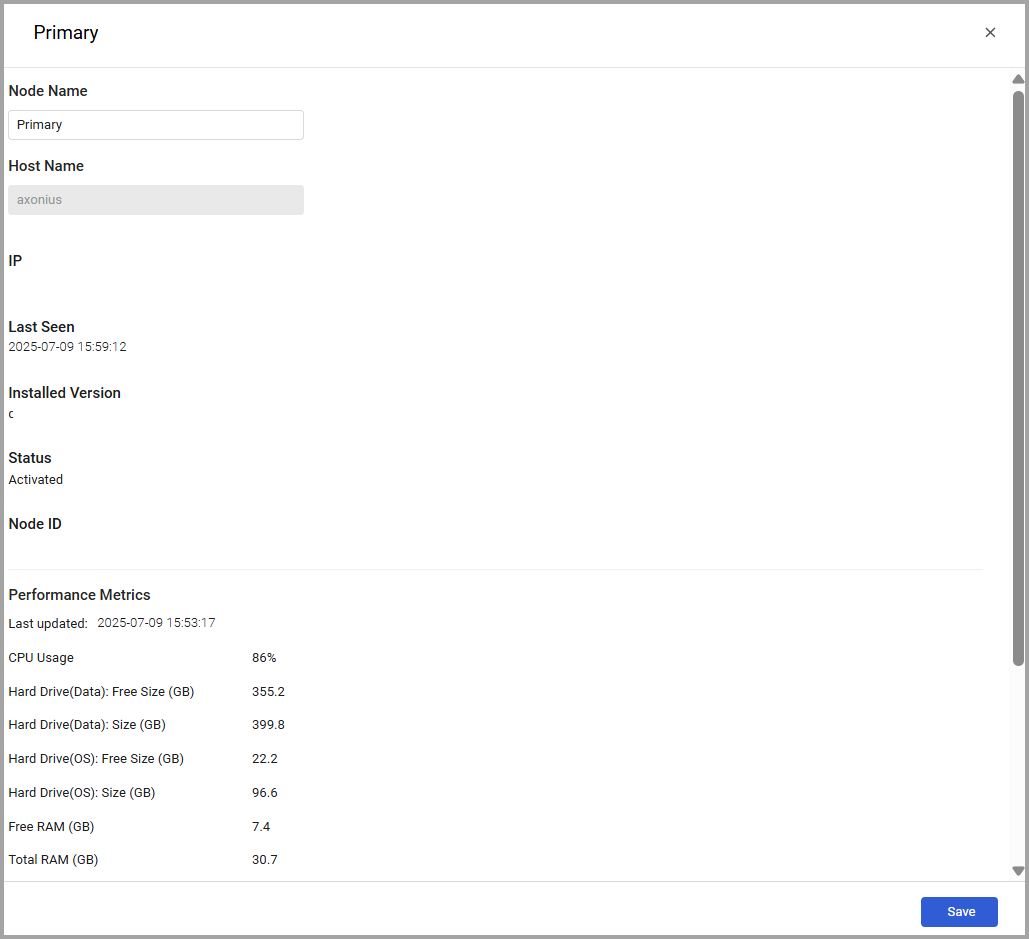
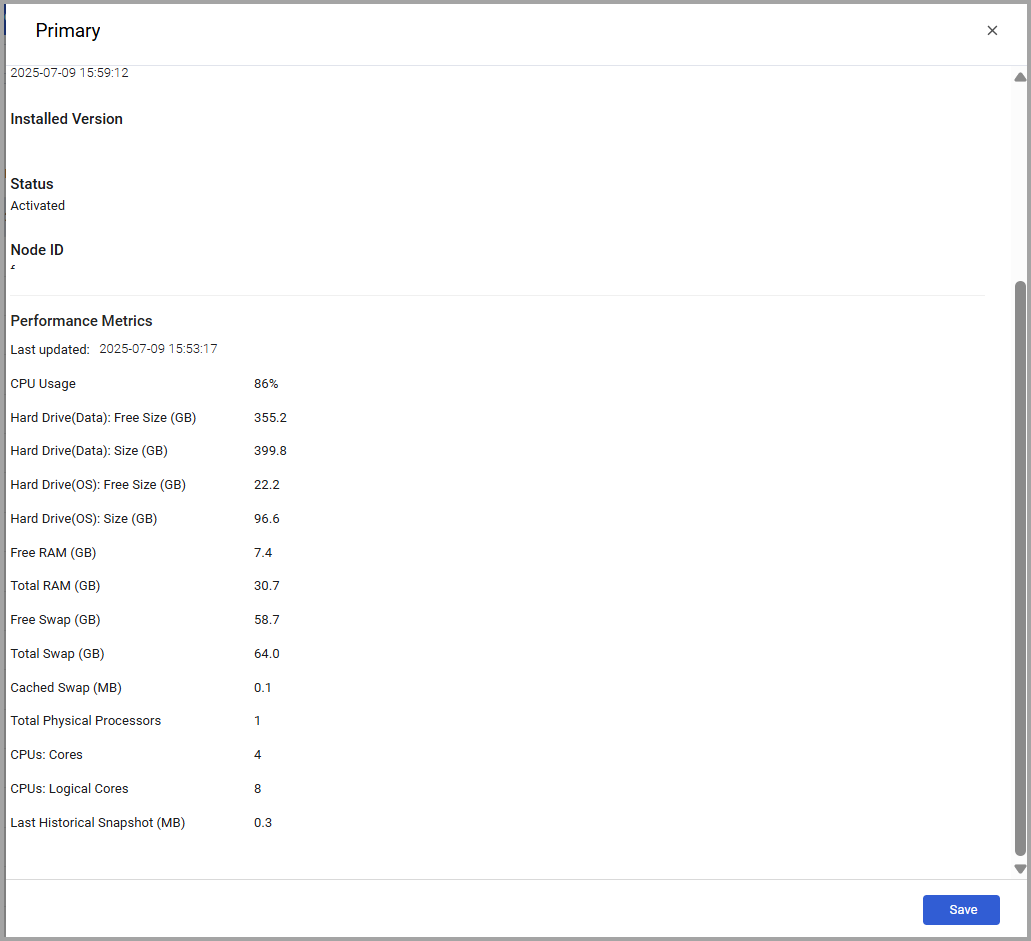
Node Performance Metrics
To view node performance metrics:
- From the Manage Nodes page, click on a Node.
- The Manage Nodes drawer opens and displays node performance metrics.
- The following performance metrics are displayed:
- Proxy IP address - The IP address of the proxy server.
- Port - The port used.
- CPU Usage - CPU usage in percentages
- Hard Drive: Free Size (GB) - The available disk space that is left on the Node machine.
- Hard Drive: Size (GB) - The total disk space that is configured on the Node machine.
- Free RAM (GB) - The available memory that is left on the Node machine.
- Total RAM (GB) - The total memory that is configured on the Node machine.
- Free Swap (GB) - The available Swap memory that is left on the Node machine.
- Total Swap (GB) - The total Swap memory that is configured on the Node machine.
- Total Physical Processors - Total number of physical processors on the Node machine.
- CPUs: Cores - Number of CPU cores on the Node machine.
- CPUs: Threads in core - Number of threads per core.
- Last Historical Snapshot (GB) - The amount of storage taken up by the most recent historical snapshot.
- Days Remaining for Historical Snapshots - The number of estimated days, historical snapshots will still be saved given available storage capacity. Note: This field will only be visible if 1) historical data retention is not configured OR 2) the number of days configured for historical data retention is higher than the estimated number of available snapshots.
Updated about 2 months ago