
Configuring a Variable Node
Variable nodes within a Workflow allow you to dynamically create, manipulate, and store data. This data is stored in the Workflow Data repository, making it available for use across other node configurations.
When you add a Variable to a Workflow, a Write to data repository node is automatically added, and the Write to Workflow Data drawer opens. This drawer is where you create new variables and update existing ones. One variable node can contain multiple variables.
Using Variable nodes you can:
-
Define new variables or update existing ones, letting you store and manage values directly within your Workflow. You can even write to multiple variables within the same node using tabs.
-
Use information from or write information to the repository without relying on external events or actions in the Workflow. This provides greater flexibility.
-
Save data from one run to another run. By default, running a workflow may overwrite the data of a previous run. Saving data to a variable lets you capture and reuse specific values from a run at a later time, regardless of the asset's path.
-
Compose structured reports by collecting and organizing data, including complex structures like arrays and objects.
-
Save sub-workflow node data for future reference.
-
Create a unified result variable when conditional paths generate multiple outcomes.
-
Control variable visibility and lifecycle using different scopes (Global, Local-Node, or Local-Block) to prevent unintended data accumulation in loops and conditional branches.
Understanding Variable Scopes
Variables in workflows can have either global or local scope. This determines where and how they can be accessed. Choosing the right scope helps prevent unintended side effects, such as data accumulation across loop iterations.
A variable is only available to nodes that are lower than the node where the variable is defined in the workflow.
Global variables:
- On the main branch of the workflow are always global and cannot be changed to a local scope.
- In a Condition branch or an Else if or Else branch are always global and cannot be changed to a local scope.
- Accessible to all nodes lower in the workflow, even within Condition branches and For Each loops.
- In a For Each loop are available to all nodes lower in the workflow, including the loop itself.
- Is overwritten when used in a Repeat For Each loop.
- Use case: Useful for data that needs to be shared across the entire workflow. For example, storing a workflow-wide counter or a final report that accumulates data from all branches
Local variables - in a Repeat For Each loop:
- Only available within the loop
- Each iteration of the loop gets its own instance of the variable
- Prevents data accumulation across iterations
- Use case: Collecting data specific to each asset in a loop without mixing results from different assets
Variable Resolution Order
When you reference a variable using {{var_name}} in a field or Dynamic Value Statement, the system searches for the variable in the following order:
- Local in Repeat for Each Loop - Resolved from innermost to outer (if inside nested blocks)
- Global workflow-level variables
- Error if the variable is not found in any scope
This resolution order ensures that more specific scopes take precedence over broader scopes, allowing you to override global variables with local ones when needed.
Referencing Variables in Dynamic Value Statements
You can reference variables in two ways:
- Explicit scope reference:
{{local.var_name}}- Specifically references a local variable. - Automatic resolution:
{{var_name}}- Follows the resolution order above.
The autocomplete feature lists in-scope variables first, then global ones, making it easier to select the appropriate variable.
Defining or Updating Variables
Variables are contained in 'Write to data repository' nodes.
To define or update variables
-
At any point in the workflow, click + and then
. The Workflow Data tool and the Write to Workflow Data drawer are open. You can click the - to minimize the Workflow Data tool.
-
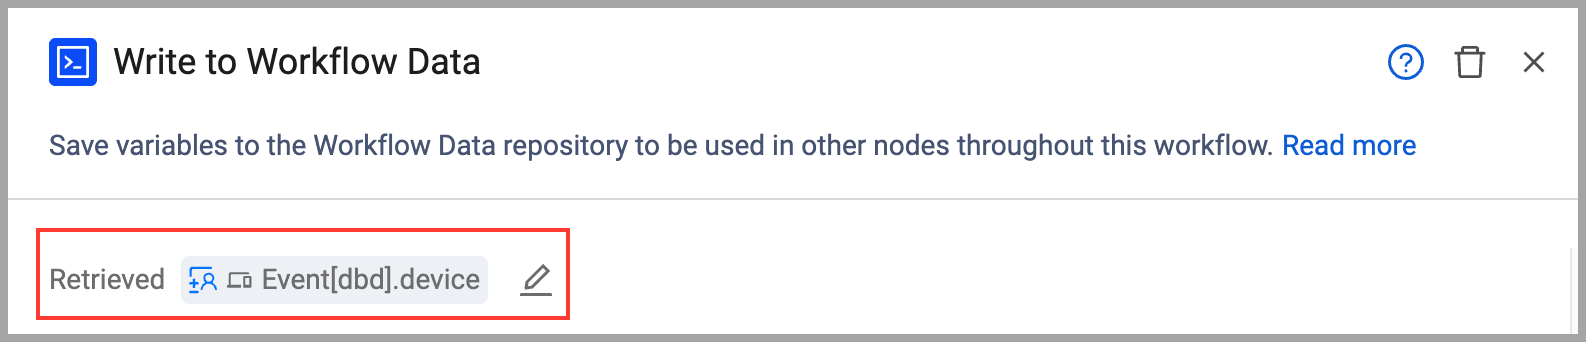
Select the asset from which the variable will receive its value. By default, variables are defined on the asset retrieved from the previous node. This asset appears at the top of the drawer. To select a different asset or no asset is selected, click
 to edit the asset or Select Asset and follow the instructions here: select the input on which to define the variables.
 -
Select the variable scope: Global or Local.
-
Define and configure a new variable or select an existing variable to update.
-
Define the variable value using the Wizard or Syntax tab.
-
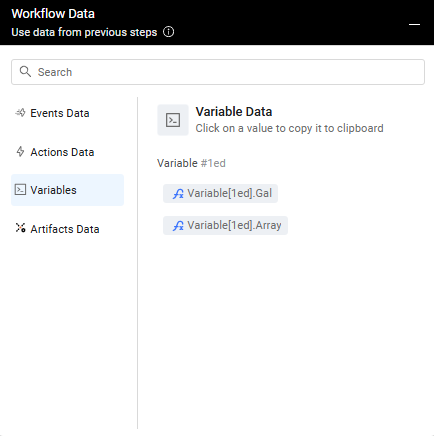
If the added or updated variable is valid, meaning that it has a valid name, scope, field type, and value type, it appears in the Variables tab of the Workflow Data repository under its node's UUID. It is now ready for use by nodes within its scope.
- If a Variable is defined in multiple nodes, the Variables tab of the Workflow Data repository shows the UUIDs of all nodes that the variable is defined in. The variable's value is either the latest node's value or the value from the taken path (following the resolution order).
- If a Variable configuration is not valid, its tab turns red and it isn't added to the Workflow Data repository. Correct the configuration to proceed.
-
If desired, select an additional existing or new variable. To do so, at the end of the line with the variable tabs, click +. A New variable tab opens. Repeat this procedure from the beginning.
- If there isn't enough room to display all tabs, clicking the More icon shows a list of the overflow tabs.
Scope Validation
The system validates variable names within each scope at build-time. Duplicate variable names within the same scope will produce a validation error. However, you can have variables with the same name in different scopes, and the resolution order will determine which one is used.
Selecting the Input on Which to Define the Variables
The Variable node, by default, defines the variable on the asset retrieved from the previous node.
You can choose a different input asset using a query or a resolved asset from a prior node.
To select an asset on which to define the variable
-
Next to Retrieved, click the Edit Asset pencil icon
 (see screen above).
 -
Choose one of the following options for the input asset:
- A resolved asset from any previous node in the Workflow.
-
Click Apply.
-
If subsequent nodes exist in the Workflow path, a warning message appears, indicating that the asset change will propagate. Click Change Asset to confirm. The new asset's name is preceded by 'Custom'.
Selecting Asset from Previous Nodes
Workflow data, including resolved assets, is stored in the Workflow Data repository. Resolved assets are identified by their node UUID and asset type:
- Event[node UUID]. (for events)
- Action[node UUID]. (for actions)
- Variable[node UUID]. (for variables)
- Artifact[node UUID]. (for artifacts)
To select a resolved asset
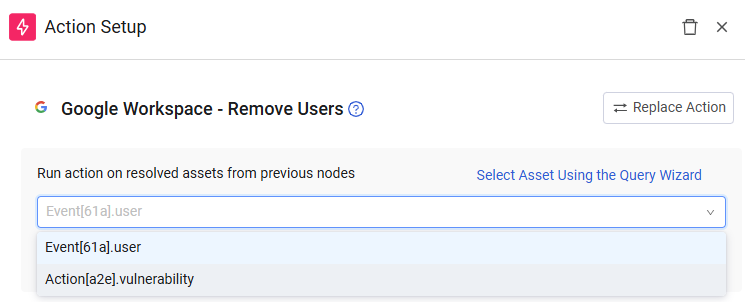
- From the Run action on resolved assets from previous nodes dropdown (open by default; if not, click Select Resolved Assets From Previous Nodes), select the desired asset.
- Example: You can choose to define the variable on the first User asset from a previous Event node or a Vulnerability asset from a previous Action node.
- Example: You can choose to define the variable on the first User asset from a previous Event node or a Vulnerability asset from a previous Action node.
Selecting First Asset Resulting From a Query
You can define the variable on the first asset returned by a query. The Workflow runs once per asset, and then proceeds to the next node.
Note
Variable assignments only affect the first asset returned by the query, even if the query is configured to run on All Assets. To update every asset, you need to modify your Workflow to iterate through all assets.
To select assets using the Query Wizard
- Open the Query Wizard by clicking Select Asset Using the Query Wizard.
- Under Run action on assets that match the query, from the Module dropdown, select an asset type.
- Configure your query using the Query Wizard that opens. In the Field Value box, you can type a value or copy a field value from the Workflow Data repository.
Resetting Input to Default Asset
You can always revert the asset on which the Variables are defined to the default (the one retrieved from the previous node in the Workflow).
To reset the asset to the default
- Click Reset to default from any tab. This reset applies to the current node and all subsequent nodes in the same path.
Defining a New Variable
To create a new Variable for your Workflow on the Write to data repository (Variable) node, you must define its name, scope, field type, value type, and value.
To define a new variable
-
In Variable name, type a name for the new variable, following these rules:
-
Length: 3 to 50 characters.
-
Letters: a-z (lowercase only)
-
Numbers: 0-9 (cannot be the first character)
-
Underscores: (cannot be consecutive _ or placed at the start/end of the variable name)
-
No spaces or special characters: (!@#$%^&*()-+=[]|;:'",< >?/)
-
Unique: Variable names must be unique within their scope.
-
-
From the dropdown, click + New field name.
- The New variable tab name updates to the new name.
- If valid, the new variable appears under Variables Data in the Workflow Data repository and in the Write to data repository node. The node displays the first four variables configured and indicates the number of additional ones. Hovering over the number displays a list of the additional variables.
-
In Variable scope, select either Local or Global.
-
In Field type, select Single Value (the default) or Multiple Values.
- For a Multiple Values field, the Append values if field exists checkbox appears.
- Enabling this option appends new values to existing values.
- Disabling this option overwrites existing values with new values.
- For a Multiple Values field, the Append values if field exists checkbox appears.
-
In Value type, select the type of data the variable will store:
Primitive Types:
- String (the default) - Text values
- Date - Date values
- Float - Decimal numbers
- Integer - Whole numbers
- Boolean - True/false values
Structured Types:
- Array - A list of values, useful for storing multiple items returned from complex operations
- Object - A JSON-like structure for storing complex, nested data returned by Dynamic Value Statement functions like
to_table(),array(), orbuild_json()
When to Use Structured Types
Use Array when you need to store a list of items, such as multiple email addresses, IP addresses, or results from iterating over a complex field.
Use Object when Dynamic Value Statements return complex structures that need to be preserved for later use, such as formatted table data for ticket bodies or rich email content.
Selecting an Existing Variable
You can update an existing variable by assigning it a new value. You cannot change its scope, field type, or value type after the variable has been created.
To select an existing variable
- In the Variable name dropdown, select the existing variable you want to update.
- The dropdown shows variables that are accessible from the current node based on scope and resolution order.
- The New variable tab name changes to the selected variable's name.
- The variable also appears in the Write to data repository node.
Updating Variables Across Scopes
When updating a variable, only variables within the current scope or broader scopes are available for selection. For example, if you're inside a loop block, you can update block-local variables, node-local variables from the current branch, or global variables, but not variables from other blocks or branches.
Defining the Variable Value
Configure the value of a new or existing Variable using the Wizard or Syntax tab. This lets you populate the variable with Custom Input, Field Value, or Workflow Data repository (memory bank) data. You define the Variable value similar to how you create a Dynamic Value Statement, with the following exceptions:
- The Action form field is not selectable; its value is Variable.
- There is no Simulate button to test the variable definition statement.
To define the Variable value
- Click the Settings icon next to Define the variable value.
- In the Settings that open, enable (the default) or disable Ignore empty values on asset fields.
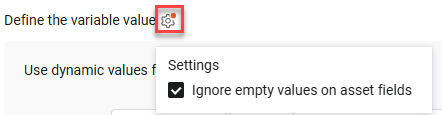
- Set the variable value from the Syntax tab (using autocomplete and the Syntax Helper) or the Wizard tab. You can click Validate to check your syntax.
- When using autocomplete, in-scope variables are listed first, followed by global variables, making it easier to reference the appropriate data.
Syntax Examples:
- All statement:
device all then form.variable_value set_value- Switch case statement:
Switch [Field]

case starts_with ("a") then form.variable_value set_value "A Group"

case starts_with ("b") then form.variable_value set_value "B Group"- Referencing other variables:
device all then form.variable_value set_value {{local.temp_result}}- Building complex structures:
device all then form.variable_value set_value build_json("name", {{hostname}}, "status", {{status}})Working with Structured Types
When your variable's value type is Array or Object, you can use Dynamic Value Statement functions that return complex structures:
- For Arrays: Use functions like
array()to create lists, or reference multi-value fields that return arrays - For Objects: Use functions like
build_json()orto_table()to create structured data
Example - Storing an array of email addresses:
device all then form.variable_value set_value array({USER_EMAILS})Example - Storing a formatted table as an object:
device all then form.variable_value set_value to_table({{vulnerability_data}})Using Structured Variables in Actions
When you reference a variable containing an Array or Object in downstream actions (such as creating tickets or sending emails), the target action determines how the data is rendered. For example, a variable containing HTML from
to_table()will be rendered as a formatted table in ticket bodies that support HTML.
Testing a Variable Node
Test Variable nodes to verify that variables are created with correct values and are accessible to downstream nodes.
Prerequisites
Before you test a Variable node:
- Connect it to an upstream node (Event, Action, Query, etc.).
- The upstream node must be tested first to provide data.
- Configure variable names, scopes, and values.
- Resolve any configuration errors.
To test a Variable node
-
In the canvas, select the Variable node.
-
Click Run Test.
-
Review the Test Configuration panel, which displays:
- Variable names and scopes (Global or Local).
- Variable values (static input or dynamic references from upstream).
- Any configuration errors.
-
The Test Results panel shows:
- Variable Names — Each variable created or updated.
- Variable Values — The resolved values (from static input or upstream data).
- Variable Scope — Whether each is Global or Local.
- Status — Success if all variables are created correctly.
Understanding test results
Success — All variables created with correct values and available for downstream nodes to reference.
Variable Reference Error — A variable value references data that doesn't exist from an upstream node. Verify the upstream node was tested first and produces the field you're referencing.
Scope Violation — A Local variable is referenced outside its ForEach loop. Change the variable scope to Global if you need to use it outside the loop.
Missing Upstream Data — A dynamic value couldn't be resolved because upstream data is unavailable. Test the upstream node first to ensure it produces the data your variable needs.
Unresolved Value — A variable value appears empty (indicated by a dash) in results. This occurs when upstream data is empty, the field doesn't exist, or the IFTTT expression is incomplete. Review the variable value definition and verify that upstream data exists.
Common testing scenarios
Scenario 1: Static value
Store a constant value (for example, a threshold):
Variable name: alert_threshold
Value: 10
Scope: Global
Test result: Variable shows value 10.
Scenario 2: Dynamic value from upstream
Store data from an Event or Action node:
Variable name: user_email
Value: {{email}} (references upstream Event node)
Scope: Global
Test result: Variable shows the email value from the event.
Scenario 3: Local variable in a loop
Store data specific to each loop iteration:
Variable name: item_count
Value: {{count}} (references current loop item)
Scope: Local
Test result: Variable shows count for the selected entity.
Next steps
After you test a Variable node and verify it works correctly:
- Add downstream nodes that reference the variables.
- In those nodes, use
{{variable_name}}to access the values. - Test downstream nodes to ensure they can resolve the variables.
- Run a full workflow test to verify variable behavior across all assets.

Use Cases for Variable Scopes
Understanding when to use each scope type helps you build more efficient and maintainable workflows.
Global Scope Use Case: Workflow-Wide Reporting
Scenario: You want to collect a summary of all actions taken across multiple branches and send a final report at the end of the workflow.
Solution: Use a global variable to accumulate results from different branches, then reference it in a final email or ticket action.
Node Scope Use Case: Branch-Specific Calculations
Scenario: In a conditional workflow, one branch needs to calculate a risk score based on specific criteria, but this score is only relevant to that branch.
Solution: Use a node-scoped variable to store the risk score, keeping it isolated from other branches and preventing namespace pollution.
Block Scope Use Case: Loop Iteration Data
Scenario: You're looping through 100 devices, and for each device, you need to collect vulnerability data and write it to a custom field on that specific device.
Problem with Global Scope: A global variable would accumulate vulnerability data from all 100 devices, and by the end, every device would receive the combined data from all devices.
Solution with Local Scope: Use a local-scoped variable inside the loop. Each iteration gets its own instance of the variable, so Device 1 gets only its vulnerabilities, Device 2 gets only its vulnerabilities, and so on.
Example Workflow:
1. Repeat For Each: Loop through all devices
   2. Variable (Block scope): "device_vulns" = collect vulnerabilities for current device
   3. Action: Write {{device_vulns}} to custom field on current device
4. Exit loop
5. Action: Send summary report
Deleting a Variable
You can remove a variable directly from the Write to data repository (Variable) node.
To delete a variable
- In the Write to Workflow Data pane, click the Remove icon x to the right of the tab of the variable you want to delete. The tab is removed from the Variable node and from the Variable data in the Workflow Data repository.
Impact of Deleting Variables
If you delete a variable that is referenced by downstream nodes, those nodes will fail during workflow execution with an "unresolved variable" error. Review all references before deleting a variable.
Deleting the Write to Data Repository Node
You can remove from the Workflow a Write to data repository node, with or without its child nodes.
To delete a Write to data repository (with or without its child nodes) from the Workflow
- In the Workflow, click the node that you want to delete.
- In the header of the Write to Workflow Data pane, click the Trashcan icon.
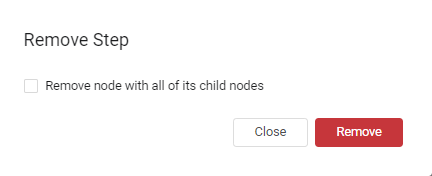
- If the node has child nodes, a Remove Step confirmation dialog opens. Choose one of the following:
- Clear the Remove node with all of its child nodes checkbox to remove only this action.
- Select the Remove node with all of its child nodes checkbox to remove this action and the entire Workflow path below it.
Updated about 2 months ago