
Working with Tags
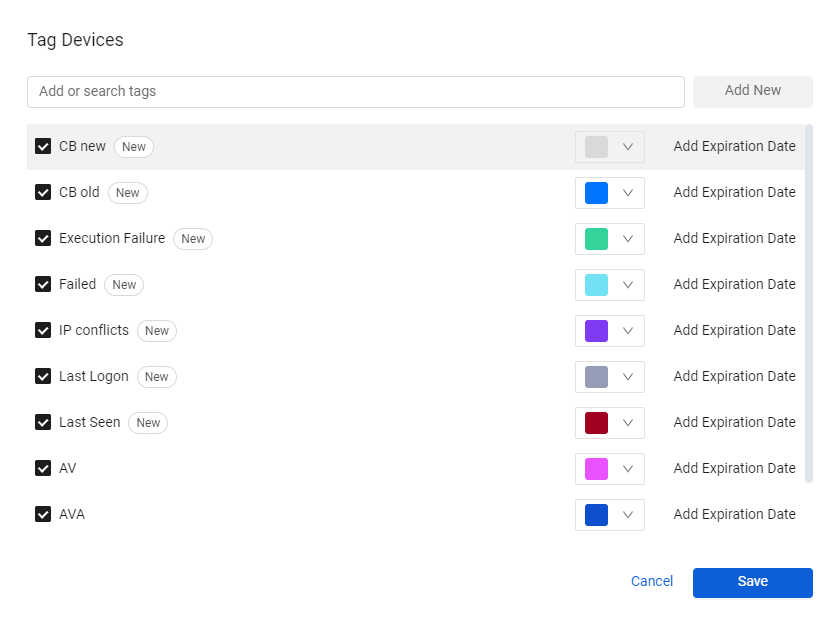
Use tags to assign context to your assets for granular filters and queries. Apply new or existing tags to the selected assets. The list of selected tags is applied to all selected assets. Therefore, tagging may result in the removal of existing tags from one or from several of the selected assets.
- A partial tag indicator is displayed when some but not all of the selected assets are tagged.
- New, checked, partial, and unchecked tags are sorted and displayed in different sections. Displayed from top to bottom are: newly created tags, checked tags, partial tags, and unchecked tags.
- "New" is displayed when you add new tags.
Note
To work with tags on a given page, you must have the 'Edit tags and custom data' permission enabled for that page.
Note
The Tag list does not reflect the tag hierarchy.
Adding Tags to Assets
To add tags to selected assets
- Select one or more assets; the Actions menu is enabled.
- From the Actions menu, choose Tag; the Tag dialog for the relevant asset opens.
-
Either select an existing tag or add a new tag.
-
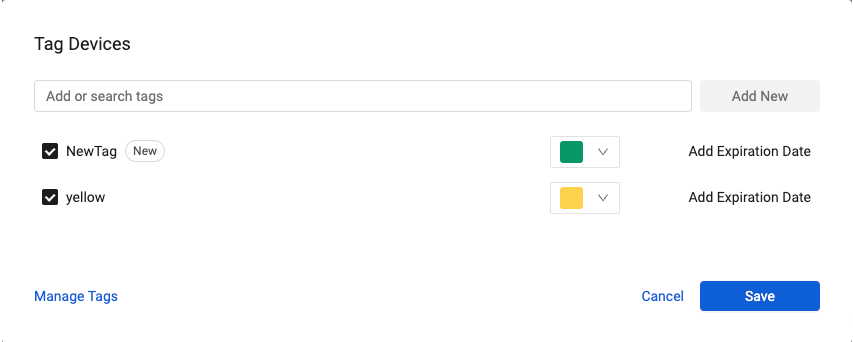
To add a new tag, enter the tag name and click Add New.
-
You can set a color for the tag. From the color dropdown, select a color for the tag background. The default background color is white.
-
Click Save.
The new tag name is displayed, with a label New next to it.
You can also add an automatic expiration date for the tags. Learn more about Setting Automatic Expiration Dates for Tags.
Note
Users with Admin permissions can manage all tags in the system. Click Manage Tags. The Manage Tags page opens.
Adding Tags to Query or Filter Results with a Quick Enforcement Action
You can use a quick Enforcement Action to add tags to all assets returned by a query.
To add tags to all assets using an Enforcement Action
-
On the assets page, run a saved query or filter the asset list.
-
From the EC Actions menu, select Tag; the Tag dialog opens.
-
In the Enforcement Set Name field, a default value is provided. You can change this to fit your needs.
-
Enter one or more tag names and if needed select a tag color. See Setting Colors for Tags.
-
To have this tag removed from assets that do not match the query parameters, select Remove this tag from entities not found in the saved query results. A safeguard is displayed. Click Confirm if you want to continue.
-
It is possible to select an expiration date. See Setting an Automatic Expiration Date for Tags.
-
To run this Enforcement Set on a schedule, toggle on Set Scheduling and configure the schedule you want. See Scheduling Enforcement Set Runs.
-
Click Save and Run.
Setting Colors for Tags
You can set colors for the tag, change colors, and remove a selected color. Color selection applies to the tag globally.
To work with colors
- Select an asset.
- From the Actions dropdown, select Tag.
Adding a color
- From the color dropdown, select a color for the tag background. The default background color is white. Select Save.
Changing the color of a tag
- From the color dropdown next to the relevant tag, choose a new color, and then click Save.
Removing the Color from a Tag
- From the color drop-down next to the relevant tag, choose the white background, and then click Save.
Setting an Automatic Expiration Date for Tags
You can set an automatic expiration date for a tag or group of tags. The expiration date applies only to the selected assets. In this way, you can add a tag to an asset for a defined period of time; once the defined time ends, the tag is automatically removed. This can be useful, for instance, if you have a system that cannot be patched for a specific period of time. In this case, you can create a saved query that excludes this specific tag. As a result, tagged assets are not included in reports and in dashboards that use the saved query for the set time, until the tag expires.
- Select one or more assets.
- From the Actions menu, choose Tag; the Tag dialog for the relevant asset opens.
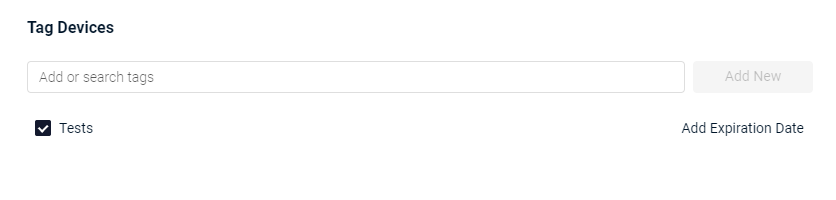
- Choose an existing tag name, or click Add New to create a new one.
- Click Add Expiration Date; a context menu opens.

- Select Specific Date or Days From Now.
Setting a Specific Date
- A date picker opens
- Choose a date.
Expires on now appears next to the Tag.

- Click Save.
Setting Days From Now
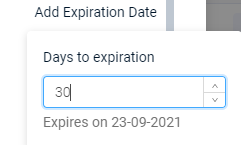
- Select Days From Now; the date calculator opens.
-
Select the number of days from now for the tag to expire. The date below changes accordingly.
-
Click Save.
Deleting an Expiration Date
You can delete an expiration date.
- Select one or more assets.
- From the Actions menu, select Tag.
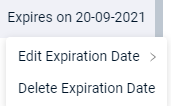
- Hover over the expiration date that you want to delete, and select Delete Expiration Date.
Changing an Expiration Date
You can change an expiration date
- Select one or more assets.
- From the actions menu select Tag.
- Select Edit Expiration Date.
- The date menu opens. Set a new date as required.
Note
If you choose a number of assets, which have different tags with different expiration dates, you can't delete or edit the dates.
Viewing Information About Tags
Add columns to display information about Tags on an asset page.
Tags
- Tags Metadata - complex field with the name of the tag, the date it was created and the date the tag was last updated.
- Tags Metadata: Name - the tag name.
- Tags Metadata: Created On - the date the tag was created.
- Tags Metadata: Last Updated - the date the tag was last updated.
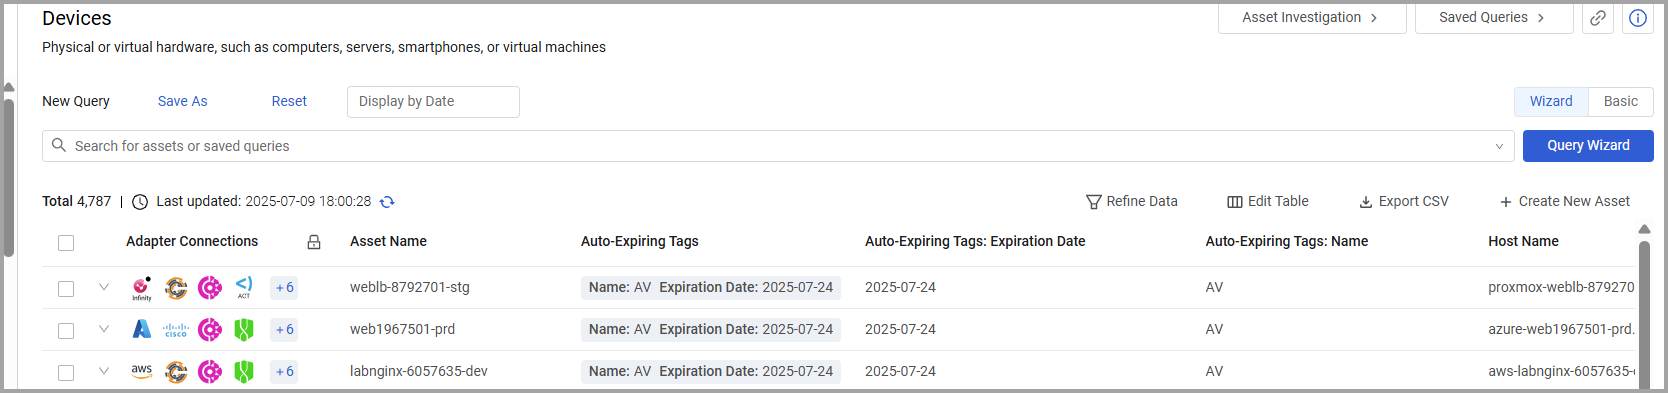
The Assets page shows information about when tags were created and updated.
Auto-Expiring Tags
- Auto-Expiring Tags - complex field with all auto-expiring tag names and their expiration dates.
- Auto-Expiring Tags: Name - the names of the auto-expiring tags
- Auto-Expiring Tags: Expiration Date - the expiration dates of the auto-expiring tags.
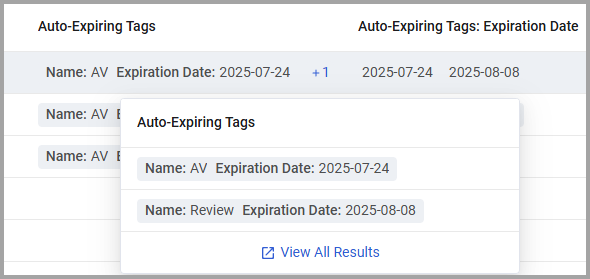
The Assets page then shows the list of tags that you have on your system, and information about expiration dates. An asset may have more than one tag when each tag has a different expiration date.
To see when each tag on an asset expires hover over the Auto-Expiring Tags column.
View more information about tags on your system on the Asset Profile Page.
Clearing Tags from Assets
You can clear or delete tags from assets.
To delete tags from assets
-
Select one or more assets.
-
From the Actions menu, choose Tag; the Tag dialog for the relevant asset opens.
-
The tags on the asset are shown as selected.
-
Clear the checkbox and click Save. The tags are now removed from the selected assets.
Creating Queries for Tags in Hierarchical Structure
You can group tags into a hierarchical structure, as described in Managing Tags from the Tag Hierarchy.
You can use the Query Wizard  to define a query that returns all assets with specific tags and their child tags This is done using the 'in tag group' operator, as long as the searched tag is part of the Hierarchical structure with child tags. You can also search for all assets with specific tags that are defined on the lowest level of the hierarchy (that is, without any child tags). In this case, only assets with that specific tag are returned. Learn more about Creating Queries with the Query Wizard.
Example
For example, in the Tag Hierarchy below, the parent tag USA is defined with child tags Washington and Virginia.

You can create a query on the Users page to search for all users with Tags in tag group USA.
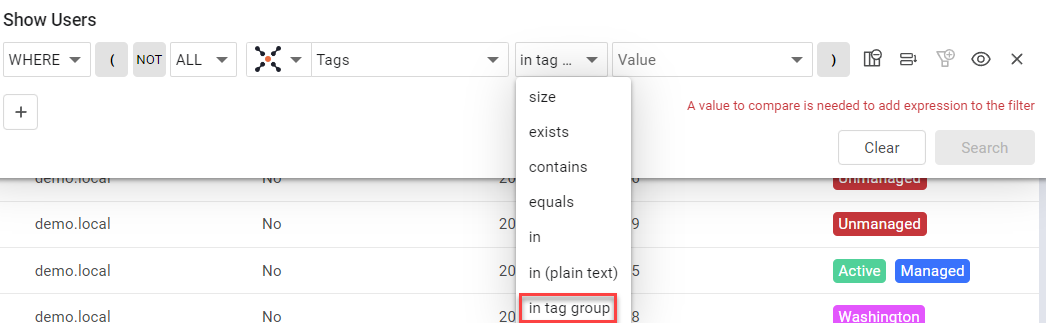
This query returns all users with the USA tag, as well as users with the Virginia and Washington tags.

Updated 9 months ago