
Adobe
Adobe offers digital content creation and publication applications across 20+ areas including graphics, photography, illustration, multimedia/video, and more.
Asset Types Fetched
- Users, Roles, SaaS Applications, Licenses, Groups
Before You Begin
To successfully connect this adapter, complete the following steps first:
Step 1: Creating a New Service Account Credential
Note
While to access SaaS application settings data you need to grant roles and/or permissions that include write capabilities, the adapter only actually reads data from the application.
- Login to Adobe Admin Console with an admin user.
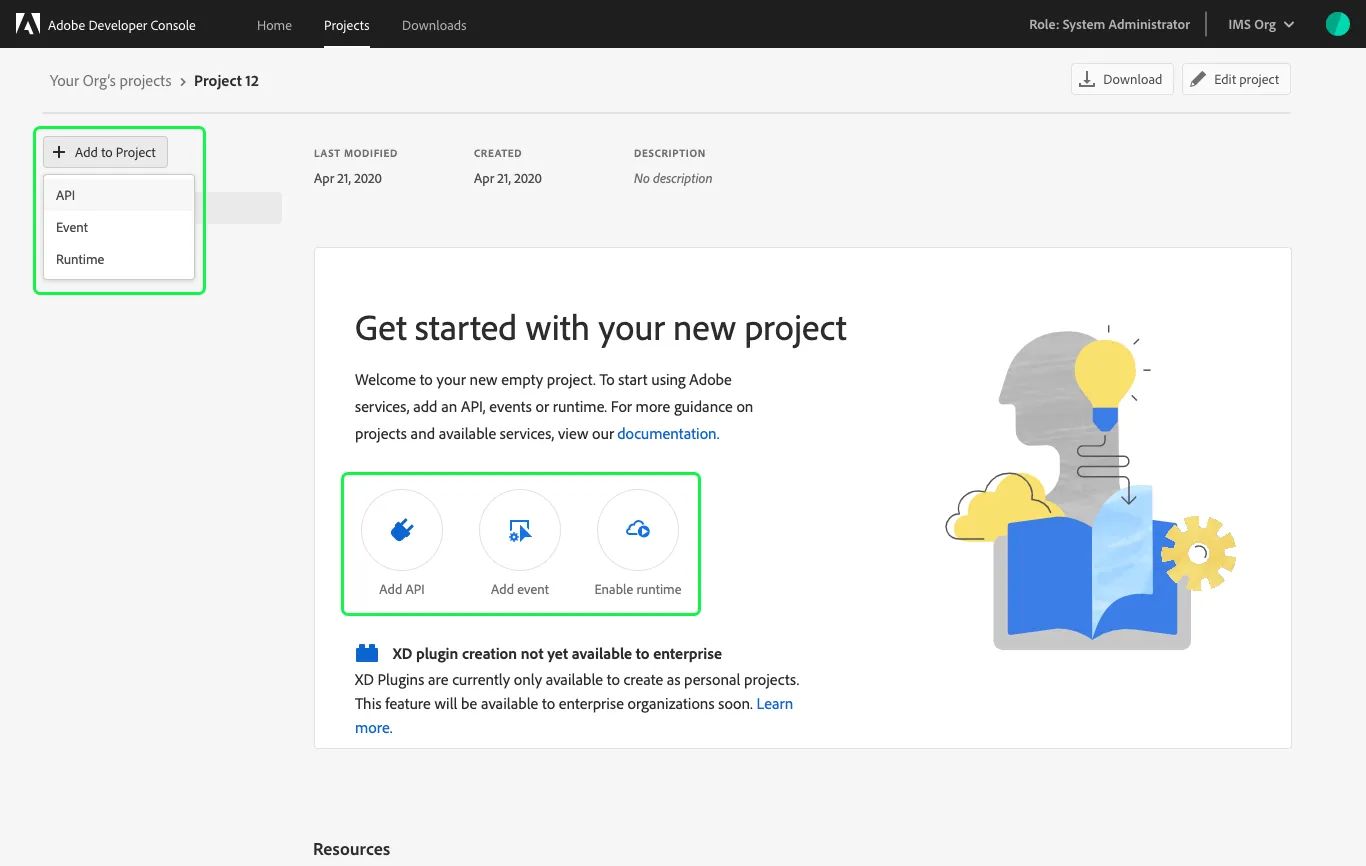
- To begin adding an API:
- From within a templated project, first select the appropriate workspace to open the Workspace overview.
- Select + Add Service in the left navigation and then select API from the drop down list.
- In an empty project, select +Add to Project in the left navigation of the Project overview and then choose API, or select Add API from the quick start buttons. The Add an API dialog shows a list of available services with the default view by setting to show only those services available to you.
- Add the following APIs:
- Adobe Services - User Management API (for user information)
- Adobe Analytics API (for last login information)
- Experience Platform API (for roles and permissions)
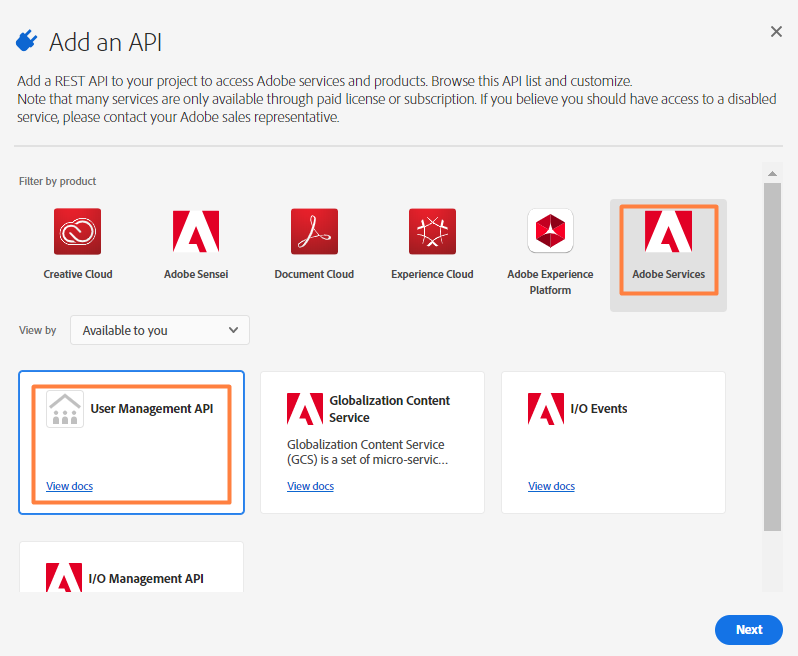
- Select Next.
- In Adobe, click Next and then click Save configured API. With the API configured, you are redirected to the API overview page.
- From the left menu, click Service Account.
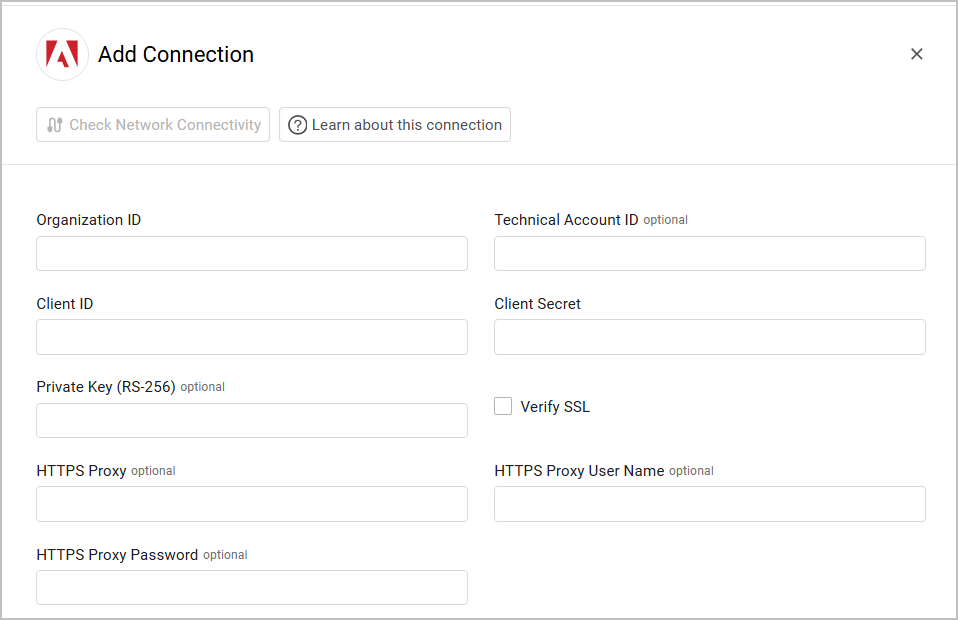
- Copy the following parameters and paste them into their respective fields in Axonius:
- Client ID
- Client secret
- Organization ID
Step 2: Creating a User Account
Note
While to access SaaS application settings data you need to grant roles and/or permissions that include write capabilities, the adapter only actually reads data from the application.
- Login to the Adobe Admin Console with an admin account.
- From the top menu, select Users.
- From the left menu, click Administrators.
- Click Add Admin and specify an email address used for Axonius, first and last name.
- Logout and then login with the newly created user. An email will be sent to the supplied address with a verification code.
- Enter the received verification code, and then set a new password of at least 32 characters.
Connecting the Adapter in Axonius
Important Note
The Technical Account ID and Private Key parameters are no longer supported by Adobe. Adobe deprecated Service Account (JWT) authentication and reached end-of-life on June 30, 2025. All integrations must use OAuth Server-to-Server authentication.
To set up OAuth Server-to-Server authentication, see Adobe's OAuth Server-to-Server credential implementation guide.
Required Parameters
- Organization ID - The created service account's organization ID.
- Client ID and Client secret - The created service account Client ID and Client secret.
When using JWT authentication:
- Technical account ID - The created service account's technical account ID.
- Private Key (RS-256) - Your service account's private key, including the '-----BEGIN PRIVATE KEY-----' prefix and the '-----END PRIVATE KEY-----' suffix.
Optional Parameters
-
Verify SSL - Select whether to verify the SSL certificate of the server against the CA database inside of Axonius. For more details, see SSL Trust & CA Settings.
-
HTTPS Proxy (optional) - Connect the adapter to a proxy instead of directly connecting it to the domain.
-
HTTPS Proxy User Name (optional) - The user name to use when connecting to the value supplied in Host Name or IP Address via the value supplied in HTTPS Proxy.
-
HTTPS Proxy Password (optional) - The password to use when connecting to the server using the HTTPS Proxy.
To learn more about common adapter connection parameters and buttons, see Adding a New Adapter Connection.
Advanced Settings
Note
Advanced settings can either apply for all connections for this adapter, or you can set different advanced settings and/or different scheduling for a specific connection, refer to Advanced Configuration for Adapters.
- Fetch Usage from Adobe Analytics - Select this option to fetch license usage data from Adobe Analytics.
- Backward Days for Usage Statistics (default: 120) - Define how many days backwards you want to fetch usage statistics.
- Report Suit ID of the report suite from which data is collected (optional)- Enter the ID of the Report Suit used to fetch usage data. If you choose Fetch Usage from Adobe Analytics this field needs to have a value.
Note
To learn more about Adapter Configuration tab advanced settings, see Adapter Advanced Settings.
Updated about 2 months ago