
ManageEngine ServiceDesk Plus
ManageEngine ServiceDesk Plus is an IT help desk and customer support system.
Asset Types Fetched
- Devices, Software, SaaS Applications, Networks
Before You Begin
Authentication Methods
You can connect the adapter with either of the following method:
- Basic Authentication - Use this option for on-prem deployment of ManageEngine ServiceDesk Plus.
- oAuth 2.0 - Use this option for cloud deployment of ManageEngine ServiceDesk Plus (SDP).
APIs
Axonius uses the following APIs:
-
api/v3/assets
-
api/v3/workstations
Required Permissions
See Generating a Technician Key Token for the permissions required for the Technician key token.
Initial Setup
For Basic Authentication: Generating a Technician Key Token
Notes
Only an administrator can generate the authentication key for technicians with login permission.
If a login for the technician is disabled, the API key is deleted.
To generate an API Key for Technician Key Token:
- Login to ManageEngine ServiceDesk Plus as an administrator.
- From the User section, click Admin
>Technicians icon. - Select the existing Technician account (or create a new one) that will be used for the Axonius adapter connection.
- To generate the API key for an existing technician, click
 (Edit) on the same row as the desired technician.
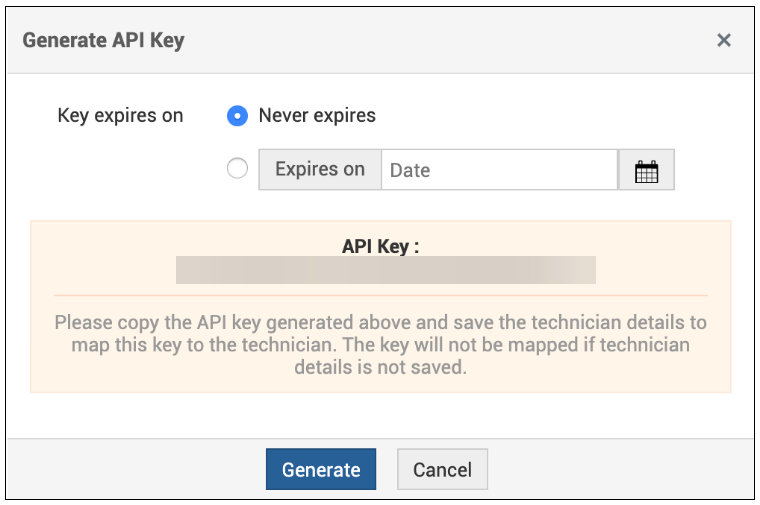
 - To generate the API key for a new technician, click Add New Technician, enter the technician details and provide the login permission. The Generate API Key window appears.
- To generate the API key for an existing technician, click
- Configure the following permissions for this technician account:
- Login Permission
- Read-only Access - Crucial for Axonius to successfully fetch asset data.
- In Key expires on, click the Never expires option to generate a permanent API Key.
- Click Generate. If a key is already generated for the technician, click Regenerate.
- Copy the API Key and paste it into the Axonius API Key parameter.
For oAuth 2.0: Configuring OAuth Authentication
To generate the OAuth Client ID, OAuth Client Secret and OAuth Refresh Token:
-
Go to the Zoho API Console: https://api-console.zoho.com/
-
Click Add client.
-
Select Self Client and click Create. If a popup asks you to confirm, click OK.
-
On the API Console main page, select the Self Client application
-
From the Generate Code tab, enter the following details, then click Create:
- Scope:
-
"SDPOnDemand.assets.READ"
-
Time Duration: “10 minutes”
-
Scope Description: free text (could be anything)
-
- Scope:
-
A popup Generated Code appears. Copy and paste the code to a temporary file.
-
From the Client Secret tab, copy the Client ID and Client Secret values to a temporary file.
-
Enter the values you copied to the following command on a Llinux machine (or Windows with curl):
curl -X POST "https://accounts.zoho.com/oauth/v2/token?grant_type=authorization_code&code=&client_id=&client_secret="-
From the command's response, copy the value of
refresh_tokenand save it in a temporary file. -
Copy the OAuth Client ID, OAuth Client Secret and OAuth Refresh Token to the appropriate places in Axonius.
Connecting the Adapter in Axonius
Required Parameters
-
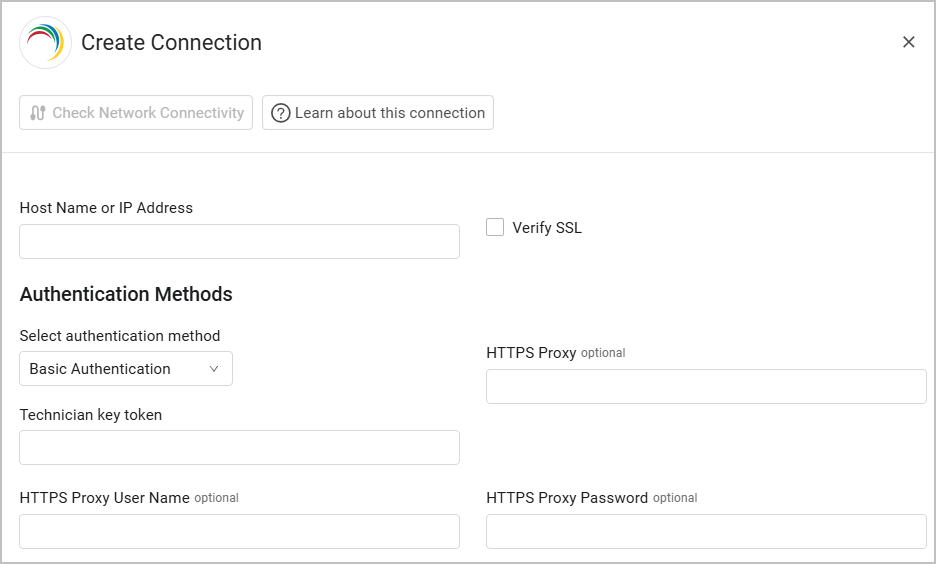
Host Name or IP Address - The hostname or IP address of the ManageEngine ServiceDesk Plus server that Axonius can communicate with.
-
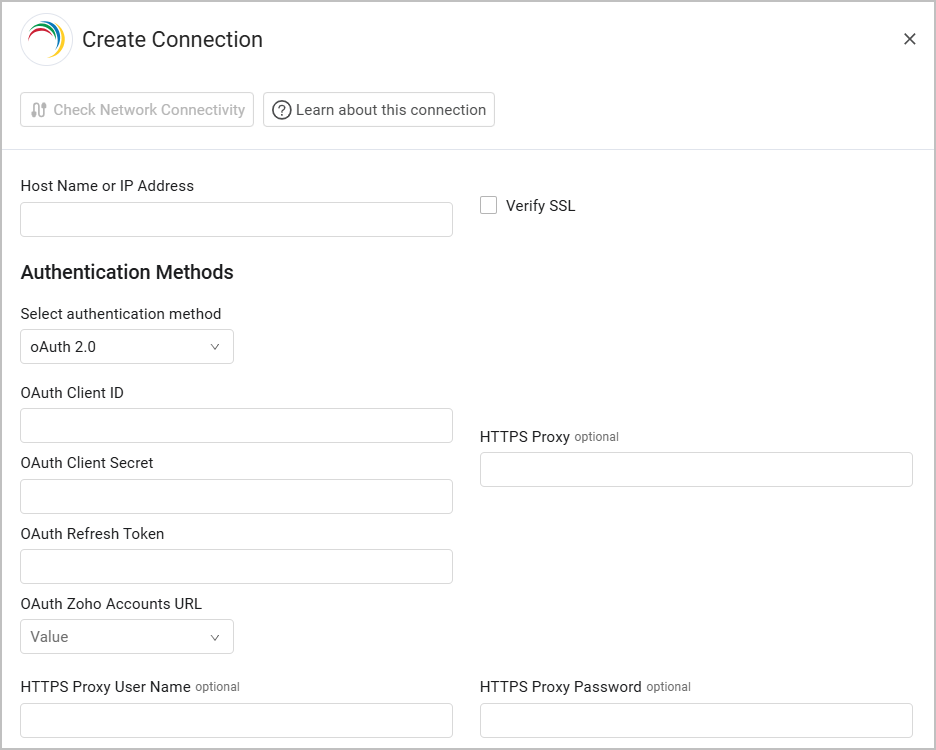
Select Authentication method - the options are oAuth 2.0 or Basic Authentication.
Basic Authentication
- Technician key token - See Generating a Technician Key Token for information on how to obtain this token.
OAuth 2.0
- OAuth Client ID, OAuth Client Secret and OAuth Refresh Token - See Configuring OAuth Authentication for information on how to obtain these parameters. b. OAuth Zoho Accounts URL - Select the account URL from the menu or add your own. See Refresh Access Tokens for information on how to obtain the account URL.
Optional Parameters
- Verify SSL - Select whether to verify the SSL certificate of the server against the CA database inside of Axonius. For more details, see SSL Trust & CA Settings.
- HTTPS Proxy - Connect the adapter to a proxy instead of directly connecting it to the domain.
- HTTPS Proxy User Name - The user name to use when connecting to the value supplied in Host Name or IP Address via the value supplied in HTTPS Proxy.
- HTTPS Proxy Password - The password to use when connecting to the server using the HTTPS Proxy.
To learn more about common adapter connection parameters and buttons, see Adding a New Adapter Connection.
Advanced Settings
Note
Advanced settings can either apply to all connections for this adapter, or to a specific connection. Refer to Advanced Configuration for Adapters.
- Enrich device with installed software data - Select this option to enrich devices with data about installed software.
- Enrich device with workstation data - By default this adapter enriches devices with workstation data. Clear this option to not enrich devices with workstation data.
- Enable Custom Parsing - Enable this option to define how to parse specific fields from the raw data fetched. You can choose to parse the data into an already existing field, or create a new one. This adapter supports Device Custom Parsing. See Adapter Custom Parsing for more information.
- Include Only Devices with Last Seen value - Select this option to include devices in which Last Seen information is available.
- Exclude devices with the Product Type - Enter specific device product type values to exclude.
Note
To learn more about Adapter Configuration tab advanced settings, see Adapter Advanced Settings.
Related Enforcement Actions
Supported From Version
Supported from Axonius version 4.7
Updated about 2 months ago