
SLA Management
Use SLA Management to define SLA policies, crucial for tracking and managing your organization's remediation efforts.
Axonius' SLA mechanism is unique in a way that it assigns remediation timelines based on asset attributes and query logic instead of on static severities. This allows for setting dynamic remediation deadlines using prioritized logic, which you can customize at any time to fit your security needs.
To access this page:
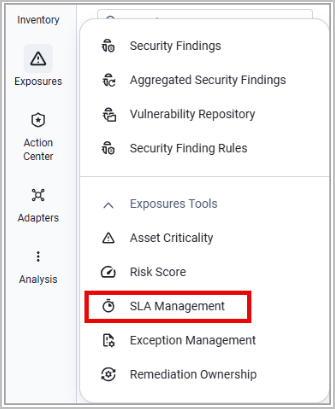
- In the Security Findings page, expand the Exposures Tools menu.
- Select SLA Management.
In Axonius New Navigation Experience:
- Select Exposures from the left navigation menu.
- Expand the Exposures Tools menu and select SLA Management.
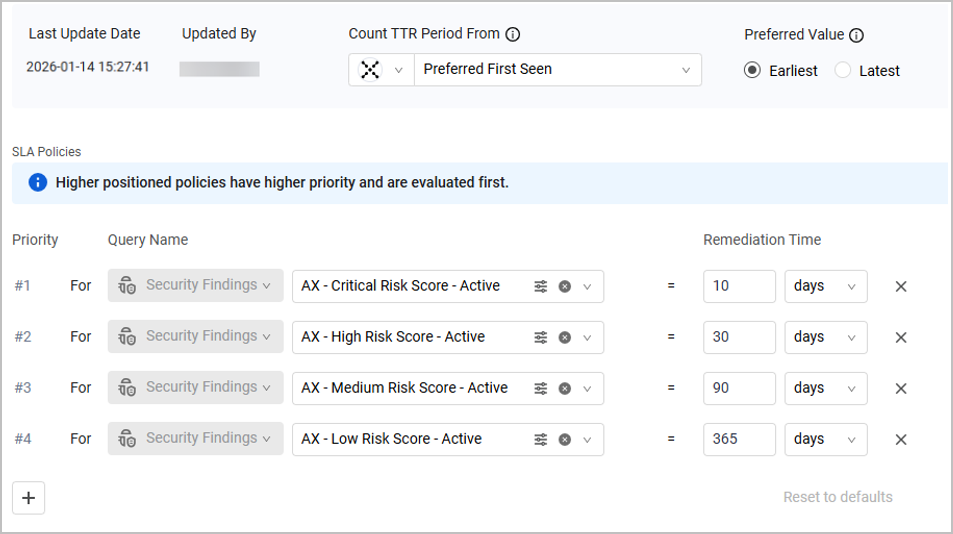
When visiting the SLA Management page for the first time, Axonius default SLA policies are displayed. Each row represents a policy, and the following details are displayed for each policy:
- Priority - Higher positioned policies have higher priority and are evaluated first.
- Query Name - The query including the Security Findings this policy applies to.
- Remediation Time - The maximal time period required to remediate the Security Findings included in the query.
In addition, the last update date and updating user are displayed.
Editing SLA Settings
To modify your SLA settings:
-
Click Edit SLA.
-
Configure the following:
- Count TTR Period From - The system starts counting the Time-to-Remediate (TTR) period from the detection date of a specific field. Select a field to start counting the TTR from its detection date.
You can select any date field from any adapter source. Note that when you select Aggregated as a source, the following field options are available:- Preferred First Seen - An aggregated date field that shows the latest date that a vulnerability was seen on the asset.
- First Seen - The time when an adapter first detected the vulnerability.
- First Fetch Time - The time when an adapter first reported the vulnerability to Axonius.
- Preferred Value - In case the field you selected has multiple values, select whether to use the latest or earliest date to count the TTR from.
- Count TTR Period From - The system starts counting the Time-to-Remediate (TTR) period from the detection date of a specific field. Select a field to start counting the TTR from its detection date.
-
In the Policies table:
-
Drag and drop rows to re-order and re-prioritize the policies.
-
Select a query to use for each policy. You can only select Security Findings queries.
Note
In case the query selected for a policy was deleted, this policy keeps using the same query. The query name in the SLA page will be the Query ID of the original query.
-
Set the remediation time: the number of hours, days, or weeks to remediate this vulnerability.
-
Click X to delete rows or + to add policies.
-
Click Save Changes. Alternatively, click Reset to default to reset the policies to the Axonius default configuration.
Note
It might take a while for your changes to apply in the system.
-
Viewing Security Finding SLA Statuses
View the SLA status of each Security Finding by adding the following fields to the Security Findings table:
- Axonius SLA: Time to Remediate - The Time to Remediate period in days as it was defined by the SLA policy.
- Axonius SLA: Due Date - The calculated remediation deadline, indicated by the following format: "in X days" or "X days ago". Hover over the value to see the exact deadline date.
Note
The Due Date is displayed on any exports or tickets created based on these assets. - Axonius SLA: Due Date Status - The possible values are:
- Within SLA - The remediation deadline is more than 10 days ahead.
- Almost Due - The remediation deadline is less than 10 days ahead.
- Overdue - The remediation deadline has passed.
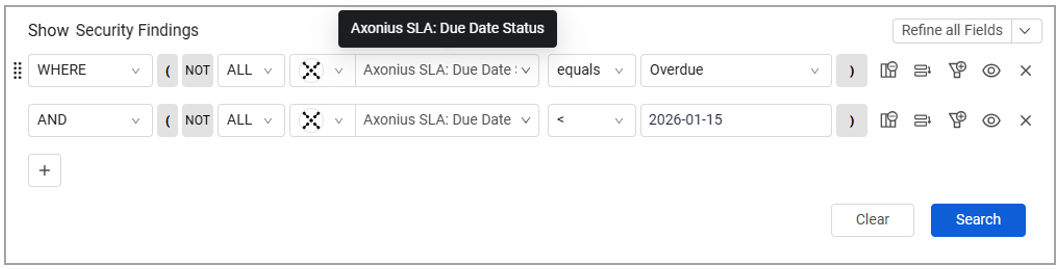
Use these fields to create meaningful queries to explore vulnerabilities in specific SLA contexts. For example, show overdue Security Findings whose remediation deadline was before a specified date:
SLA Data in the Exposure Overview Workspace
Reducing Critical Security Findings that are out of SLA is a key objective, mirroring the performance goals associated with Time to Resolution metrics. The primary focus is to ensure that non-compliant findings are kept to a minimum. Use the charts in the Exposure Overview Workspace to see which vulnerabilities are out of SLA and compare the SLA data between different Risk Levels, and initiate remediation processes by creating tickets or assigning the relevant assets to a case.
Updated about 1 month ago