Managing Asset Graphs
Use the Asset Graph Manager page to manage your saved Asset Graphs. You can save, duplicate, delete, load and edit the details of all the Asset Graphs in your system.
To access the Asset Graph Manager page:
- Click
 in the left navigation bar.
 - In the upper-right corner of the Asset Graph page, click Manage Asset Graphs. The Asset Graph Manager page opens.
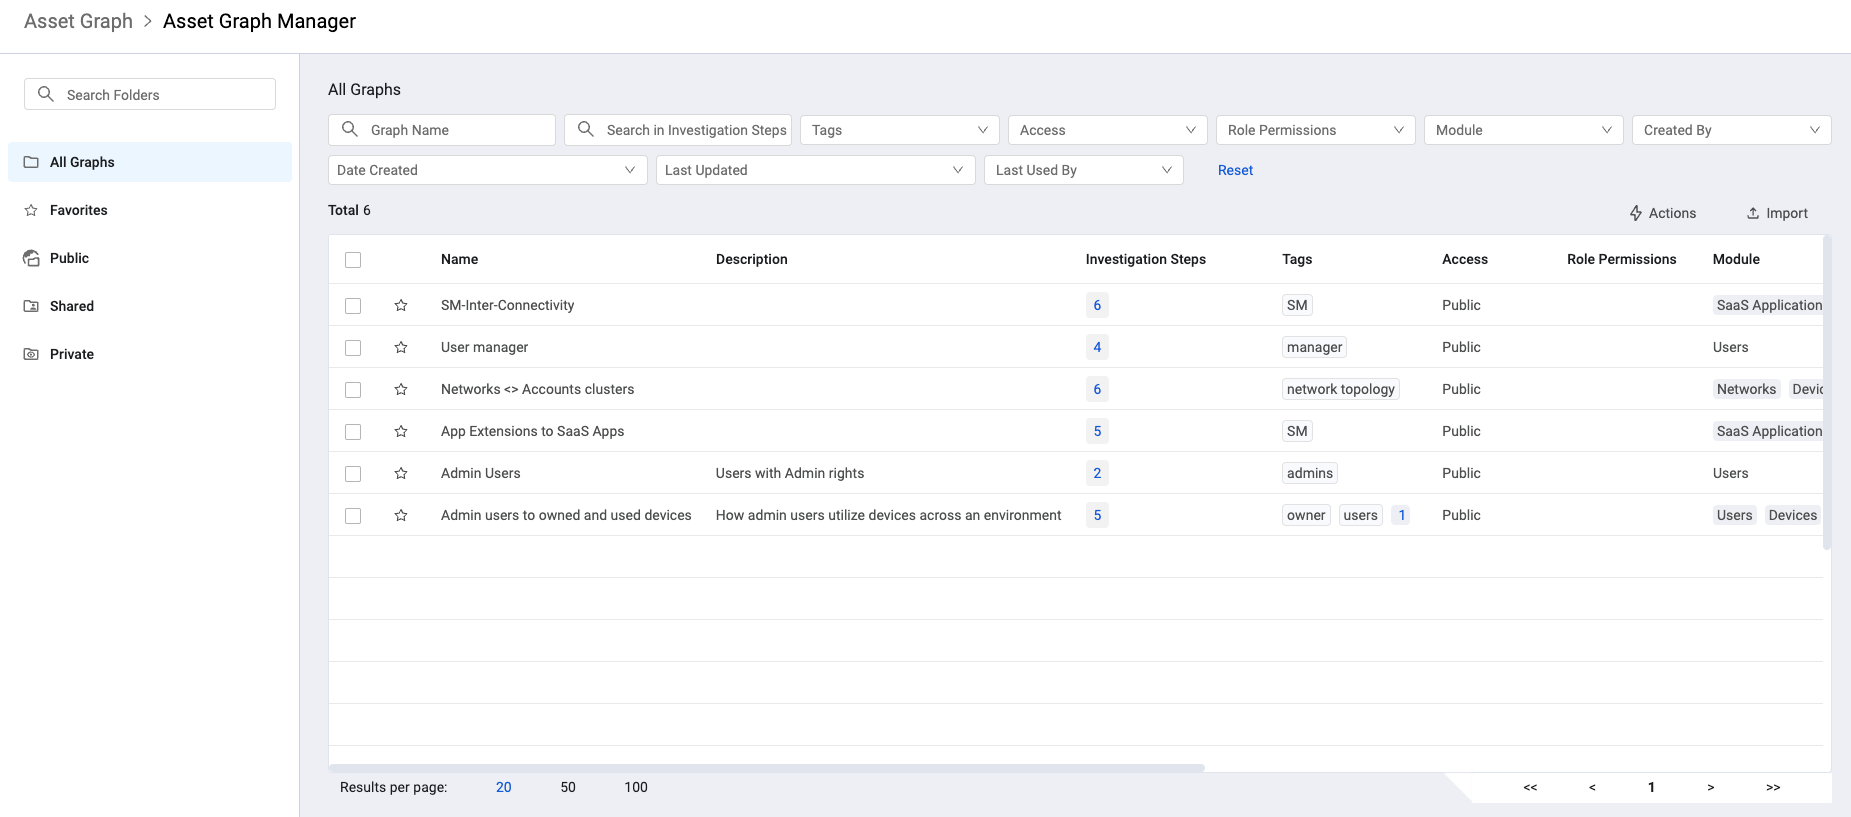
The Asset Graph Manager page consists of the following main elements:
- Folders pane(left pane)
- Graphs table(main area)
- Search/Filter bar
The Folders Pane
The Folders pane organizes asset graphs into various folders according to access level.
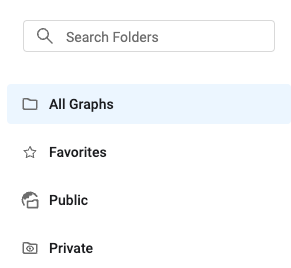
Asset Graphs are organized under the following folders:
- All Graphs - Lists all saved asset graphs including Private ones. This list is displayed when you access the Asset Graph Manager page.
- Favorites - Lists all saved asset graphs starred as a Favorite. See Favorites for more information on working with Favorites.
- Public - Lists all saved asset graphs accessible to all users in your Data Scope. Asset graphs you save are available only to this Data Scope.
- Private - Lists saved asset graphs accessible only to you.
When you select a folder, the folder name is displayed above the table.
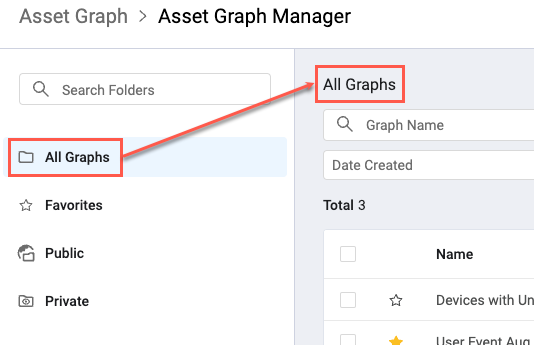
To search for a specific saved asset graph, start typing in the Search bar at the top of the pane. Matching results are shown immediately.
Folders can be expanded and collapsed by clicking the arrows next to the folder name. See Creating, Deleting and Renaming Folders for more about working with folders.
The Asset Graph Manager Table
Asset Graphs in each folder are listed in the Asset Graph Manager table. Click on one of the folders in the Folders pane to see the list of asset graphs in that folder.
The following information is displayed on the Asset Graphs Manager page:
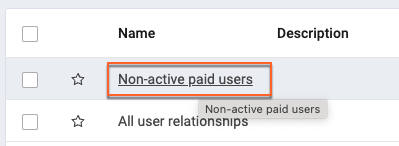
- Name - The name of each Asset Graph. Click on the name of an Asset Graphs to open the graph configuration drawer.
- Description - Displays the optional text in the Description field of the Asset Graph configuration.
- Investigation Steps - The count of the steps taken in the Asset Graph. Hover over the number to see a popup with the steps listed.
- Tags - Lists the tags assigned to the Asset Graph.
- Access - Which Data Scopes/Roles have access.
- Role Permissions - The type of access each role has:
- No Access - Users with this role have no access.
- System Access - Users are assigned the same access level as exists in the role definition.
- Viewer - Users with this role can view.
- Editor - Users with this role can view and edit.
- Module - Shows each asset type included in the graph.
- Created By - Lists the user who created it.
- Date Created - Date the Asset Graph was created.
- Last Updated - Date the Asset Graph was last updated.
- Last Used By - The user who last accessed the Asset Graph.
See Working with Tables to learn more about tables in Axonius.
Searching and Filtering the Graphs Table

In the Search box, enter the text to search for in the Asse you want to see. Description text is also searched.
You can filter the Asset Graphs by the all the columns in the table with the addition of the following fields:
- Search in Investigation Steps - Search for the entered text within the investigation steps.
Click Reset to clear all filter selections.
Viewing and Editing Asset Graph Details
Click on an Asset Graph in the table to display the details drawer. Details include the same information listed in the Graphs table, as well as a more complete list of each step taken in the investigation.
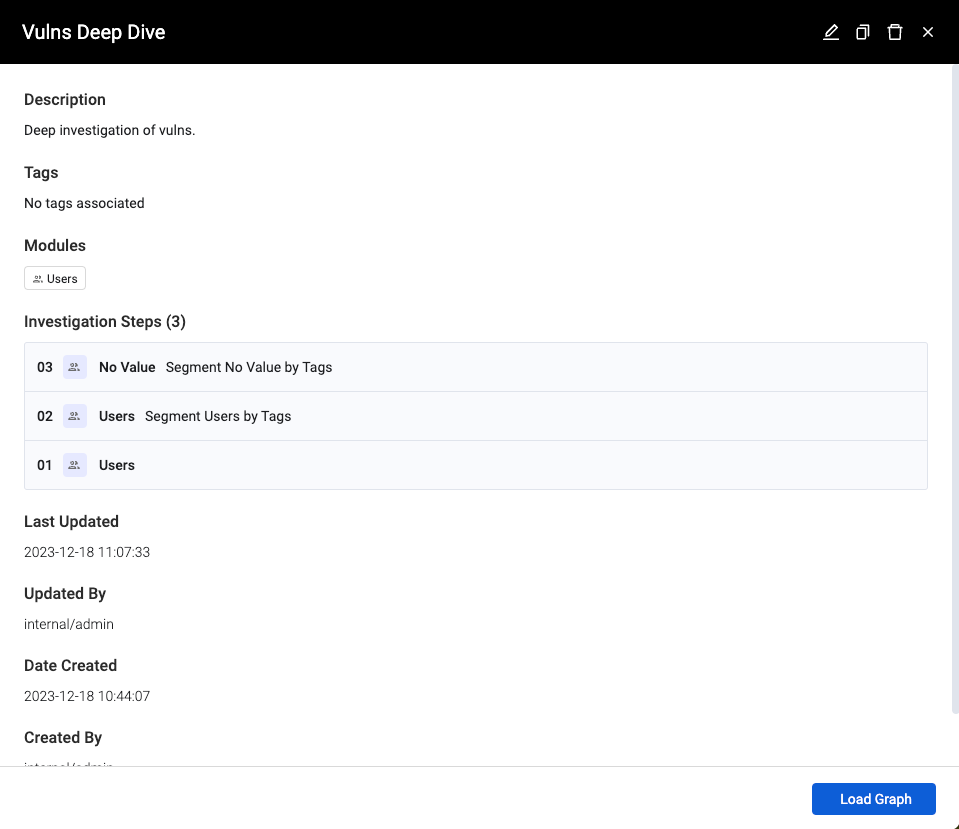
You can edit the graph name, the description, the access, and tags. Click Update to save the changes.
Click ![]() to edit the graph configuration.
to edit the graph configuration.
Loading an Asset Graph
To load an Asset Graph:
- Do one of the following:
- In the Details drawer, click Load Graph.
- In the Graphs table, click on the name of the graph you want to load.
Managing Favorites
You can mark items as Favorite to add it to the Favorites folder. This makes it easy to find the items you use the most.
To add an item to Favorites:
- In the table, find the item you want to add to Favorites.
- Do one of the following:
- To the left of the item name in the table, click
 .
.
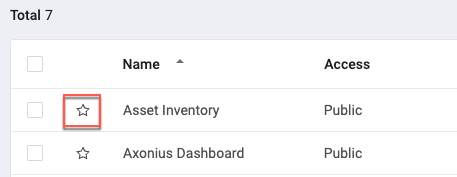
- Select one or more items in the table and at the top right of the table click Add to Favorites to add the dashboard to the Favorites list or Remove from Favorites to remove it from Favorites. When you select items that are already Favorites and items that are not Favorites, both options appear in the Actions list.
- When viewing an asset graph, click the star next to the Save As list.
- To the left of the item name in the table, click

Deleting an Asset Graph
You can delete Asset Graphs. Only one Asset Graph can be edited or refreshed at a time. You can delete any number of Asset Graphs at the same time.
To delete an Asset Graph:
- In the table, find the Asset Graph you want to delete.
- Do one of the following:
- In the header of the Graph details drawer, click
 .
. - Select an Asset Graph in the table and from the Actions menu at the top-right of the table, click Delete.
- In the header of the Graph details drawer, click
Duplicating an Asset Graph
You can create a copy of an Asset Graph to use as a basis of a new graph.
To duplicate an Asset Graph:
- In the table, find the Asset Graph you want to duplicate.
- Do one of the following:
- In the header of the Graph details drawer, click
 .
. - Select an Asset Graph in the table and from the Actions menu at the top-right of the table, click Duplicate.
- In the header of the Graph details drawer, click
- A details drawer is opened with the same details as the graph being copied. The name is "Copy of ". You can change the name to something more descriptive. You can also add or remove tags.
- Click Create to save the new graph.
Creating, Deleting and Renaming Folders
You can create new folders under the Public or Private folder, as well as delete, and rename folders. You must have the Manage dashboard folders permission.
These functions are found in the 3-dot menu to the right of the folder name that is visible when you hover over it.
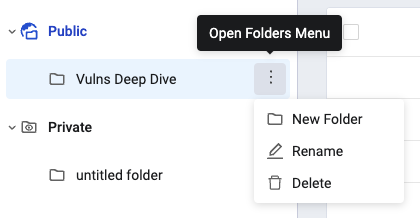
To create a new folder:
-
Hover over the folder under which you want to create a new folder.
-
Click the 3-dot menu and select New Folder.
-
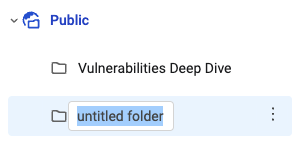
A new folder is created with the name untitled folder in a text box and the name is selected. Type a name for the folder.
-
Click outside the text box or press Enter and the name is saved.
To delete a folder:
- Hover over the folder you want to delete.
- Click the 3-dot menu and select Delete.
- In the Delete Folder dialog, click Delete Folder to confirm. All dashboards in the folder will also be deleted from the system.
To rename a folder:
- Hover over the folder you want to rename.
- Click the 3-dot menu and select Rename. The name of the folder is displayed in a text box and the name is selected.
- Type a name for the folder.
- Click outside the text box or press Enter and the name is saved.
Moving Asset Graphs to Another Folder
You can move Asset Graphs to another folder.
To move Asset Graphs to another folder:
- In the table, find the Asset Graphs you want to move.
- Select an Asset Graph in the table and at the top right of the table click Actions and then Move to Folder.
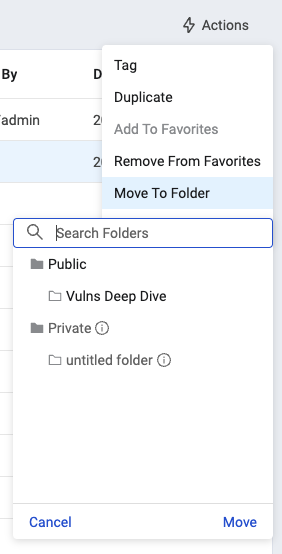
- In the Folder List dropdown, find the destination folder you want or search for a specific folder by entering part or all of its name in Search Folders.
- Click the destination folder, and then click Move. The dashboards are moved to the selected folder.
Updated 4 months ago
