
CloudHealth
CloudHealth is a cloud management platform to analyze and manage cloud cost, usage, security, and governance.
Types of Assets Fetched
This adapter fetches the following types of assets:
- Devices
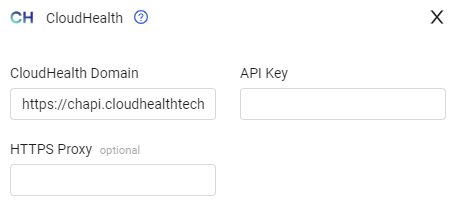
Parameters
- CloudHealth Domain (required, default:
https://chapi.cloudhealthtech.com) - The hostname of the Cloud Health server. - API Key (required) - The API Key generated through the CloudHealth web interface. To generate an API key, see Generate an API Key.
- HTTPS Proxy (optional) - Connect the adapter to a proxy instead of directly connecting it to the domain.
Note
To learn more about common adapter connection parameters and buttons, see Adding a New Adapter Connection.
Advanced Settings
Note
Advanced settings can either apply for all connections for this adapter, or you can set different advanced settings and/or different scheduling for a specific connection, refer to Advanced Configuration for Adapters.
- Fetch AWS accounts - Select whether all connections for this adapter will fetch AWS accounts.
- Fetch AWS Classic Load Balancers - Select whether all connections for this adapter will fetch AWS Classic Load Balancers.
- Fetch AWS Application Load Balancers - Select whether all connections for this adapter will fetch AWS Application Load Balancers.
- Fetch AWS Network Load Balancers - Select whether all connections for this adapter will fetch AWS Network Load Balancers.
- Fetch AWS RDS instances - Select whether all connections for this adapter will fetch AWS RDS instances.
- Fetch AWS S3 buckets - Select whether all connections for this adapter will fetch AWS S3 buckets.
- Fetch AWS VPCs - Select whether all connections for this adapter will fetch AWS VPCs.
- Fetch AWS NAT gateways - Select whether all connections for this adapter will fetch AWS NAT gateways.
- Fetch Azure VMs - Select whether all connections for this adapter will fetch Azure VMs.
- Fetch Azure IP addresses - Select whether all connections for this adapter will fetch Azure IP addresses.
- Fetch Azure virtual networks - Select whether all connections for this adapter will fetch Azure virtual networks.
- Fetch Azure network interfaces - Select whether all connections for this adapter will fetch Azure network interfaces.
- Fetch Azure Subscription and ID - Select this option to fetch Azure Subscription and ID information.
- Fetch GCP computer instances - Select whether all connections for this adapter will fetch GCP computer instances.
- List AWS Account tags as adapter tags - Select to consider the AWS Account tags as adapter tags.
- Fetch offline assets - Select whether to fetch offline assets.
- Fetch GCP project information - If selected, will fetch the Google project ID and name for GCP assets.
Note
For details on general advanced settings under the Adapter Configuration tab, see Adapter Advanced Settings.
APIs
Axonius uses the Cloud Health API.
Generate an API Key
-
Click My Profile in your user settings.
(345).png)
-
In your profile settings, scroll to the API Key section and click Get API Key. Then click Save Profile Changes.
(346).png)
Create a Read-only User for Axonius
When a dedicated user is required, you need to create the Axonius user role and Axonius user.
Creating the Axonius User Role
To create the Axonius User role
- In the left menu bar, navigate to Setup
>Admin>Roles. - Copy the Standard User profile and fill-in the following fields:
- Name - "Axonius User"
- Description - "Standard User with Generate API Key privileges"
- Select the checkbox next to:
- All Privileges
>Setup>Generate API Key Profile.
- All Privileges
- Save the profile.
Creating an Axonius User
An Axonius user is a Standard User (read only user) that has the capability to also generate an API key.
To create an Axonius user
- From the left menu bar, navigate to Setup
>Admin>Users. - From the right corner of the page, click INVITE USER and fill-in the following fields:
- Full Name - Axonius User
- Email Address
- Role - Axonius User
- Organization
- Click Invite User.
Updated 10 months ago