
Configuring Ingestion Rules
This page explains how to enable ingestion rules for an adapter, configure them per connection, and test them after a fetch
This page explains how to enable ingestion rules for an adapter, configure them per connection, and test them after a fetch. For an overview of how ingestion rules work, see Setting Adapter Ingestion Rules.
Using Ingestion Rules
-
Click the Adapters icon on the left navigation panel to open the Adapters page.
-
Search for and select the relevant adapter. The Adapter Profile page opens displaying the list of connected connections.
-
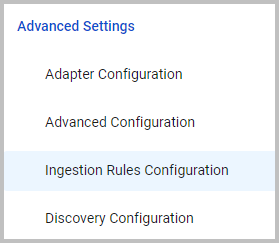
Under Advanced Settings, select Ingestion Rules Configuration. The Ingestion Rules Configuration page is displayed.
-
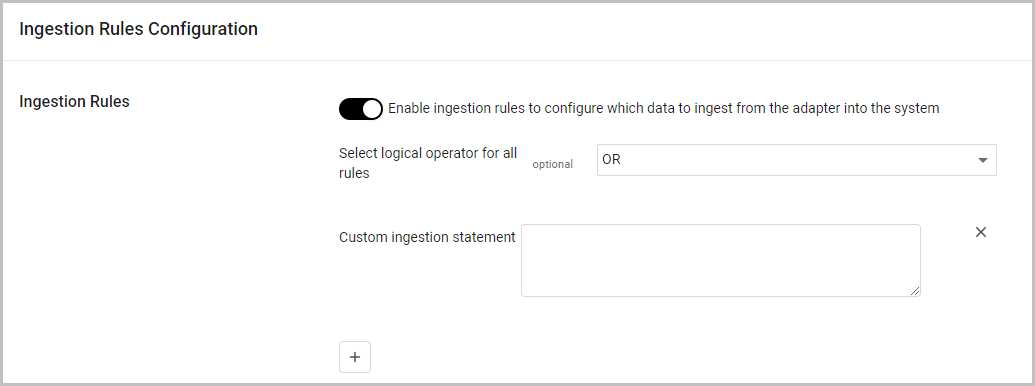
Toggle on Enable ingestion rules to configure which data to ingest from the adapter into the system.
-
If you want to add more than one rule, from the Select logical operator for all rules drop-down, select the operator to apply between the rules: OR (the default), AND, or Custom.
- When you select Custom, an additional Custom Logical Expression field appears, allowing you to define a precise logical combination of your rules.
-
Enter one Ingestion Rule statement in the Custom ingestion statement input box. Click + to add another Ingestion Rule statement. See Ingestion Rule Statement Reference for syntax, and Ingestion Rules Operators for available operators.
-
Once you have entered all the rules you need, click Save to save your settings. An entity is ingested according to the Boolean logic of the operator that you set.
Configuring Ingestion Rules for Each Adapter Connection
To configure Ingestion Rules separately for each adapter connection:
-
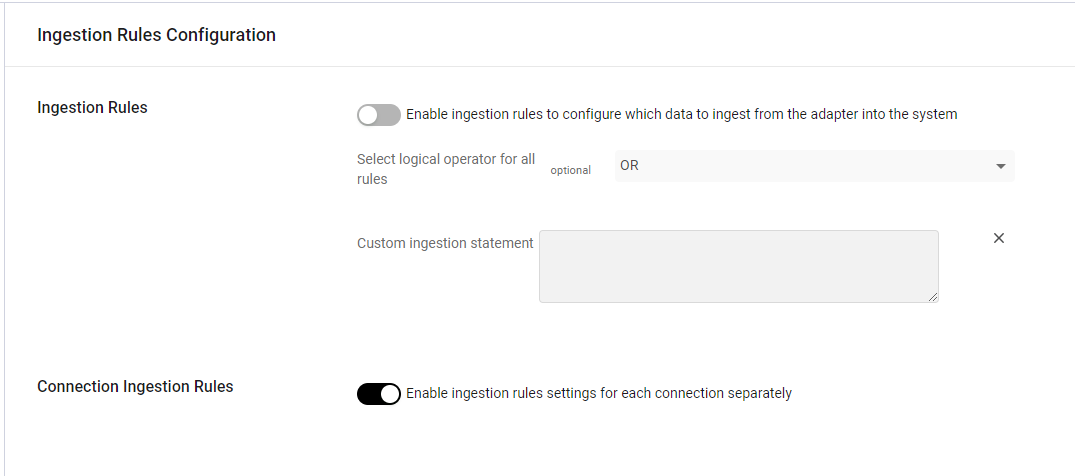
On the Ingestion Rules Configuration page, toggle on Enable ingestion rules settings for each connection separately.
-
Click Save. The Ingestion Rules Configuration tab now also appears on the Add Connection drawer.
-
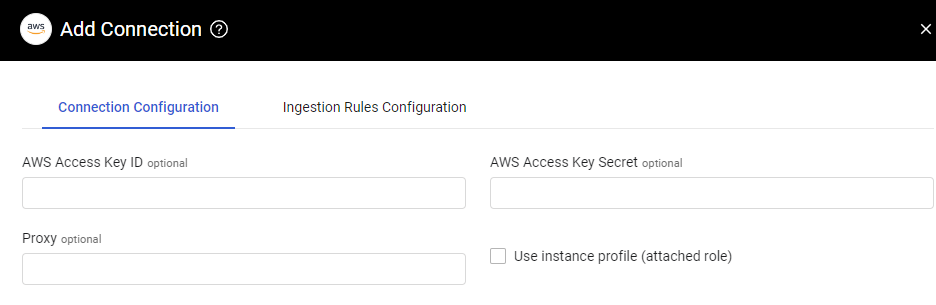
Click Add Connection. The Connection Configuration drawer now has an additional tab (Ingestion Rules Configuration).
-
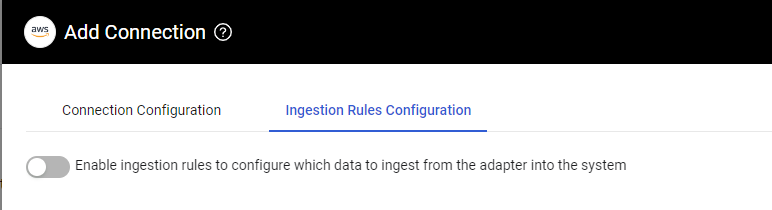
Select the Ingestion Rules Configuration tab and toggle on Enable ingestion rules to configure which data to ingest from the adapter into the system. The Ingestion Rules configuration pane opens.
-
Configure the ingestion rules that you want for this specific connection, then select Save or Save and Fetch.
Using Custom Logical ExpressionsWhen you have multiple ingestion rules and need more flexibility than a single AND or OR operator provides, use the Custom logical operator. This allows you to define precise logical combinations of your rules.
When to Use Custom Logical ExpressionsUse the Custom option when neither "all rules must match" (AND) nor "at least one rule must match" (OR) meets your requirements. For example:
- You want rule 1 and either rule 2 or rule 3 to match.
- You need complex combinations like
(1 OR 2) AND (3 OR 4).
This level of control cannot be expressed with a single AND or OR operator applied uniformly across all rules.
Expression SyntaxCustom logical expressions are composed of the following elements:
Element Description Example Integers Rule numbers, assigned in order starting from 1 1,2,3AND Both sides must match 1 AND 2OR At least one side must match 1 OR 2Parentheses Group sub-expressions to control precedence (1 OR 2) AND 3Important
Operator keywords (
AND,OR) are case-sensitive and must be written in uppercase.Expression Examples1 AND (2 OR 3)— Rule 1 must match, and either rule 2 or rule 3 must match.(1 OR 2) AND (3 OR 4)— At least one of rules 1–2 must match, and at least one of rules 3–4 must match.
Validation RulesThe custom logical expression is validated when you save the ingestion rules configuration. The following conditions must be met:
- Valid syntax — The expression must use only integers,
AND,OR, and parentheses in a well-formed structure. - No out-of-range rule numbers — Every integer in the expression must correspond to an existing rule. For example, if you have configured 3 rules, only the numbers 1, 2, and 3 are valid.
- All rules must be referenced — Every configured rule must appear at least once in the expression. For example, if you have configured 3 rules and the expression is
1 AND 3, saving will be rejected because rule 2 is missing.Note
If validation fails, an error message will indicate the specific issue with your expression. Correct the expression and try saving again.
Testing Ingestion Rules
From the Add Connection page, click Save and Fetch to test the Ingestion Rules. The system performs a fetch, and each entity brought from the adapter goes through the ingestion rule process.
Note
Instead of initiating a fetch to test the Ingestion Rules, you can wait until the adapter fetches in accordance with your discovery cycle.
After the fetch is complete, open the relevant assets page to see your results. In the Query Wizard, specify your adapter and select From Last Fetch - yes.

In the Adapter Fetch History, you can also see how many assets of each asset type were ignored before and after the Ingestion Rules were implemented.
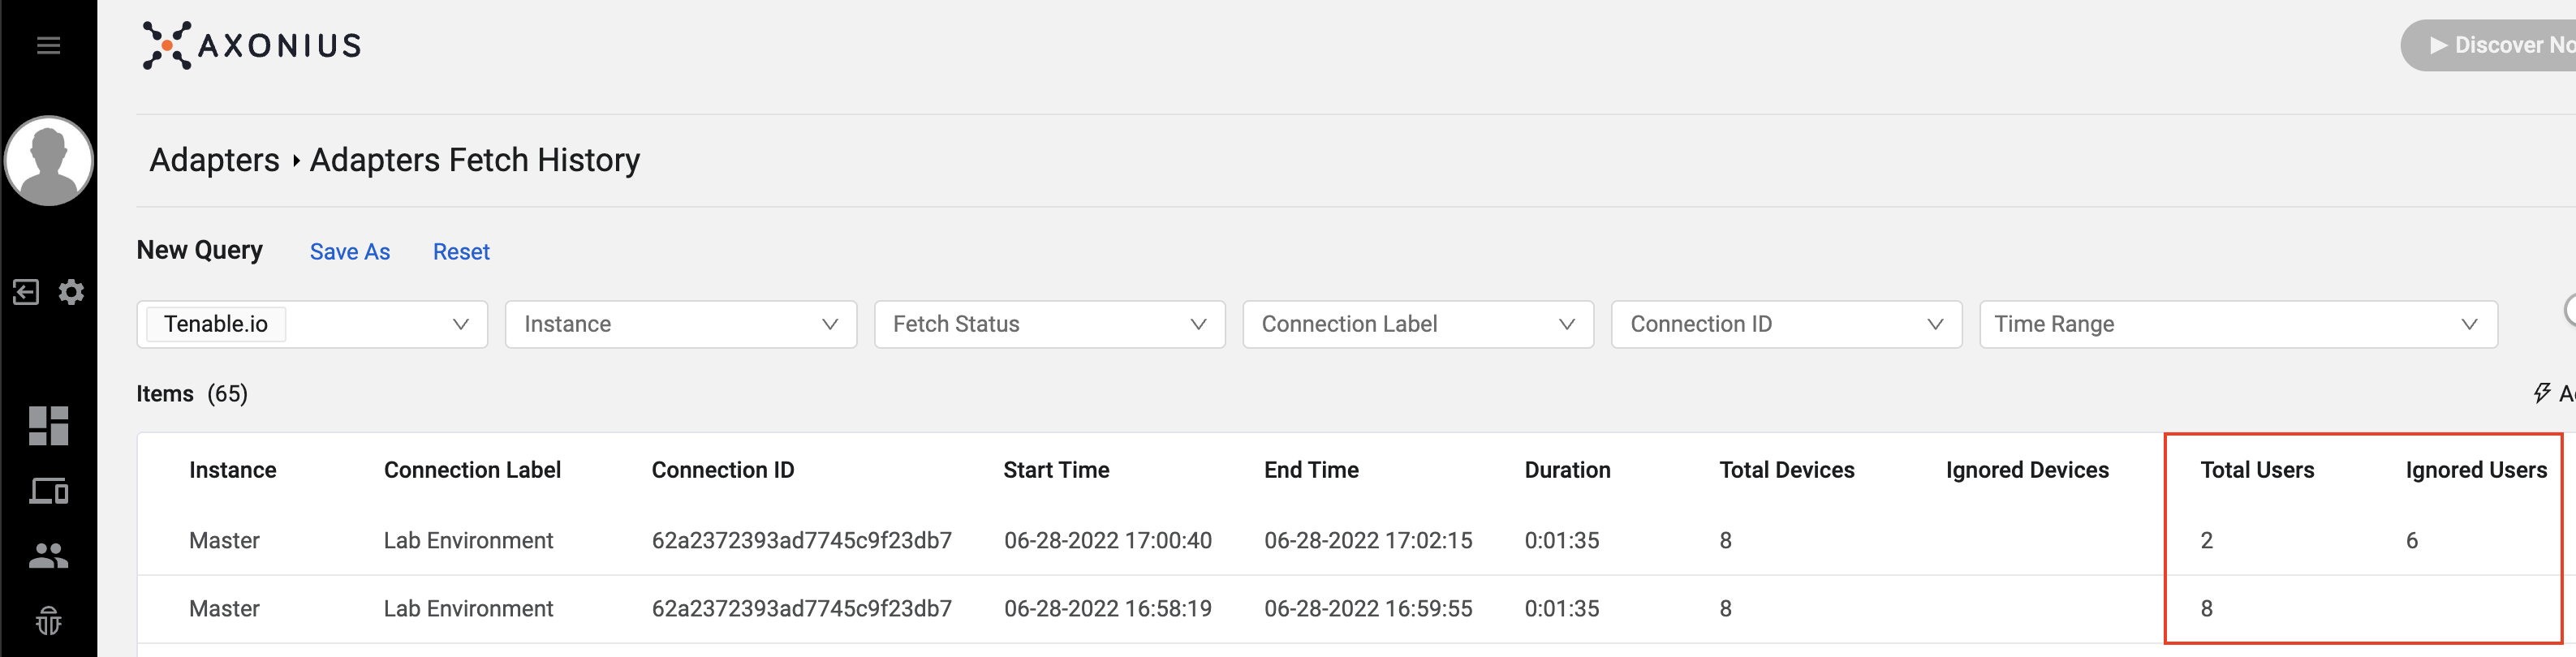
If required, you can fine-tune the rules and rerun a fetch.
Entities not ingested will still appear in Axonius for the amount of time set in the Delete devices (or users) and other assets that have not been returned from the source in the last X hours setting.
Related Pages
- Setting Adapter Ingestion Rules — Overview and required permissions
- Ingestion Rules Operators — All supported filter operators
- Ingestion Rules Post Actions — Modify or drop fields before ingestion
- Ingestion Rules Examples — Real-world configuration examples
Updated 7 days ago