
Cisco ISE Initial Setup
Authorizing Axonius in pxGrid Services on your Cisco ISE domain
To authorize Axonius with the sufficient permissions for using the pxGrid services do as follows:
-
Enable the Use pxGrid to Fetch Live Sessions checkbox in the Add Connection dialog.
-
Clicking Save and Fetch will generate an Axonius ID that will follow in an error to authorize the generated ID in the pxGrid System: (Next steps)
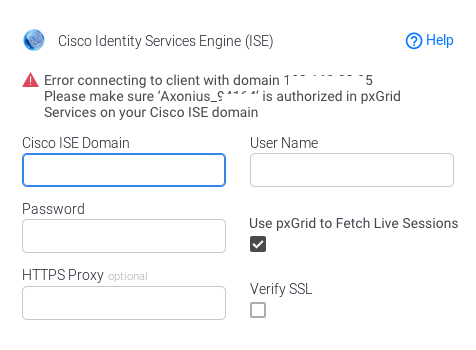
-
Log into the ISE Admin GUI, navigate to Administration
>pxGrid Services
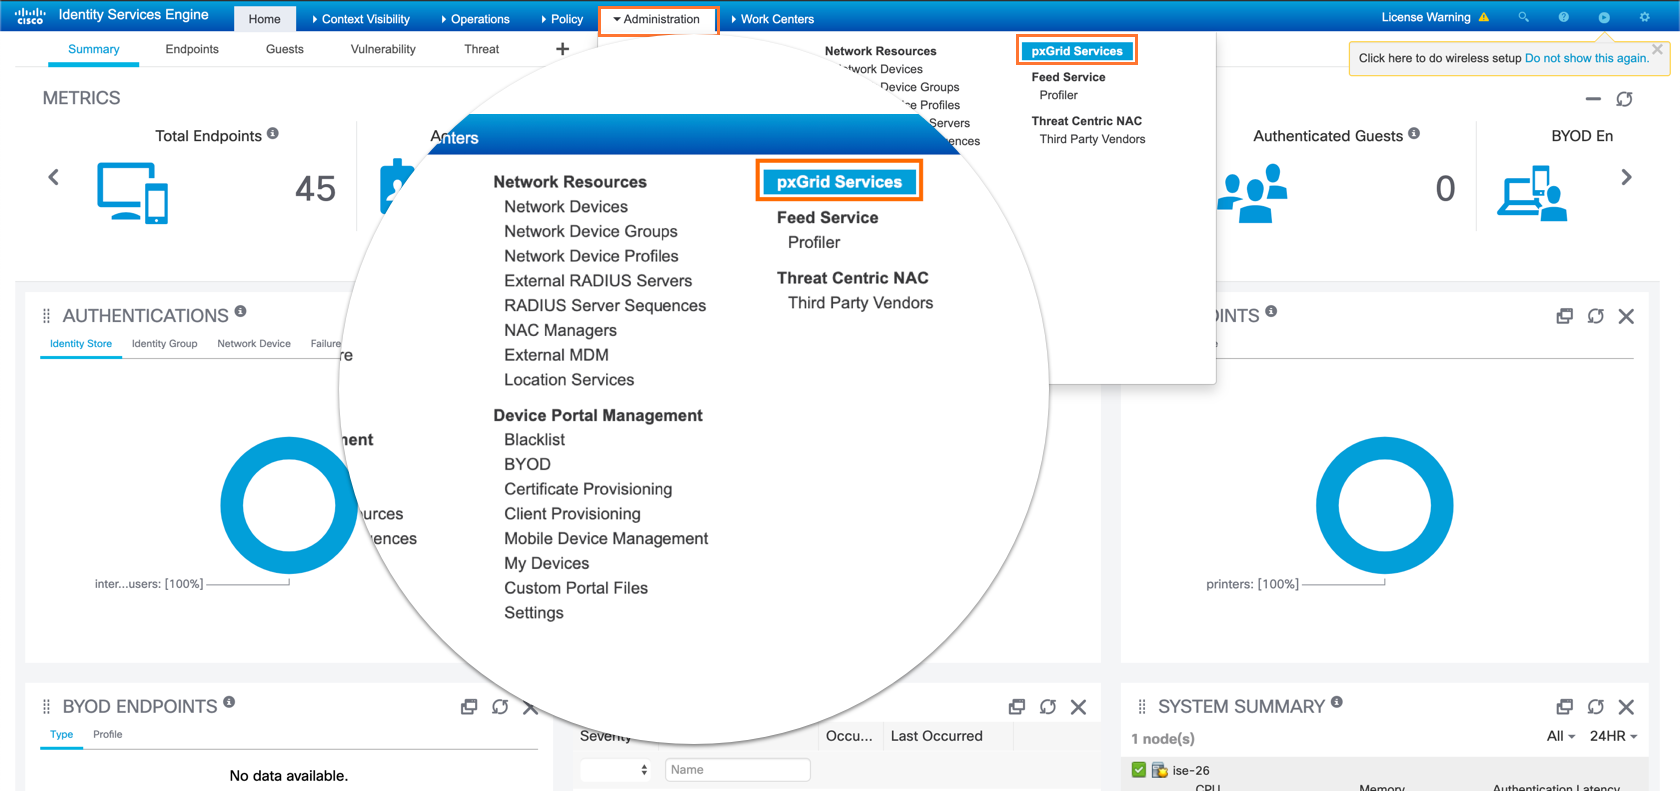
-
If the user you define does not appear in the Cisco UI, you might have to navigate to the “Settings” tab in the Cisco ISE pxGrid Administration settings page and tick the checkbox labeled “Allow password based account creation“.
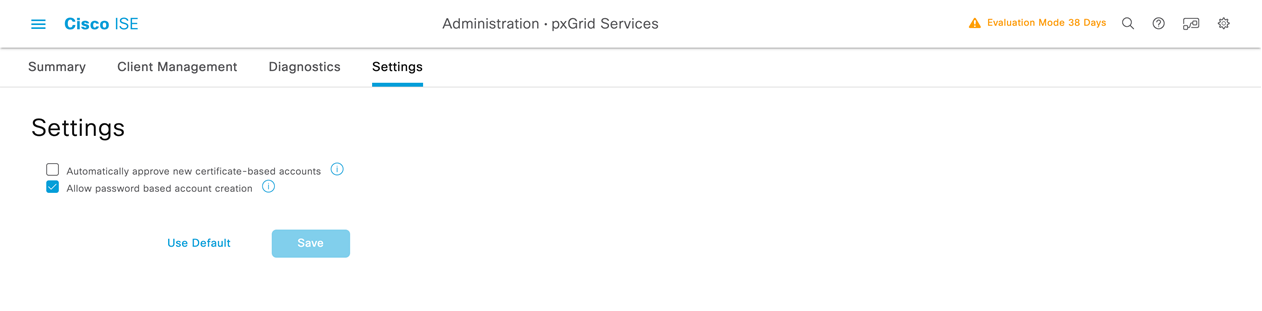
-
Select the Axonius client and click Approve as shown in the image.
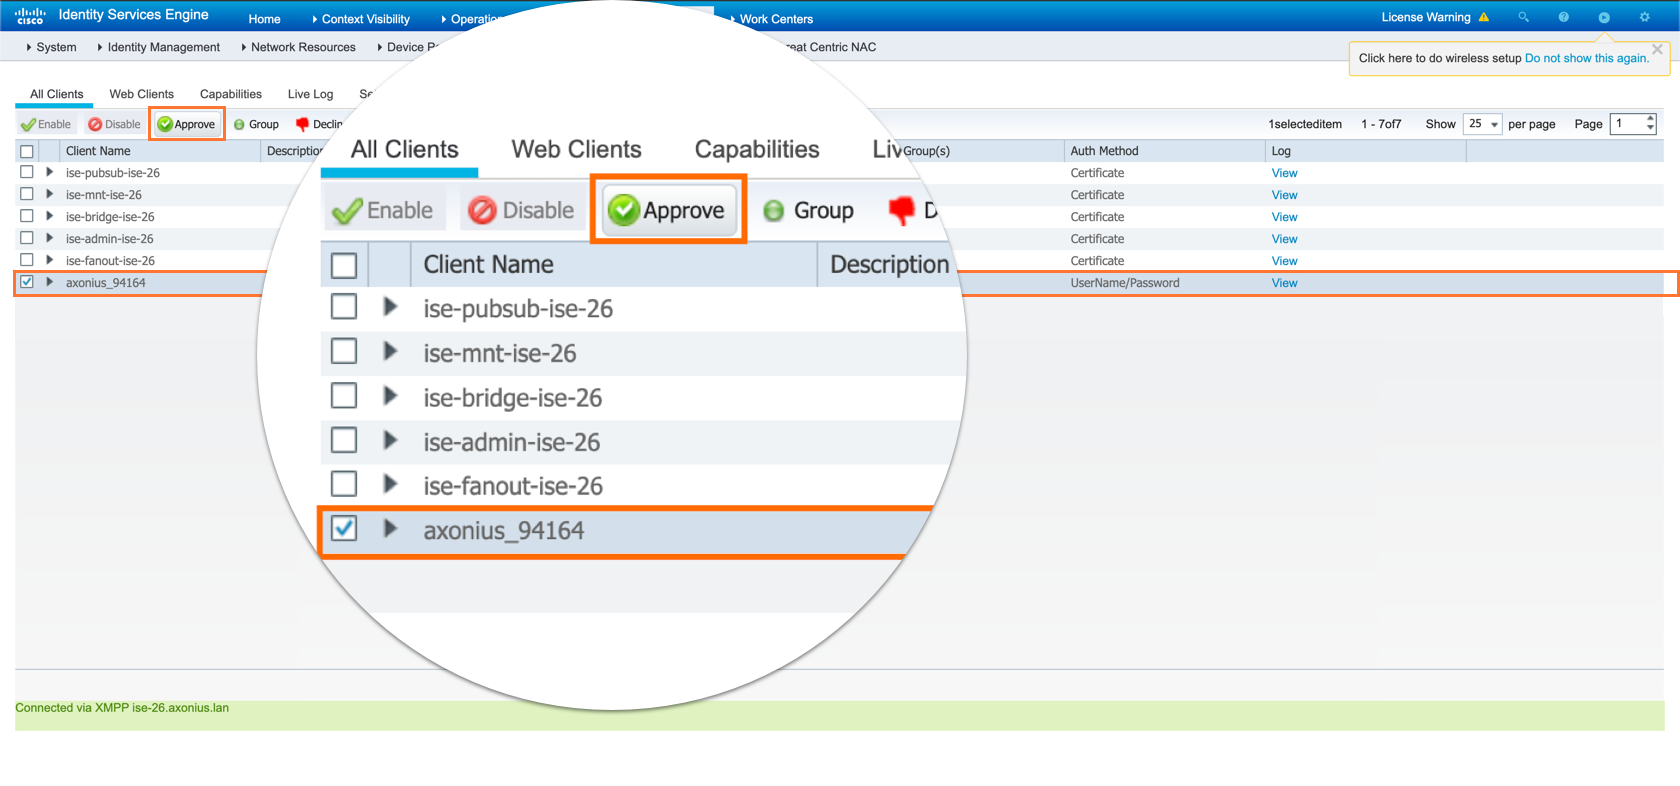
- Click Save and Fetch to complete the configuration and establish the connection. If the error mentioned in step 2 occurs with the same account, check whether the Axonius account (Axonius_XXXX) is authorized in pxGrid.
Note
pxGrid Services should be enabled on your Cisco ISE domain.
Enabling pxGrid Services in Cisco ISE Administration
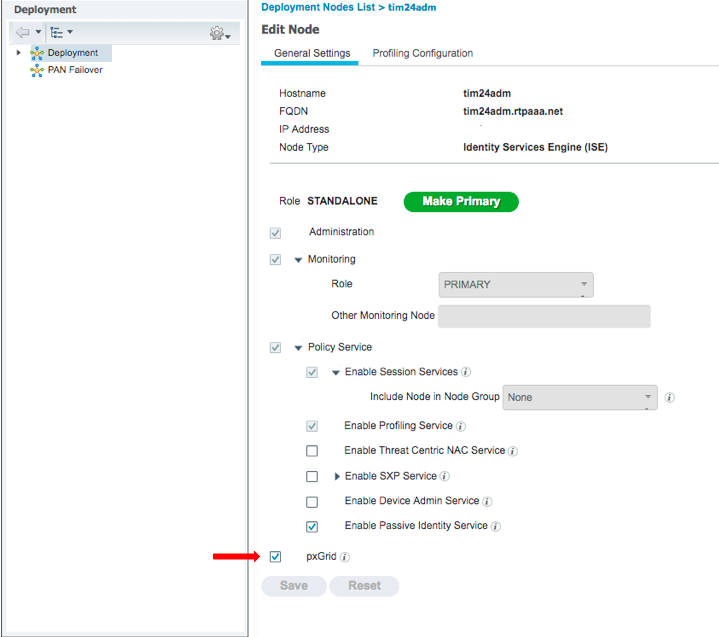
To enable pxGrid Services in Cisco ISE Administration:
- Log into the ISE Admin GUI, navigate to Administration
>Deployment - Select the ISE node to be used for the pxGrid persona.

- Select pxGrid and click Save.
Note
For Cisco ISE pxGrid to be enabled you must have a plus license on ISE deployment. For more details, see Configure ISE 2.4 and FMC 6.2.3 pxGrid Integration.
Updated 11 days ago