
Adding and Editing Custom Fields
You can add a custom field to one or more selected assets at the same time, or edit their existing fields with custom values.
You can only edit fields that already exist in the table - optional fields which are not in the table are not available for editing.
Note
It is currently not possible to add a valid IP/IPv4 address to a newly added Network Interfaces: IPs /Network Interfaces: IPv4s field.
Adding or Editing Custom Fields on a Single Asset
- On the relevant Assets page, select an asset.
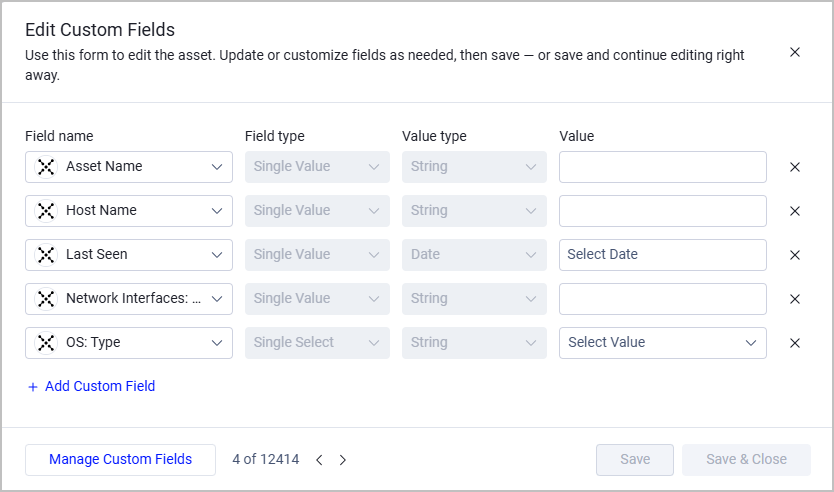
- From the Actions menu at the right edge of the row, select Edit Custom Fields. The Edit Custom Fields dialog opens.
-
- To edit existing fields: edit the field's value or select a value from the dropdown options - depending on the field type. For example:
- Asset Name - a Single Value field, enter a name (string).
- OS: Type - a Single Select field, select a value from the dropdown list.
- To add new custom fields:
- Click + Add Custom Field.
- In the field row that opens, select an existing field, or start typing the name of a new field and then click + New Field Name.
- Fill in or select values for added fields. To delete a field value, click the x to the right of the Value box.
For details on the different custom field types and inputs you can add, see Creating New Custom Fields.
Note
If you don't provide a new value and leave this box empty - the field is deleted from the asset.
- To edit existing fields: edit the field's value or select a value from the dropdown options - depending on the field type. For example:
-
Choose how to proceed:
-
To save your changes and return to the Assets page: Select Save & Close. The following notification appears: Custom fields saved.
-
To save your changes and proceed to edit more assets: Select Save. The system saves your changes and immediately reopens a clean empty form, so you can edit asset after asset without having to close and re-open the dialog each time. Use the < > arrows to navigate between assets.

Step 1: Click Save

Step 1: Click ">" to go to the next asset in the list

Step 3: Edit the next asset
-
Adding or Editing Custom Fields on Multiple Assets
-
On the relevant Assets page, select the required assets.
-
From the More Actions menu on top of the table, select Edit Custom Fields. The Edit Custom Fields dialog opens. Note that in a state of multiple asset selection, the dialog is titled "Editing [the number of selected assets] Assets".

-
Add or edit fields as explained in step 3 of Adding or Editing Custom Fields on a Single Asset. Only fields you fill in are changed, leaving all other field values untouched.
-
Click Save. The following notification appears: Custom fields saved.
You can also click Manage Custom Fields to open the Custom Data Management screen, where you can manage all Custom Fields in the system from one central location.
Filtering the List of Fields
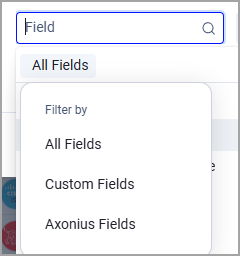
You can filter the list of fields so that the Fields dropdown displays only Custom Fields, or only Axonius Fields, or All Fields.
-
In the Field dropdown, click All Fields.
-
Select the required filter from the Filter by menu.
Inline Editing a Custom Field on the Assets Page
You can use inline editing to modify an existing value of a custom field or add a value to an empty custom field.
To edit an existing value or add a value using inline editing
- On the relevant Assets page, configure the columns to display the custom fields you want to edit. See Setting Page Columns Display on how to configure the page columns.
- Hover over the empty space or existing value of an asset's custom field and click the pencil icon that appears.
.png)
- In the Edit dialog, add or change the value according to the field type and click Save Changes.
Updated 7 days ago