
Adding and Editing Software in the Software Registry
Add, edit, and duplicate software in the Software Registry, and add software versions.
Use the Add Software and Edit Software drawers to add software to the Software Registry, set its approval status, and manage the approval status of its versions.
For all other Software Registry topics, such as importing software, approval statuses, the Software Registry table, and exporting, see Software Registry.
Required Permissions
- Manage Software - to add, edit, and duplicate software in the Software Registry.
Only users with no data scope can change the Software Registry. See Software Registry and Data Scopes.
Adding Software
- Make sure you are in 'Live Data' view.
- Click Add Software. The Add Software drawer opens for 1: Name and Vendor.
- Enter the Software Name (required) and the Vendor (optional).
- Click Next. The 2 - Settings and Version Management drawer opens.
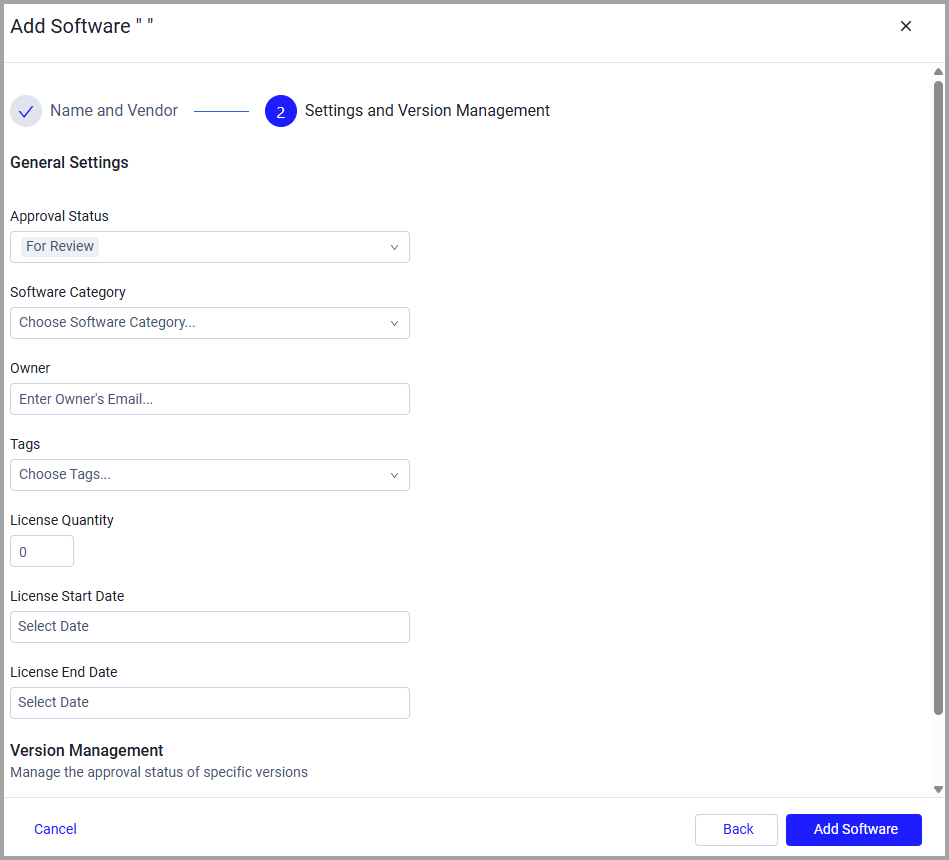
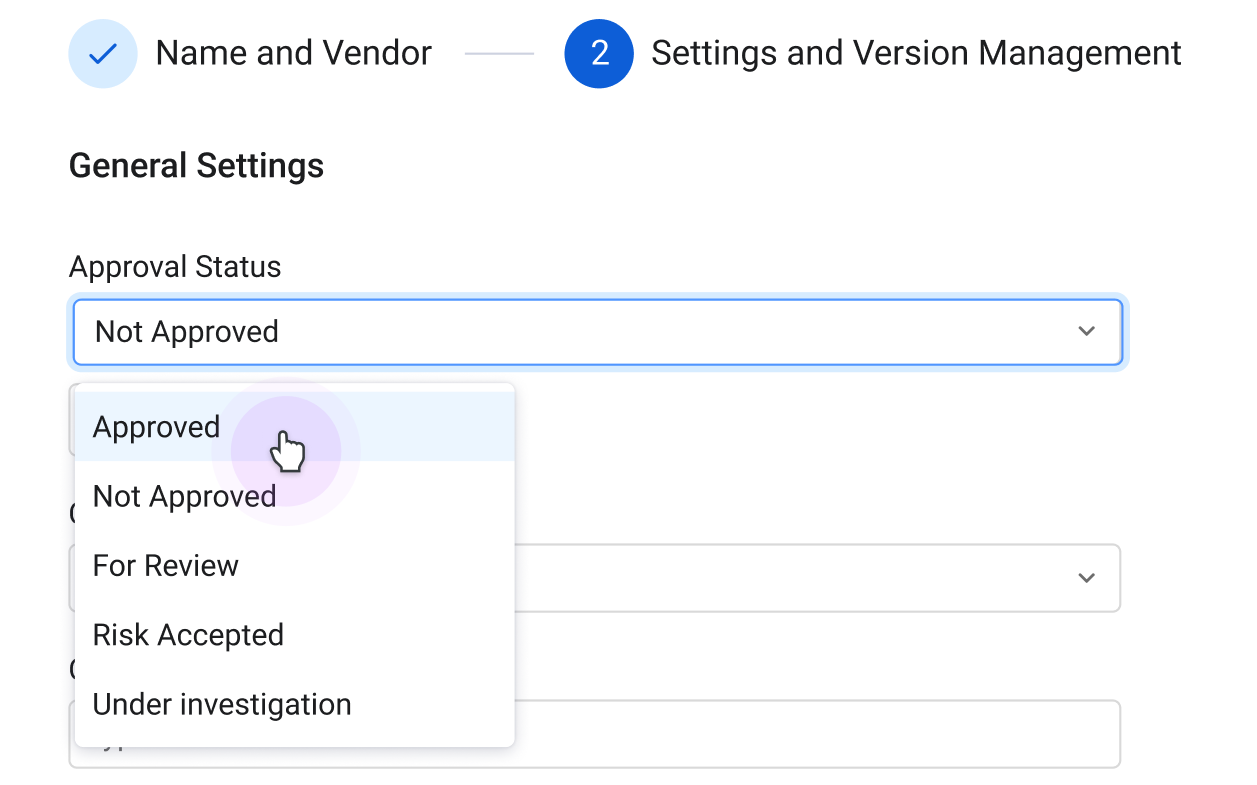
- Under General Settings, select the applicable Approval Status for the added software:
- Select and define any other optional settings.
- Under Version Management, use the plus to add specific versions of the software.
- For each version, enter the version and optionally select End of Life and End of Support.
- Select an Approval Status for each version (required). If software isn't Approved, you can't edit the approval status of a version, and all versions are set to Not Approved. For software that is Approved, you can enter different approval statuses for each version of the software.
Note:
If a Software isn't Approved, you can't edit the approval status of a version, and all versions are set to Not Approved.
- Click Add Software. The software now appears in the table.
Version Field Requirements
When you add or edit versions in the Software Registry:
- The Version field is mandatory.
- You must also provide at least one of the following: Approval Status, License Quantity, License Start/End date, End-of-Life date, or End-of-Support date.
- An error is displayed if you try to save without meeting these requirements.
Editing Software
To edit the information about the software:
- Click the action button at the right side of the row and choose Edit Software, or select one or more items click the More Actions button at the top of the table and click Edit Software.
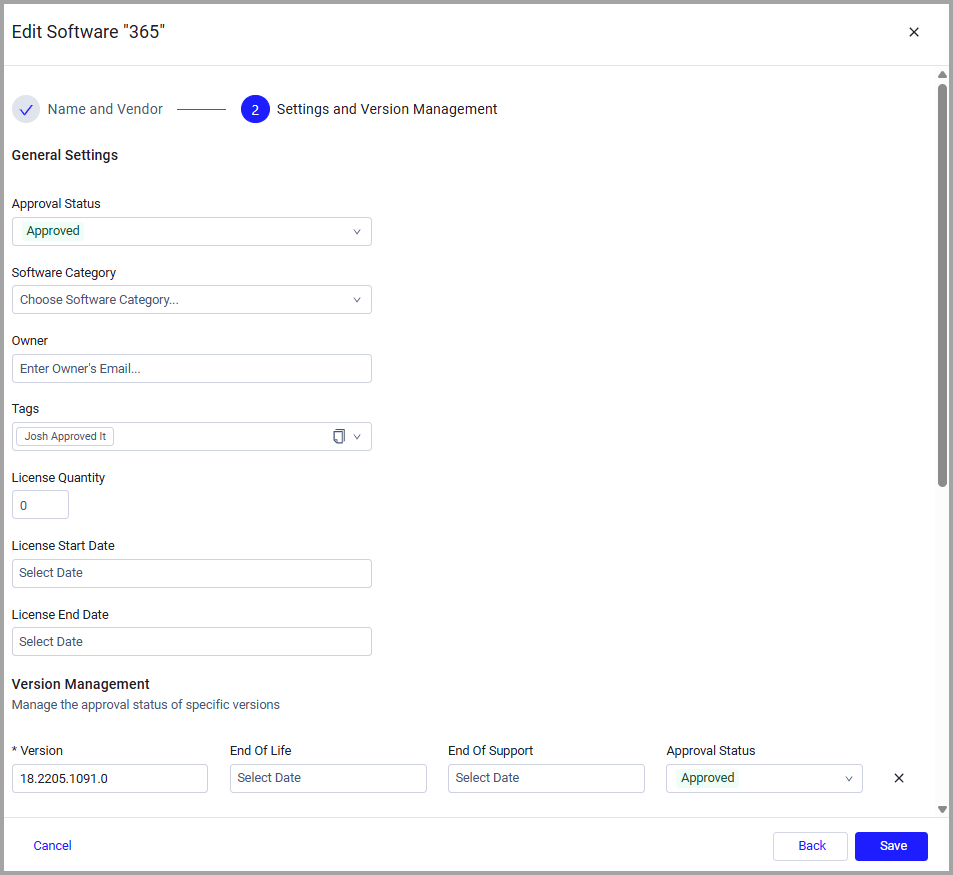
- The Edit Software - Settings and Version Management drawer opens.
- Update the following general settings: Approval Status, Software Category, Owner, Tags, License Quantity, and License Start/End Date. You can also manage the approval status of specific versions.
Note:
- You can't edit a software's name or its vendor name.
- You can duplicate the software along with its Software Registry data to another asset.
- When you change a software's approval status from Approved to Not Approved, all version approval statuses automatically change to Not Approved and become read-only.
- Click Save to save your changes.
Duplicating Software
- To duplicate the software, click the Actions button at the right side of the row.
- Select Duplicate Software. The Add Software drawer opens.
- Enter the new Software Name (required) and Vendor (optional) to avoid duplicates in the system.
- Click Next.
- The Add Software - Settings and Version Management drawer opens.
- Update the settings and then click Add Software.
Updated 31 minutes ago